23
• Provides audio feedback (if this option has been chosen) by making a warning
sound, which immediately alerts you to a possible problem even if you are not
looking at the screen. The warning sound is a rapid string of notes going up the
musical scale if the image is judged as overexposed or conversely a rapid string
of notes going down the musical scale if the image is judged as underexposed.
• Downgrades the approval status to yellow (if Approval is set to ‘Auto’).
Note that some shots may trigger the warning even though they are exposed accord-
ing to your intentions. You should consider these warnings only as a guideline.
3. If no problem is detected, then the image is saved with green status.
If you set Approval to ‘Auto’, all images will be stored as Green if judged as correct
and Yellow if judged as technically doubtful. No images are ever stored as Red
automatically!
4. When you are browsing through your shots, keep an eye on the approval status of
each and consider whether you should promote or demote each shot based on its
appearance on the preview screen. You can also apply a browse filter to, for exam-
ple, browse only red shots when looking for images to delete or to browse only
green shots to make sure you have a good version of each shot that you need.
5. When you begin working with the images on your computer, use the approval sta-
tus as a guide for organizing your work. For example, you might begin by opening
and optimizing the green shots and then go to the yellow shots only if you still need
more images and then, finally, check the red shots as a last resort.
Note that the system is very flexible so you can use it in any way that you like. For exam-
ple, you can set the camera to assign all new images a yellow or green status regardless
of the exposure warning. Be careful when assigning red status because red images may
be deleted if the current storage medium becomes full.
Reading and changing the approval status
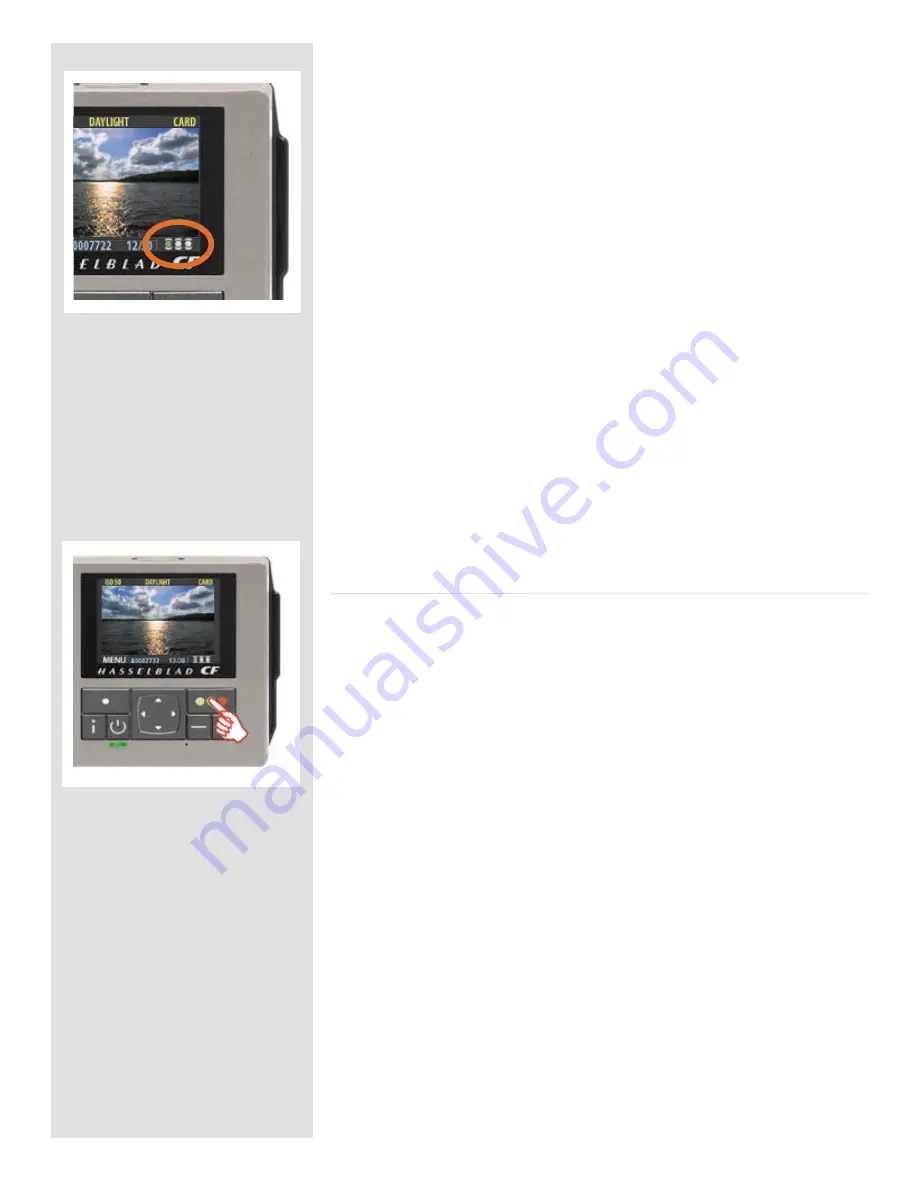
The current approval status of each shot is indicated in two ways:
• In most preview modes, the current status is indicated by a coloured dot in the
bottom-right corner of the screen.
• Each image is given a name that indicates its approval status. Approved (green)
image names start with “A” (e.g., “A0000043”); warning (yellow) images start
with “B” (e.g., “B0000043”); and images marked for delete (red) start with “C”.
Because of this naming convention, you will also be able to sort your image files
by status after you have copied them to your computer (e.g., by listing the folder
by file name).
By keeping an eye on the file name and/or coloured dot as you browse your images at
the single-image, four-thumbnail or nine-thumbnail level, you can easily see the current
approval status of each of them.
To change the approval status of the currently displayed/selected image, simply press the
approval button until the desired approval status is shown.
Note that you can set the camera to filter by approval status as you browse, which
means that some images may be hidden (though they are still there). See “Browsing
by Approval Status”, below, for details about how to work with the filter.
Be careful when assigning red status because red images may be deleted if the current
storage medium becomes full.
Summary of Contents for CF DIGITAL CAMERA BACK RANGE
Page 1: ...User Manual Hasselblad CF Digital Camera Back Range ...
Page 32: ...32 Menu structure Items on the main menu ...
Page 68: ...Addendum V2 to User Manuals 2007 H1 H1D H2 H2D H3D 503CWD CFV CF 2007 09 20 V2 ...
Page 74: ...Software Reference FlexColor 4 0 for Camera Backs by Hasselblad Imacon ...
Page 85: ...Software Reference FlexColor 4 0 for Camera Backs Introduction 12 ...
Page 93: ...Software Reference FlexColor 4 0 for Camera Backs FlexColor Menus 20 ...
Page 127: ...Software Reference FlexColor 4 0 for Camera Backs The Preferences Window 54 ...
Page 133: ...Software Reference FlexColor 4 0 for Camera Backs FlexColor ICC Profiles 60 ...
Page 143: ...Software Reference FlexColor 4 0 for Camera Backs The Thumbnails Window 70 ...
Page 155: ...Software Reference FlexColor 4 0 for Camera Backs The Exposure Window 82 ...
Page 159: ...Software Reference FlexColor 4 0 for Camera Backs Active and Reload Buttons 86 ...
Page 165: ...Software Reference FlexColor 4 0 for Camera Backs The Gradations Window 92 ...
Page 177: ...Software Reference FlexColor 4 0 for Camera Backs The Texture Window 104 ...
Page 183: ...Software Reference FlexColor 4 0 for Camera Backs The Live Video Window 110 ...
Page 185: ...Software Reference FlexColor 4 0 for Camera Backs The Tasks Window 112 ...
Page 189: ...Software Reference FlexColor 4 0 for Camera Backs Appendix 116 Keyboard Shortcuts ...


