B
C
A
E
F
I
J
K
L
D
G
H
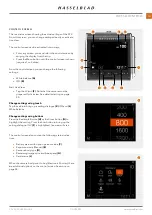
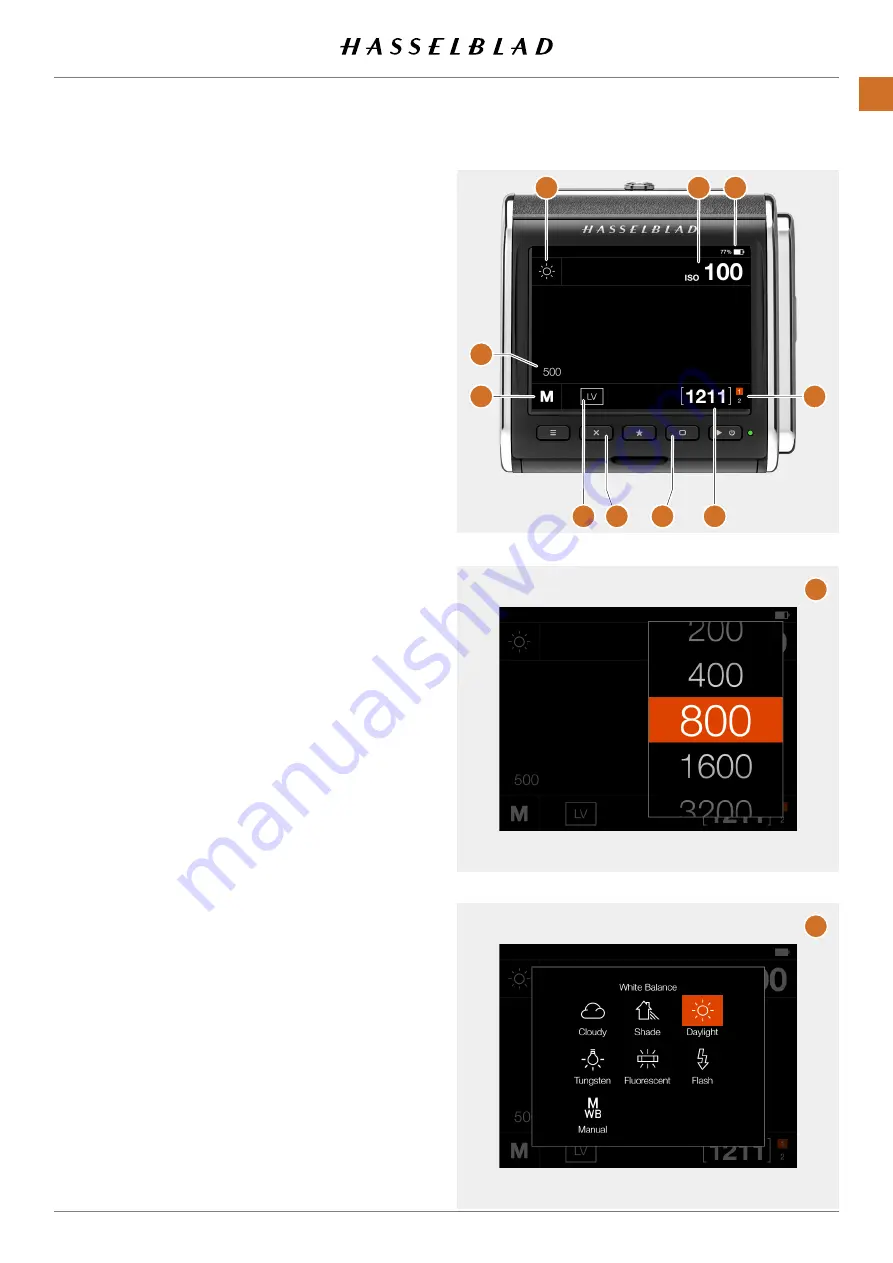
CONTROL SCREEN
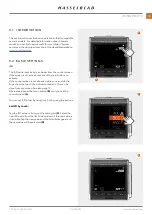
This is a status screen showing the actual settings of the CFV.
From this screen, you can change settings directly or activate
Live View.
The control screen can be activated in two ways:
●
Form any screen, you can slide in the control screen by
swiping the display from the top.
●
Press the Menu button until the control screen is shown
(requires 1 or 2 clicks).
From the control screen you can change the following
settings:
●
White balance
(A)
●
ISO
(B)
Start Live View:
●
Tap the LV icon
(F). Note that the camera must be
prepared for live view. See details starting on page
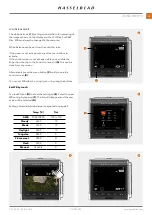
Change settings using touch
Tap the value to bring up a setting dialogue
(K) ISO and (L)
White Balance.
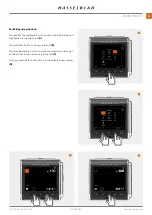
Change settings using buttons
Press the Rectangle Button
(H) or the Cross button (G) to
highlight the setting. Press the Star button to bring up the
setting dialogue. If LV
(F) is highlighted, live view will start.
The control screen also contain the following status indica-
tions:
●
Battery status with option percent value
(C).
●
Exposure mode (Manual)
(E)
●
Camera body type
(D)
●
Remaining images on card (free space)
(G)
●
Card status
(J)
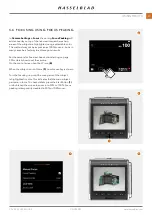
When the camera body is set to Any (Electronic Shutter), there
are additional options on the control screen. See more on
CFV II 50C USER GUIDE
www.hasselblad.com
34
PARTS & CONTROLS
Summary of Contents for CFV II 50C
Page 1: ...CFV II 50C User Guide 2019 12 20 v1 ...
Page 6: ...1 INTRODUCTION ...
Page 15: ...2 QUICK START ...
Page 21: ...3 SAFETY ...
Page 25: ...4 PARTS CONTROLS ...
Page 39: ...5 USING THE CFV ...
Page 68: ...6 SETTINGS ...
Page 98: ...7 PHOCUS ...
Page 106: ...8 ACCESSORIES ...
Page 109: ...9 APPENDIX ...


