19
‘A12’ film magazines accept all 120 size films and produce a 6 x 6cm image. They are easy to use and
can be pre-loaded for rapid workflow. They provide the opportunity to vary the type of film used
and can be quickly and easily switched mid-film without losing any frames.
There are a number of reasons why using film might either be preferable or even necessary for digi-
tal photographers too. For example you might want the specific results you know that a certain film
emulsion can produce or you might want to use very long exposure times, etc.
A magazine also functions as an emergency battery-free back up to a digital back. Also, remember
that a 6 x 6 cm film magazine use will also allow you to exploit the full focal length of your lenses.
Operation of the magazines is not difficult but pay particular attention to the section on loading.
Go through the procedure one step at a time and practice a little until you feel confident. Note espe-
cially which way round the spool of film is placed and the positioning of the backing paper under
the clamp bar.
The film is automatically advanced frame-by-frame in the magazine by the camera winding mech-
anism and consequently only when attached to the camera body. Therefore when separated, the
magazine and camera body could become unmatched. This can be determined by checking the
magazine status indicator or by the winding crank status.
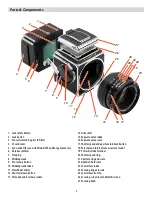
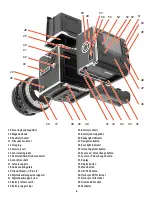
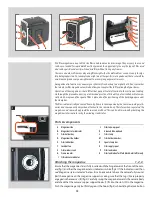
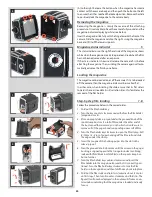
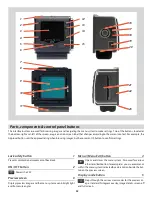
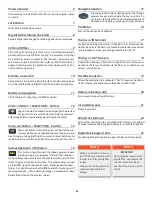
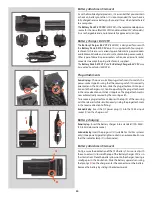
Parts & components
A. Magazine slide
J.
Film take-up spool
B. Magazine status indicator
K.
Grooved take-up knob
C. Film holder key
L.
Film clamp
D. Magazine slide holder
M.
Film holder number
E. Film tab holder
N.
Spool clamp bar
F. Lock button
0.
Film supply spool
G. Film winder crank
P.
Film load index
H. Frame counter
Q.
Film load index for Ilford black & white film only
I. Film advance indicator
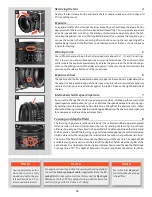
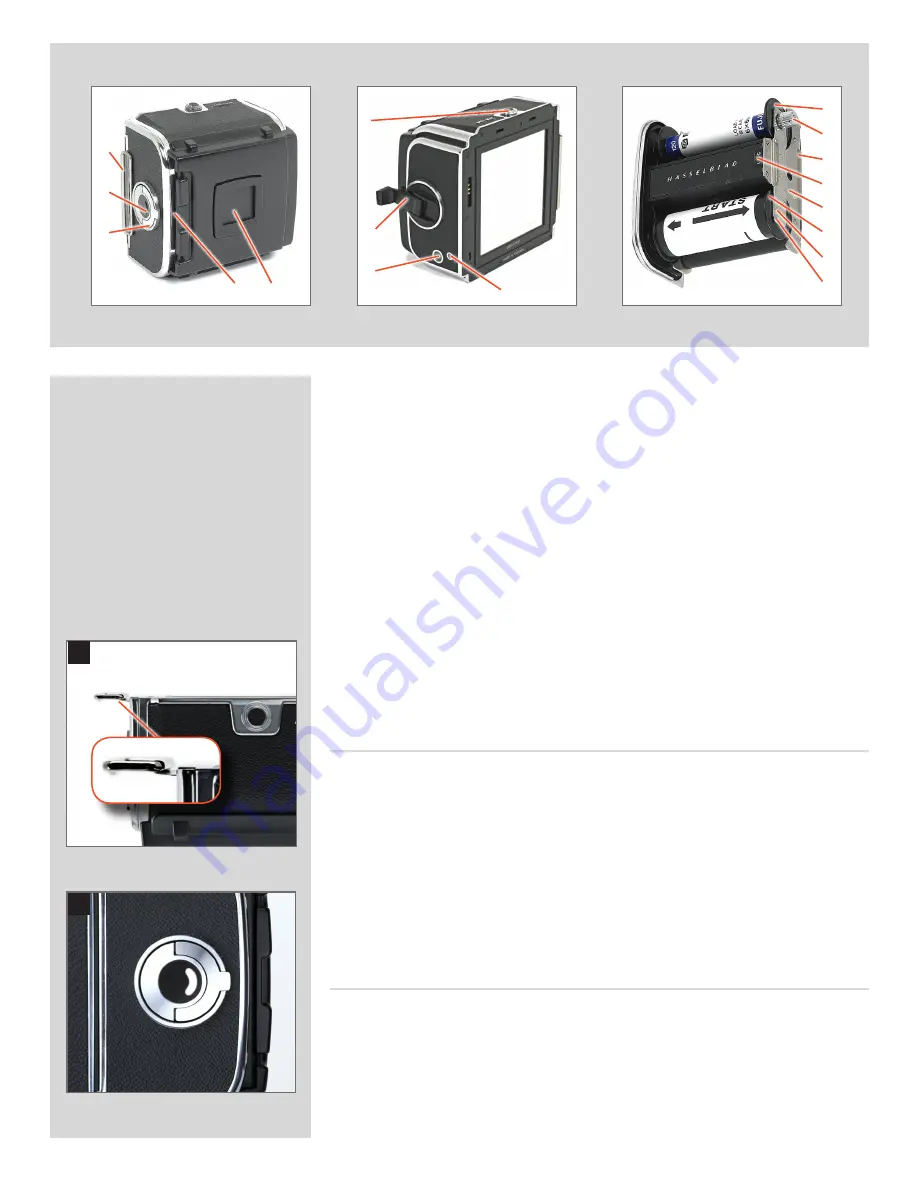
Attaching the magazine
1, 2, 3
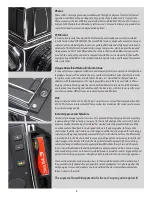
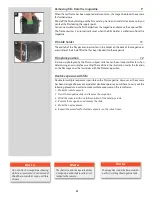
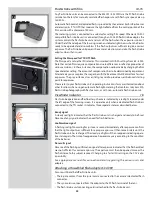
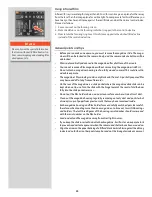
Ensure that the magazine slide is fully inserted with the hinge towards the front of the cam-
era (fig 1) and that the magazine status indicator is white (fig 2). If the indicator is red then
see “Magazine status indicator” below. It is also advisable to have the camera fully wound.
Rest the magazine on the magazine supports making sure that the lugs (A) are properly
engaged in the recesses (B) (fig 3). Carefully swing the magazine towards the camera body
and check that the camera’s upper support hooks (C) fit into the slots (D) in the magazine.
Push the magazine gently but firmly against the hooks (fig 3) while sliding the lock button
A
B
C
D E
J
K
L
M
N
O
P
Q
1
2
I
F
G
H
Summary of Contents for CFV
Page 1: ...User Manual 503CW 503CWD CFV CFVII CFV 39 CFV 50 Version 10 ...
Page 2: ...2 Welcome to Hasselblad 503CW 503CWD CFV ...
Page 6: ...6 1 General Information Photo JoaoCarlos HasselbladMasters ...
Page 28: ...28 1 Overview Photo ClaudioNapolitan HasselbladMasters ...
Page 42: ...42 2 Getting Started Photo MarkHolthusen HasselbladMasters ...
Page 51: ...51 3 Previews Photo MarkZibert HasselbladMasters ...
Page 55: ...55 4 Batches Browsing Photo BangPeng HasselbladMasters ...
Page 61: ...61 5 IAA Instant Approval Architecture Photo LyleOwerko HasselbladMasters ...
Page 66: ...66 6 Delete Format Copy Photo JoaoCarlos HasselbladMasters ...
Page 72: ...72 7 Settings Photo NinaBerman HasselbladMasters ...
Page 73: ...73 Navigating the USER INTERFACE settings ...
Page 85: ...85 8 Cleaning Photo DirkRees HasselbladMasters ...
Page 87: ...87 9 Appendix Photo MarkHolthusen HasselbladMasters ...

