23
General points and tips
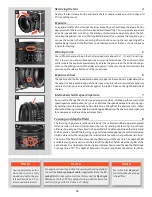
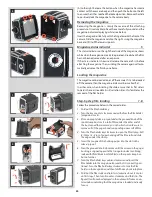
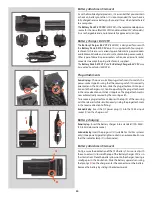
• Before you can make an exposure, you must remove the magazine slide. The maga
-
zine will then be locked on the camera body, and the camera release button will be
unblocked.
• Film is automatically advanced in the magazine after a full turn of the crank.
• You cannot remove a film magazine without re-inserting the magazine slide first.
• Do not attach a magazine showing red to a fully wound camera! This could result in
a double exposure.
• The magazine’s film winding crank is only blocked at frame 1. A partially exposed film
may be wound off at any frame afterwards.
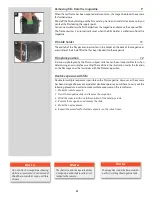
• On the rear of the magazine is a slide pocket where the magazine dark slide can be
kept when not in use. Turn the slide with the hinge towards the rear to fold the bow
fully into the slide pocket recesses.
• Do not put the film holder down on an unclean surface or where it can attract dust.
• Clean out the magazine housing regularly removing not only dust and particles but
also any scraps of paper from previous rolls that may have remained inside.
• Each magazine housing and film holder form a carefully matched pair. Be careful,
therefore, when loading more than one magazine at a time not to switch housings
and holders. The last three figures of the housing serial number should correspond
with the serial number on the film holder.
• Load and unload the magazine away from direct light sources.
• If you keep the slide inserted in an attached magazine, it will act as an exposure lock
to prevent inadvertent exposures when the camera and shutter have been wound on.
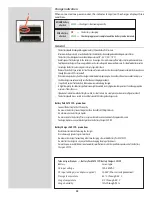
• Align the arrow on the paper backing of all Ilford black & white films against the oblong
index (and no further) on the spool clamp bar and not the triangular index as normal.
Using infrared film
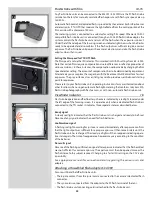
Infrared (IR) rays (wavelengths longer than 800 nm) form an image on a plane further away
from the lens than the image plane for visible light. To compensate for this difference you
have to align the chosen distance against the red IR index and not the normal central index.
Proceed as follows:
1. Focus as usual on the focusing screen.
2. Note the distance on the focusing scale that is opposite the central index line.
3. Now rotate the focusing ring to set this distance opposite the dashed IR index line
instead of the central index line.
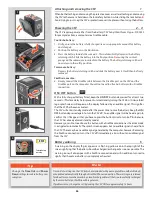
N o t e
Please observe the special information
that came with your IR film about restric-
tions concerning magazine loading, film
development, etc.
Summary of Contents for CFV
Page 1: ...User Manual 503CW 503CWD CFV CFVII CFV 39 CFV 50 Version 10 ...
Page 2: ...2 Welcome to Hasselblad 503CW 503CWD CFV ...
Page 6: ...6 1 General Information Photo JoaoCarlos HasselbladMasters ...
Page 28: ...28 1 Overview Photo ClaudioNapolitan HasselbladMasters ...
Page 42: ...42 2 Getting Started Photo MarkHolthusen HasselbladMasters ...
Page 51: ...51 3 Previews Photo MarkZibert HasselbladMasters ...
Page 55: ...55 4 Batches Browsing Photo BangPeng HasselbladMasters ...
Page 61: ...61 5 IAA Instant Approval Architecture Photo LyleOwerko HasselbladMasters ...
Page 66: ...66 6 Delete Format Copy Photo JoaoCarlos HasselbladMasters ...
Page 72: ...72 7 Settings Photo NinaBerman HasselbladMasters ...
Page 73: ...73 Navigating the USER INTERFACE settings ...
Page 85: ...85 8 Cleaning Photo DirkRees HasselbladMasters ...
Page 87: ...87 9 Appendix Photo MarkHolthusen HasselbladMasters ...

