84
Setting Fixed Sample Points
You are able to set up to five fixed
Sample points
so that you can monitor
the effects that your settings are having in key areas around your image.
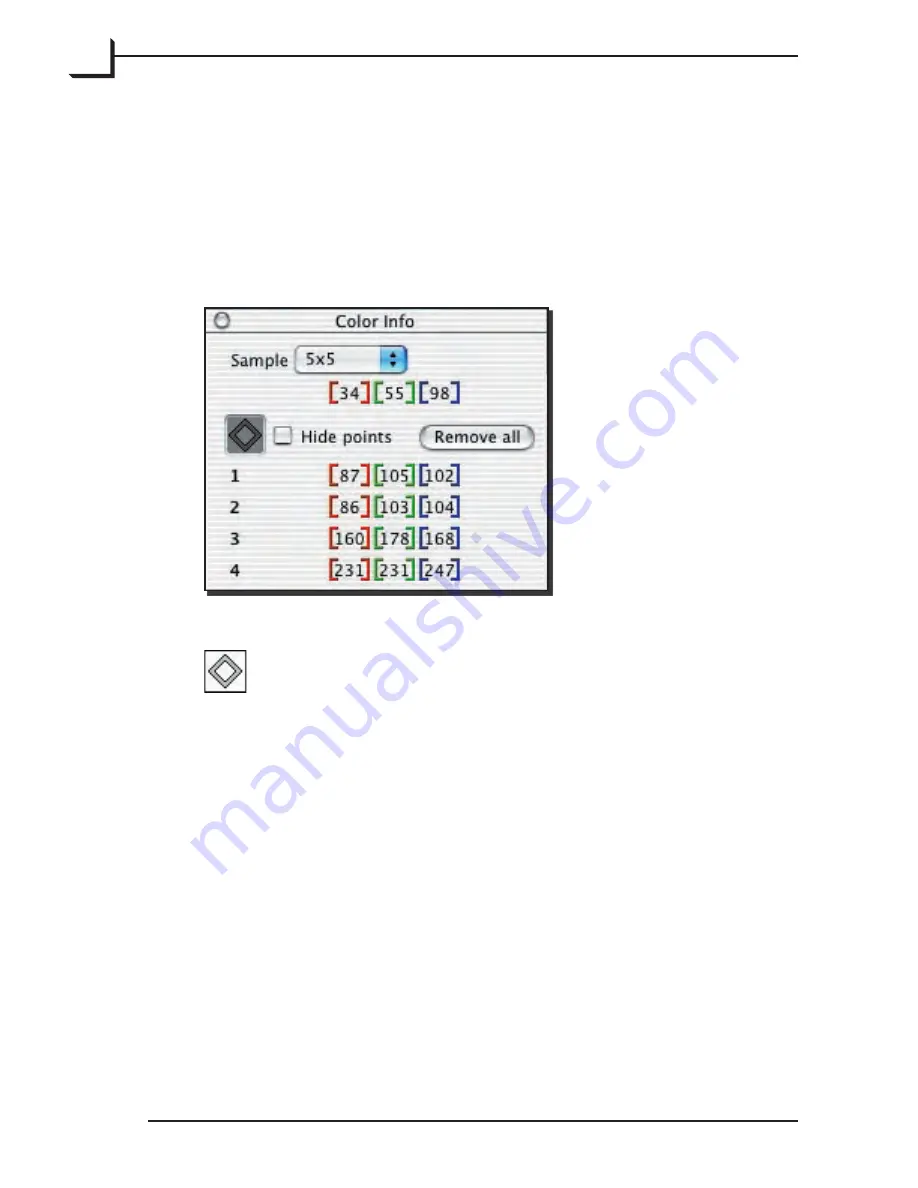
Each sample point is indicated with a diamond and a number in the
preview image. The current values for each sample point are shown next
to the appropriate number in the
Color Info
window.
To set a sample point, click on the
Sample Point
button, which
will turn grey when it is activated. Then click on a point in
your image to place the point. A numbered diamond will then
appear on the preview image at the point you select. You can
work with the sample points as follows:
• To move an existing sample point, activate the sample point picker by
clicking on the
Sample Point
button to make it grey, then click and
drag on the target point.
• To delete an existing sample point, activate the sample point picker,
click once on the target point and then press the backspace button on
your keyboard.
• To keep the existing sample points, but hide them in the preview,
mark the
Hide points
check box. To view and/or edit the points again,
remove the mark from this check box.
• To remove all sample points from your preview click
Remove all
.
Summary of Contents for Flextight X1
Page 1: ...User Manual Flextight X5 X1 English v 1 3 ...
Page 15: ...PRESS PULL OUT PULL OUT PRESS A B D C E G H F A 15 ...
Page 18: ... CE Declaration of conformity 18 ...
Page 19: ... CE Declaration of conformity 19 ...
Page 21: ...Software Reference FlexColor 4 0 for Flextight Scanners by Hasselblad Imacon ...
Page 26: ...6 ...
Page 32: ...12 ...
Page 40: ...20 ...
Page 50: ...30 ...
Page 84: ...64 ...
Page 98: ...78 ...
Page 112: ...92 ...
Page 126: ...106 ...
Page 134: ...114 ...
Page 148: ...128 ...
Page 149: ...129 ...


