OPERATION
8
Form No. FS2HACm-0815
English
General
Use the following procedures to turn on, prepare, and shut
down the Heated Air Curtain Cabinets.
Read all safety messages in the IMPORTANT SAFETy
INFORMATION section before operating this equipment.
Startup
1. make sure the unit is plugged into a properly grounded
electrical receptacle of the correct voltage, size, and plug
configuration. Refer to the SPECIFICATIONS section for
details.
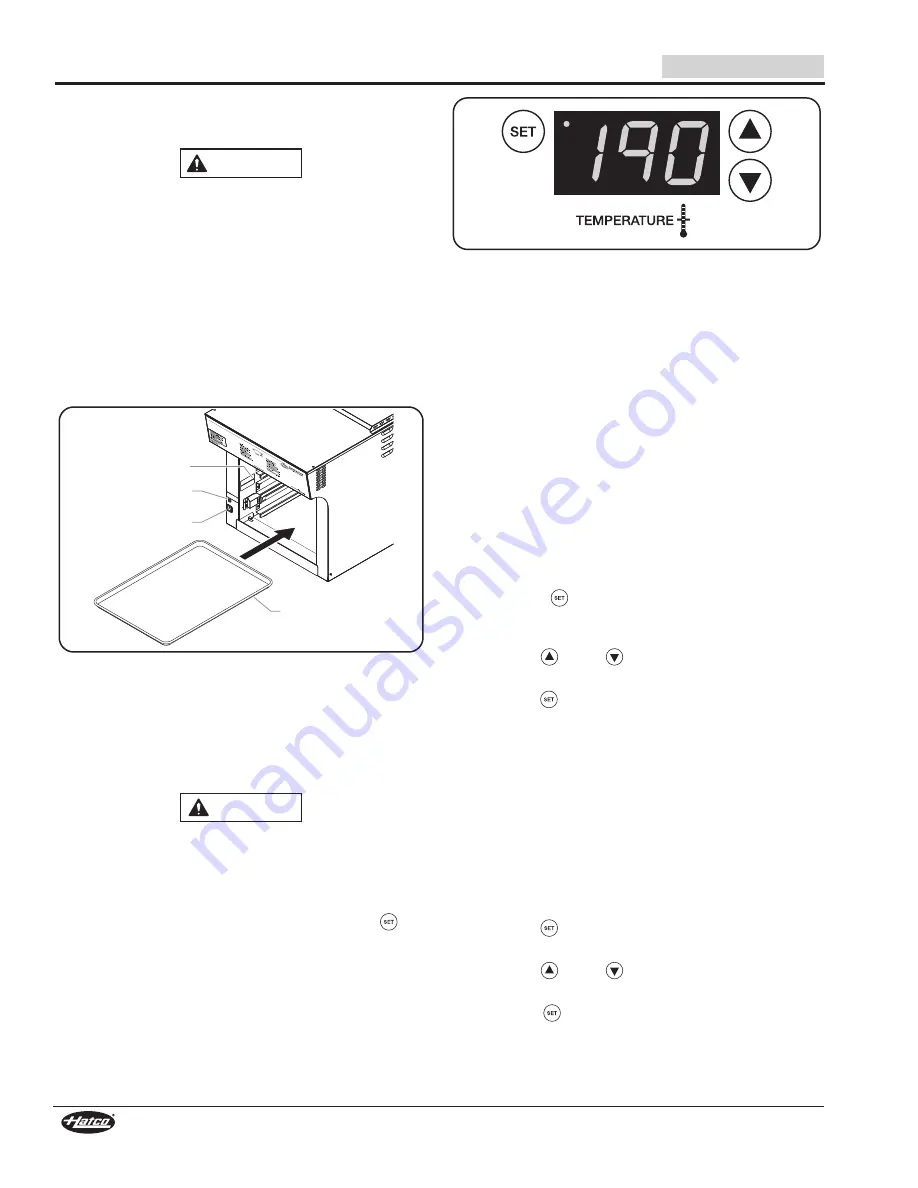
2. Fill all the shelves of the unit with empty full-size sheet pans.
make sure all pans are behind the line next to the arrow
inside each end of the unit.
NOTE: Keeping the sheet pans behind the arrows allows the air
currents in the unit to flow properly and maintain the
required temperature.
Starting Up
3. move the Power I/O (on/off) switch to the “I” (on) position.
• The heating elements and blowers will energize.
• The digital temperature controller will energize and the
current temperature of the cabinet or “LO” will appear
on the display. “LO” indicates the cabinet temperature
is below 70°F (21°C).
BURN HAzARD:
• Some exterior surfaces on unit will get hot. Use caution
when touching these areas.
• Pan/tray will be very hot upon removal—use oven mitt,
protective clothing, or pan gripper to remove.
4. On the digital temperature controller, press the
key
three times to verify the setpoint temperature. (“SP” will be
displayed after the second press.)
• The setpoint temperature will be shown for 10 seconds.
After 10 seconds, the display will revert to the current
temperature of the unit. To change the setpoint
temperature, refer to “Changing the Setpoint Temperature”.
NOTE: The digital temperature controller is factory pre-set to a
setpoint temperature of 190°F (87°C). Once the setpoint
temperature is changed, the new setpoint temperature
will remain in memory until it is changed again.
CAUTION
Arrow
Power I/O (on/off)
Switch
Warning Light
Full-Size
Sheet Pan
WARNING
Digital Temperature Controller
5. Allow the unit to reach the setpoint temperature before
loading preheated food product onto the sheet pans.
NOTE: If the warning light illuminates during operation, a
blower malfunction has occurred. Turn off unit and
contact an Authorized Service Agent or Hatco for
assistance.
Shutdown
1. move the Power I/O (on/off) switch to the “O” (off) position
and allow the unit to cool.
NOTE: A cooling fan inside the unit will run for a short time after
the unit is turned off.
2. Perform the “Daily Cleaning” procedure in the
mAINTENANCE section of this manual.
Changing the Setpoint Temperature
Use the following procedure to change the setpoint temperature
on the digital temperature controller.
1. move the Power I/O (on/off) switch to the “I” (on) position.
2. Press the
key three times. The current setpoint
temperature will be shown on the TEmPERATURE display
(“SP” will be displayed after the second press).
3. Press the
key or
key within 10 seconds to change
the setpoint temperature.
4. Press the
key to lock in the new setpoint temperature.
The TEmPERATURE display will go blank for two seconds
to show that the new setting has been accepted.
NOTE: After 10 seconds of inactivity during the programming
process, the controller will exit programming mode
automatically without saving any changes.
5. Allow the unit to reach the setpoint temperature before
loading food onto the sheet pans.
Changing the Fahrenheit/Celsius Setting
Use the following procedure to change between Fahrenheit
and Celsius on the display.
1. move the Power I/O (on/off) switch to the “I” (on) position.
2. Press the
key once. Either an “F” for Fahrenheit or “C”
for Celsius will be displayed.
3. Press the
key or
key within 10 seconds to change
from “F” (Fahrenheit) and “C” (Celsius).
4. Press the
key three times to lock in the new setting.
The TEmPERATURE display will go blank for two seconds
to show that the new setting has been accepted.
NOTE: After 10 seconds of inactivity during the programming
process, the controller will exit programming mode
automatically without saving any changes.


