

LOCATION
Locate the Display Cabinet at the proper counter height,
in an area that is convenient for use. The location should
be level to prevent the cabinet or its contents from
accidentally falling, and strong enough to support the
weight of the unit and the food displayed.
WARNING
For safe and proper operation, the Display Cabinet
must be located a reasonable distance from
combustible walls and materials. If safe distances are
not maintained, discoloration or combustion could
occur.
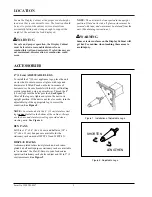
LENGTHEN
SHORTEN
ACCESSORIES
4" (10 cm) ADJUSTABLE LEGS
To install the 4" (10 cm) appliance legs, place the unit
on its side. Be sure to secure all glass with tape and
drain water if filled. Punch out holes in corners of
bottom cover. Secure bracket with four (4) self-drilling
screws (supplied), using a power driver. Thread the 4"
(10 cm) legs into the holes provided.
See Figure 7.
After all the legs are tightened, return the unit to its
upright position. If the unit is not level or rocks, turn the
adjustable tip of the appropriate leg to correct the
condition.
See Figure 8.
NOTE:
For stacked units the 6” (15 cm) stainless steel
legs
cannot
install in the bottom of the cabinet. Always
use the base and stainless steel legs provided when
stacking units.
See Figure 6.
BUN PANS
Full Size 18” x 26” (46 x 66 cm) and half-size (18” x
13” (46 x 33 cm) bun pans are available for the
stationary rack on model WFST-1X and WFST-2X.
DISPLAY RACKS
A chrome-plated rotisserie-style rack and a chrome-
plated 4-shelf multi-purpose stationary rack are available
to “customize” the Flav-R-Savor to your foodservice
operation. Stationary rack shelves adjust and tilt in 2" (5
cm) increments.
See Figure 9.
Figure 8. Adjustable Legs.
Figure 7. Installation of Adjustable Legs.
NOTE:
The unit must be transported in the upright
position. If laid on its side, all glass surfaces must be
secured with tape, and water must be drained from the
unit. (See draining instructions.)
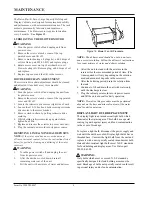
WARNING
Some exterior surfaces on the Display Cabinet will
get hot. Use caution when touching these areas to
avoid injury.
5
Form No. WFSTM-0297


