Form No. LWM-1104
5
OPERATION
WARNING
Some exterior surfaces on the unit will get hot.
Use caution when touching these areas to avoid
injury.
WARNING
To prevent any injury, discontinue use if power
cord is frayed or worn.
CAUTION
Damage to countertop material caused by heat
generated from Hatco equipment is not covered
under the Hatco Warranty. Contact the
manufacturer of the base material for
application information.
PLACING INTO SERVICE
LW-2 MODEL
1. Plug warmer into an electrical outlet of the
correct voltage, size and plug configuration. See
SPECIFICATIONS
for details.
2. Place food pan into base. Turn the switch,
located on the electrical cord, to the ON position.
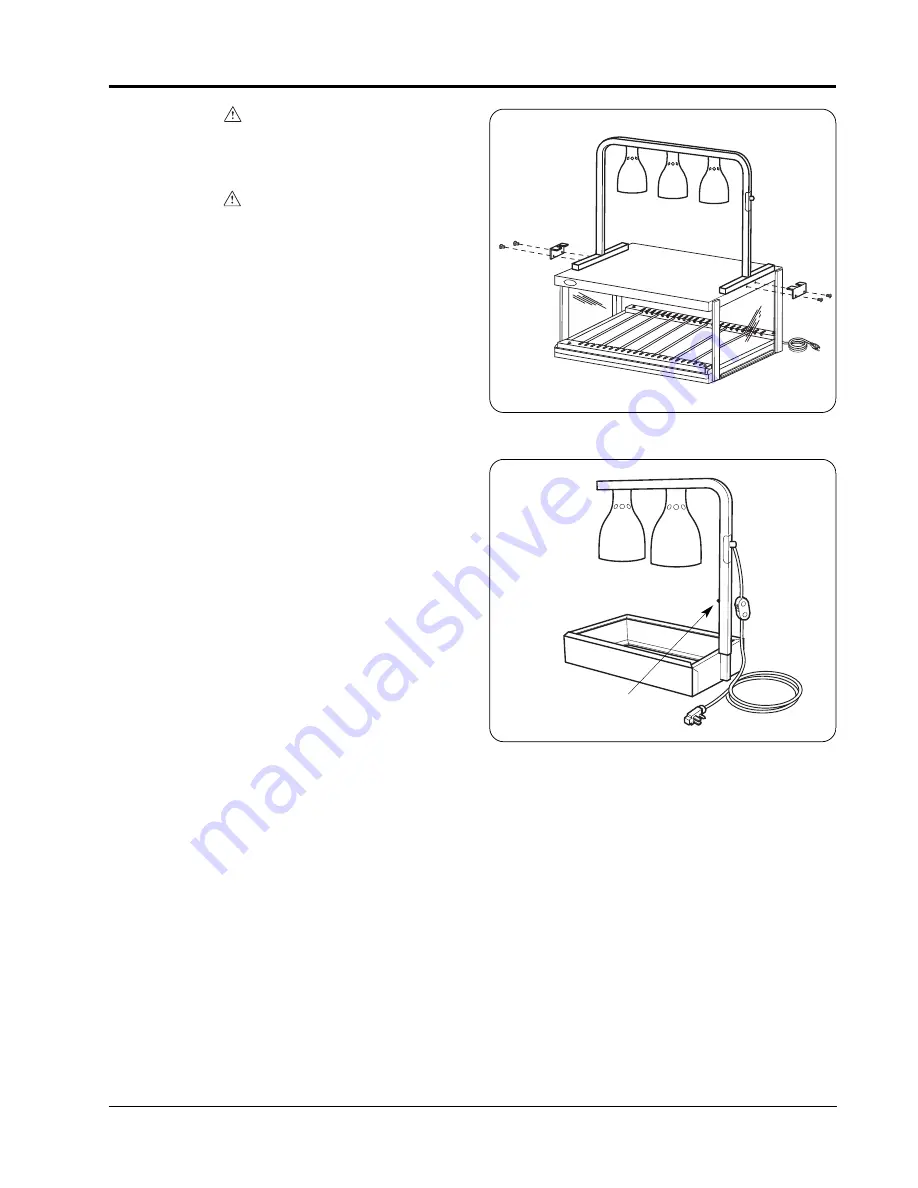
LW-3 MODEL
1. For free standing operation, place the unit over
the food pans to be warmed.
For mounting to a Hatco GRSDH-36 unit,
remove two top middle screws from each side of
unit. Secure the LW-3 to the display warmer
using the two mounting brackets supplied and
original screws. (See Figure 6.)
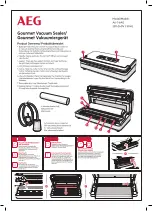
HEIGHT ADJUSTMENT (LW-2 ONLY)
The lamps can be adjusted from 14" to 20"
(356 - 508 mm) above the base.
1. Grasp the lamp assembly and remove the
adjustment screw. (See Figure 7.)
2. Move the lamp assembly up to the desired
position. There are four adjustment positions.
3. Align the selected holes and install the
adjustment screw. Tighten securely.
Figure 6. LW-3 Mounting
Figure 7. Height Adjustment–LW-2 Only
Height Adjustment Screw
Summary of Contents for LW-2
Page 10: ...Form No LWM 1104 8 NOTES ...
Page 11: ...Form No LWM 1104 9 NOTES ...


