INSTALLATION
Form No. MDWM-0608
5
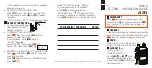
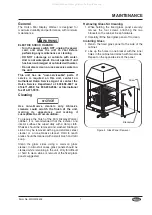
Reversible Access Door
Any door may be changed from hinged left to hinged
right.
1. While holding the door securely, remove the
screw attaching the top left hinge/pivot pin to the
cabinet.
2. Carefully lift the door off of the bottom
hinge/pivot pin. Also remove the nylon washer
and save.
3. Rotate the removed hinge and attach (with the
pivot pin facing up) using the removed screw to
the bottom-most outer hole on the right-hand
side of the cabinet (see Figure 6).
4. Remove the screw attaching the bottom left
hinge/pivot pin to the cabinet.
5. Rotate the door 180° and install the nylon
washer and the door onto the newly attached
bottom right hinge/pivot pin.
6. Rotate the removed hinge (the pivot pin now
facing down) and insert it into the top of the door.
7. Line up the hinge’s hole with the top-most hole
in the cabinet and attach with the removed
screw.
Configurable Access Door
Any door may be exchanged with a fixed glass panel
to suit the installation.
1. While holding the door securely, remove the screw
attaching the top hinge/pivot pin to the cabinet.
2. Carefully lift the door off of the bottom
hinge/pivot pin. Also remove the nylon washer
and save.
3. Remove the screw attaching the bottom
hinge/pivot pin to the cabinet. Keep the nylon
washer and hardware.
4. While holding the fixed glass panel securely,
remove the four screws attaching the two
brackets to the cabinet.
5. Carefully move the fixed glass panel to the side
of the unit from which the door was removed.
6. Line up the holes in one bracket with the inner
holes in the cabinet and attach with the screws
(see Figure 6). Repeat on the opposite side of
the fixed glass panel.
7. On the side of the unit from which the fixed glass
panel was removed, line up the hole in the
hinge/pivot pin (with the pivot pin facing up) with
the bottom-most hole in the unit and attach with
a removed screw.
8. Install the nylon washer and the door onto the
newly attached bottom hinge/pivot pin.
9. Insert the remaining hinge/pivot pin (the pivot pin
facing down) into the top of the door.
10. Line up the hinge’s hole with the top-most hole
in the cabinet and attach with the other removed
screw.
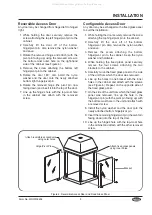
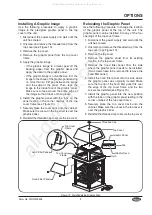
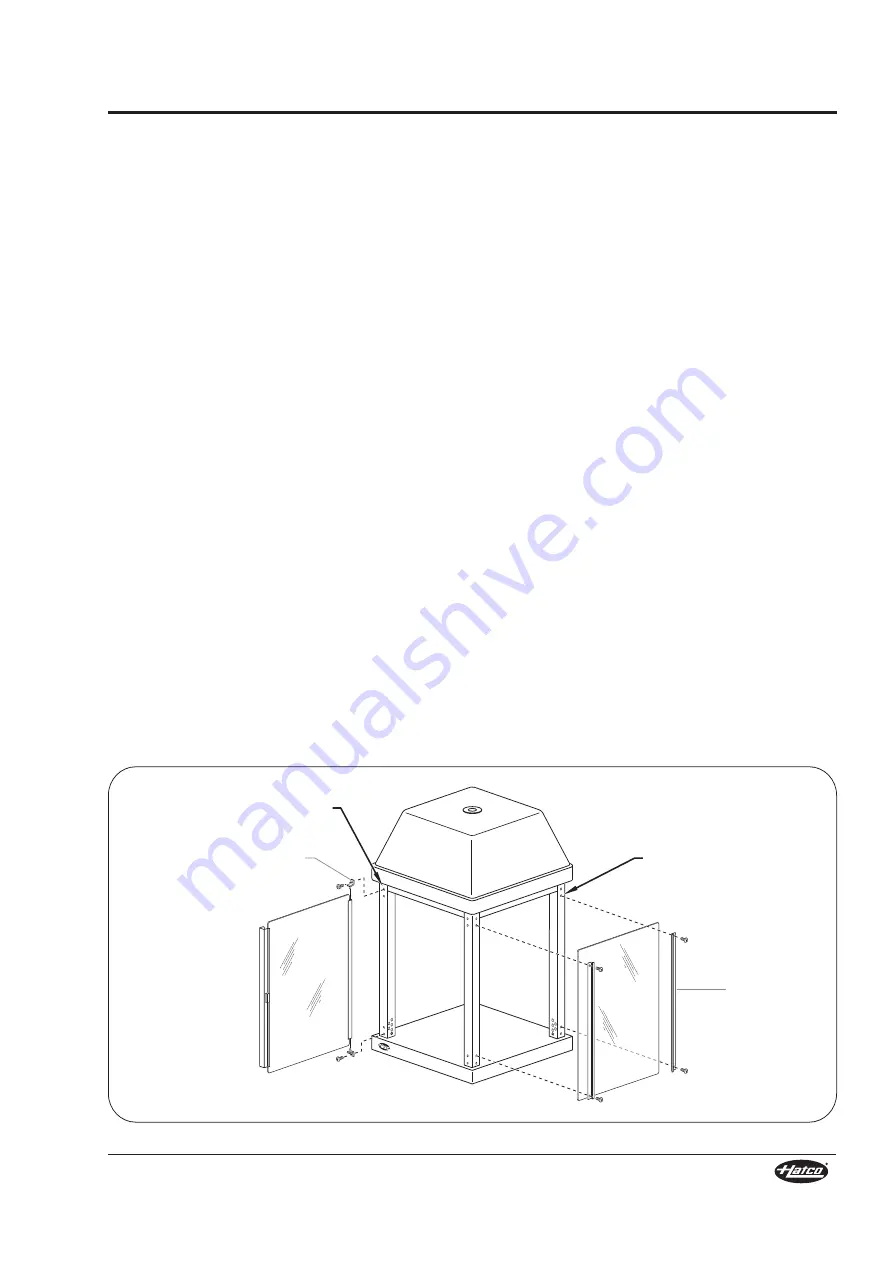
Figure 6. Reversible Access Door and Fixed Glass Panel
Attach fixed glass panels
using inner holes.
Attach reversible accessdoors
using outer holes.
Bracket
Hinge/Pivot Pin
All manuals and user guides at all-guides.com