background image

- 1 - 


I-CONCEPT TREADMILL USER MANUAL


Summary of Contents for I-CONCEPT

Page 1: ... 1 I CONCEPT TREADMILL USER MANUAL ...

Page 2: ... 2 INDEX 1 OUTLOOK INSTRUCTION 3 2 SAFETY INSTRUCTION 4 3 GROUNDING WIRES INSTRUCTION 5 4 ASSEMBLE PART LIST 6 5 ASSEMBLE STEPS 7 6 CAUTION 10 7 MAINTENANCE 11 8 COMPUTER OPERATION INSTRUCTION 12 ...

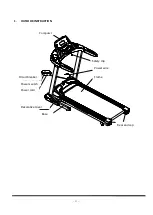
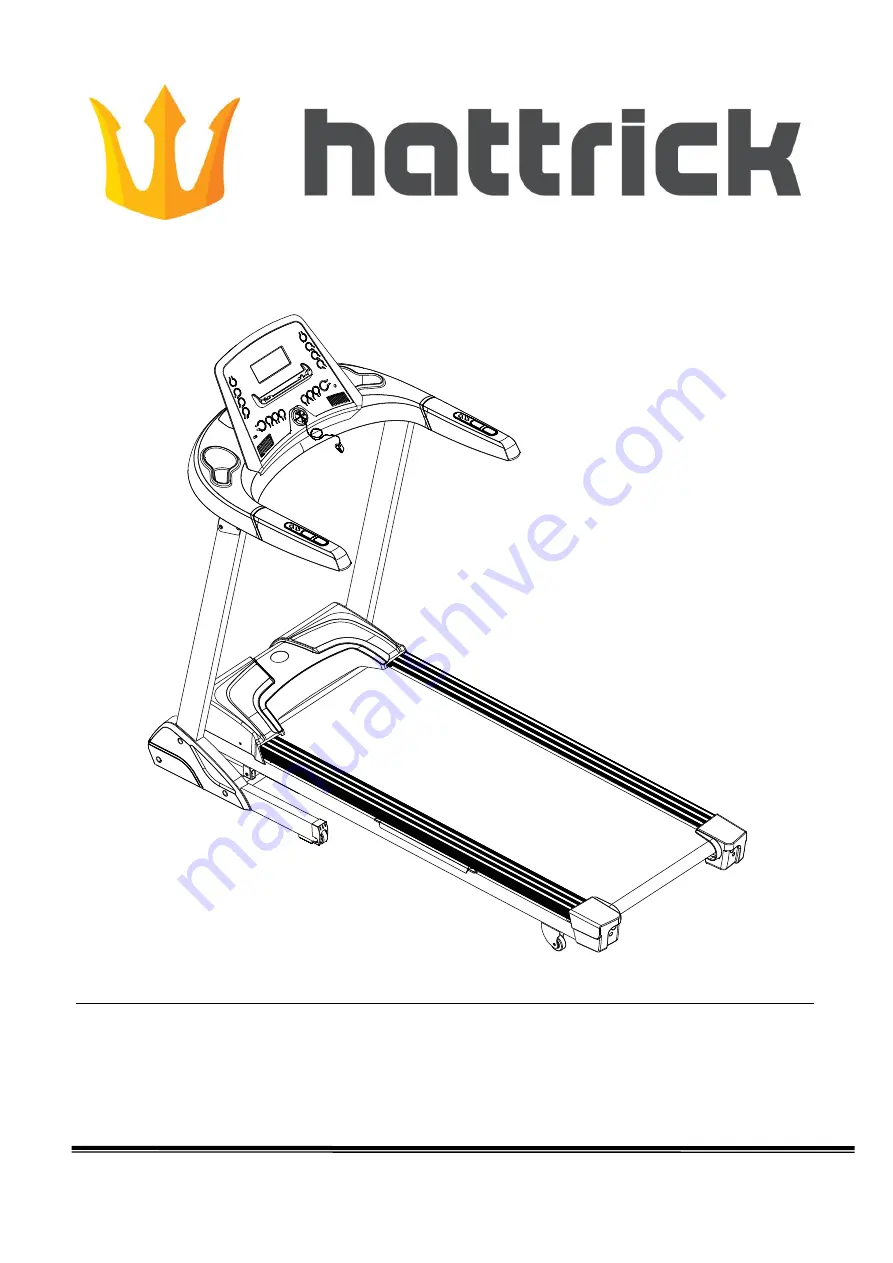
Page 3: ... 3 1 OUTLOOK INSTRUCTION 電子表 電源開關 電源線 過載保護開關 底座 修飾蓋 安全插銷 夾子 電源線 機台主架 后調整盒 Computer Power switch Power cord Circuit breaker Safety clip Power wire Frame Base Rear end cap Decorative cover ...

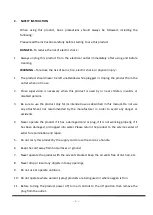
Page 4: ... intended use as described in this manual Do not use any attachment not recommended by the manufacturer in order to avoid any danger or accidents 4 Never operate the product if it has a damaged cord or plug if it is not working properly if it has been damaged or dropped into water Please return the product to the service center of seller for examination and repair 5 Do not carry this product by th...

Page 5: ...propriate outlet that is properly installed and grounded in accordance with all local codes and ordinances DANGER Improper connection of the equipment grounding conductor can result in a risk of electric shock Check with a qualified electrician or serviceman if you are in doubt as to whether the products are properly grounded Do not modify the plug provided with the product if it will not fit the ...

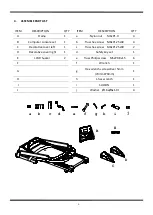
Page 6: ...4 B Computer console set 1 b Truss hex screw M8xP1 25x40 4 C Decorative cover left 1 c Truss hex screw M8xP1 25x90 2 D Decorative cover right 1 d Safety key set 1 E I PAD Sucker 2 e Truss Philips screw M5xP0 8x15 6 F f Wrench 1 G g Hex wrench screwdriver 5mm 70mmX70mm 1 H h L hex wrench 1 I i SLILCON 1 J j Washer Ø16xØ6x1 0t 4 ...

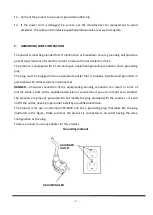
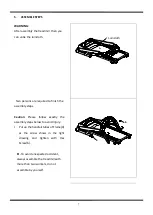
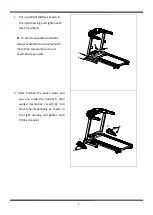
Page 7: ...ish the assembly steps Caution Please follow exactly the assembly steps below to avoid injury 1 Put up the handrail tubes of Frame A as the arrow shows in the right drawing and tighten with Hex Screw b Ps To avoid unexpected accident always assemble the treadmill with more than two workers do not assemble by yourself b b Loincloth ...

Page 8: ...ected accident always assemble the treadmill with more than two workers do not assemble by yourself b b c c 3 After finished the above steps and you can untie the loincloth then wedge decorative cover C D into the frame respectively as shown in the right drawing and tighten with Philips screw e e e C D ...

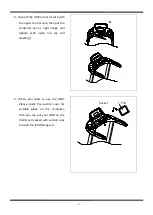
Page 9: ...ter set as right image and tighten with nylon nut a and washer j a B j 5 When you need to use the IPAD Please paste the suction cups for suitable place on the computer then you can put your IPAD on the holder and sucked with suction cups to avoid the IPAD falling out l L I PAD Sucker ...

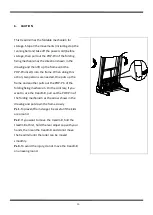
Page 10: ...One puts up the frame and another pulls out the POP Pin of the folding fixing mechanism On the contrary if you want to use the treadmill pull out the POP Pin of the folding mechanism as the arrow shows in the drawing and put down the frame slowly Ps 1 To prevent from danger be careful if the kids are around Ps 2 If you want to move the treadmill fold the treadmill at first hold the rear adjust cap...

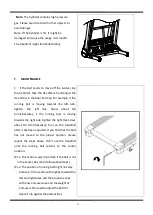
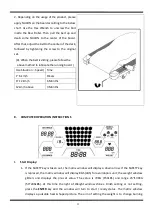
Page 11: ...e running belt is moving towards the right side tighten the right Hex Screw about 1 4 turn clockwise Turn on the treadmill after it has been adjusted If you find that the belt has not moved to the proper position please repeat the steps above Don t use the treadmill until the running belt returns to the center position Ps 1 This action is very important if the belt is not in the center be sure to ...

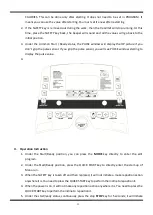
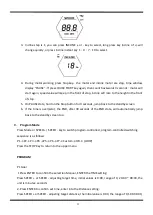
Page 12: ...Speed Time 1 6 km h 1Years 6 12 km h 6 Months 12km h above 3 Months 8 COMPUTER OPERATION INSTRUCTIONS I Start Display 1 If the SAFETY key is taken out the matrix window will display a down arrow If the SAFETY key is replaced the matrix window will display KGS LBS for avoirdupois unit the weight window glitters and displays the pre set value The value is 70KG 150LBS and range 23 130KG 50 286LBS At ...

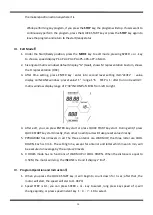
Page 13: ... will see PULSE window starting to display the pulse value 4 II Operation Instruction 1 Under the Start Ready position you can press the MODE key directly to enter the edit program 2 Under the Start Ready position press the QUICK START key to directly enter the start up of Manu run 3 When the SAFETY key is taken off and then replaced it will not initiate a make reposition action anywhere it is You...

Page 14: ...splay range of 1 30 INCLINE of LEVEL from left to right 4 After edit you can press ENTER key start or press QUICK START key start During edit if press QUICK START key start directly then other no edit parts will take preset value directly 5 PPROGRAM has 30 levels in all The three anterior are WARM UP the three latter are COOL DOWN Each is 3 min The setting time except for anterior and latter which...

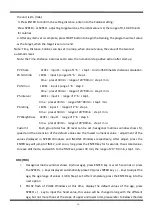
Page 15: ...ndby screen 6 If the time is over zero the END after 30 seconds of the END state will automatically jump back to the standby screen too V Program Mode Press Mode or SPEED SPEED key to switch program controlled program controlled switching sequence is as follows P1 P2 P3 P4 P5 P6 P7 Custom H R C LOOP Press the STOP Key to return to the upper menu PROGRAM P1 Goal 1 Press ENTER to confirm the selecti...

Page 16: ...6 step1 time preset 30min range of 20 99min step 1 min P7 Weight loss LEVEL input 1 range of 1 6 step 1 time preset 30min range of 20 99min step 1 min Custom1 Each group total has 30 level can be set hexagonal matrices window shows M speed and the ascension of the default values are the lowest numerical value adjustment of the values displayed in SPEED Windows and INCLINE Windows respectively Afte...

Page 17: ...124 124 32 179 113 113 50 162 102 102 68 144 91 91 15 195 123 123 33 178 112 112 51 161 101 101 69 143 91 91 16 194 122 122 34 177 112 112 52 160 101 101 70 143 90 90 17 193 122 122 35 176 111 111 53 159 100 100 71 142 90 89 18 192 121 121 36 175 110 110 54 158 100 100 72 141 90 89 19 191 121 121 37 174 110 110 55 157 99 99 73 140 90 88 20 190 120 120 38 173 109 109 56 156 98 98 74 139 90 88 21 18...

Page 18: ... review the cumulative value for the each motion b Some APP need connection to the Google map to do the operation s display after the locate 2 Operations for treadmill execute APP STEP 1 Let the Bluetooth device pairing with the iPad 將 Bluetooth a Please put the Ipad to the ipad holder which in front of the LCD then can fixed the iPad b Enter the set the project of the iPad open the Bluetooth devi...

Page 19: ...rs the Bluetooth will automatically cancel the connection Not connected please follow above steps again STEP 2 Press the iPad main menu button the screen will be return to iPad desktop STEP 3 Start the iPad treadmill APP of downloaded enter to APP page treadmill will detect APP when the APP and treadmill connection success then unlock APP screen can start from APP interface to use various modes to...

Page 20: ...mal Please check the Bluetooth device with iPad matching whether belong this treadmill if it is correct please turn off the iPad maybe the iPad crash or meet the wireless interference 4 For below situation may can make iPad automatically disconnected When using APP synchronization using application of background such as listen to music or review the photos And so on please try to reduce the round ...

Page 21: ...e than range If there is any error message please contact with sales companies E6 E7 Ascension anomaly and simple elimination method 1 Re start the treadmill if also display E6 or E7 message please up to 2 steps 2 The ascension of compulsory up or down to test the incline motor and transmission signal line is normal the operation instructions as following Special announcement It is must be very ca...

Page 22: ...ure 2 3 If the above steps are still can t exclude the abnormal function of the INCLINE fault then please contact the technical personnel of the dealer you also can force the incline function failure at this time for convenience of users at no incline function case can still continue to use the treadmill you can press STOP don t loosen and press key at the same time the two button are pressed at t...

Page 23: ... 2 0 2 0 2 0 2 0 2 0 2 0 2 0 1 5 1 0 KPH 1 6 2 4 3 2 3 2 3 2 3 2 3 2 3 2 3 2 3 2 3 2 3 2 3 2 3 2 3 2 3 2 3 2 3 2 3 2 3 2 3 2 3 2 3 2 3 2 3 2 3 2 3 2 3 2 2 4 1 6 Level 4 Incline 0 0 1 0 1 0 1 0 1 0 1 0 4 0 1 0 1 0 1 0 1 0 4 0 1 0 1 0 1 0 4 0 5 0 1 0 1 0 1 0 1 0 4 0 1 0 1 0 1 0 1 0 1 0 1 0 1 0 0 0 MPH 1 0 1 5 2 0 2 0 2 0 2 0 2 0 2 0 2 0 2 0 2 0 2 0 2 0 2 0 2 0 2 0 2 0 2 0 2 0 2 0 2 0 2 0 2 0 2 0 2 0...

Page 24: ...5 4 5 3 0 2 5 2 0 KPH 3 2 4 0 4 8 8 8 5 6 8 8 5 6 9 6 6 4 9 6 6 4 9 6 7 2 9 6 7 2 9 6 7 2 9 6 7 2 9 6 6 4 9 6 6 4 9 6 5 6 8 8 7 2 4 8 4 0 3 2 Level 4 Incline 2 0 2 0 3 0 3 0 3 0 4 0 4 0 4 0 4 0 5 0 5 0 5 0 5 0 6 0 6 0 6 0 5 0 5 0 5 0 5 0 4 0 4 0 4 0 4 0 3 0 3 0 3 0 3 0 2 0 2 0 MPH 2 0 2 5 3 0 6 0 4 0 6 0 4 0 6 5 4 5 6 5 4 5 6 5 5 0 6 5 5 0 6 5 5 0 6 5 5 0 6 5 4 5 6 5 4 5 6 5 4 0 6 0 5 0 3 0 2 5 2 ...

Page 25: ...0 2 5 2 0 KPH 3 2 4 0 4 8 8 0 8 8 9 6 8 8 9 6 8 8 9 6 8 8 9 6 8 8 9 6 8 8 9 6 8 8 9 6 8 8 9 6 8 8 9 6 8 8 9 6 8 8 8 0 7 2 4 8 4 0 3 2 Level 4 Incline 0 0 0 0 0 0 0 0 0 0 1 0 1 0 1 0 1 0 1 0 1 0 1 0 1 0 1 0 1 0 1 0 1 0 1 0 1 0 1 0 1 0 1 0 1 0 1 0 1 0 0 0 0 0 0 0 0 0 0 0 MPH 2 0 2 5 3 0 5 5 6 0 6 5 6 0 6 5 6 0 6 5 6 0 6 5 6 0 6 5 6 0 6 5 6 0 6 5 6 0 6 5 6 0 6 5 6 0 6 5 6 0 5 5 5 0 3 0 2 5 2 0 KPH 3 ...

Page 26: ...4 5 3 0 2 5 2 0 KPH 3 2 4 0 4 8 8 8 6 4 8 8 6 4 8 8 6 4 8 8 6 4 8 8 6 4 8 8 6 4 8 8 6 4 8 8 6 4 8 8 6 4 8 8 6 4 8 8 6 4 8 8 7 2 4 8 4 0 3 2 Level 4 MPH 2 0 2 5 3 0 6 0 4 5 6 0 4 5 6 0 4 5 6 0 4 5 6 0 4 5 6 0 4 5 6 0 4 5 6 0 4 5 6 0 4 5 6 0 4 5 6 0 4 5 6 0 4 5 3 0 2 5 2 0 KPH 3 2 4 0 4 8 9 6 7 2 9 6 7 2 9 6 7 2 9 6 7 2 9 6 7 2 9 6 7 2 9 6 7 2 9 6 7 2 9 6 7 2 9 6 7 2 9 6 7 2 9 6 7 2 4 8 4 0 3 2 Leve...

Page 27: ... 2 5 2 0 KPH 3 2 4 0 4 8 6 4 8 0 8 8 8 0 9 6 8 8 9 6 8 8 9 6 8 8 9 6 8 8 9 6 8 8 9 6 8 8 9 6 8 8 9 6 8 8 9 6 8 8 8 0 6 4 4 8 4 0 3 2 Level 4 MPH 2 0 2 5 3 0 4 0 5 0 5 5 6 0 6 5 6 0 6 5 6 0 6 5 6 0 6 5 6 0 6 5 6 0 6 5 6 0 6 5 6 0 6 5 6 0 6 5 6 0 5 0 4 0 3 0 2 5 2 0 KPH 3 2 4 0 4 8 6 4 8 0 8 8 9 6 10 4 9 6 10 4 9 6 10 4 9 6 10 4 9 6 10 4 9 6 10 4 9 6 10 4 9 6 10 4 9 6 10 4 9 6 8 0 6 4 4 8 4 0 3 2 Le...

Page 28: ...4 0 3 5 2 0 1 5 1 0 KPH 1 6 2 4 3 2 4 8 5 6 6 4 7 2 7 2 7 2 8 0 8 0 8 0 8 0 8 8 8 8 8 8 8 8 8 0 8 0 8 0 7 2 7 2 7 2 6 4 6 4 6 4 5 6 3 2 2 4 1 6 Level 4 MPH 1 0 1 5 2 0 3 5 4 0 4 5 5 0 5 0 5 0 5 5 5 5 5 5 5 5 6 0 6 0 6 0 6 0 5 5 5 5 5 5 5 0 5 0 5 0 4 5 4 5 4 5 4 0 2 0 1 5 1 0 KPH 1 6 2 4 3 2 5 6 6 4 7 2 8 0 8 0 8 0 8 8 8 8 8 8 8 8 9 6 9 6 9 6 9 6 8 8 8 8 8 8 8 0 8 0 8 0 7 2 7 2 7 2 6 4 3 2 2 4 1 6 ...

Reviews: