background image

15

SERVICE

    Tool service must be performed only by qualified repair personnel. 

    When servicing a tool, use only identical replacement parts. Use only authorized 

parts.

    Use only the lubricants supplied with the tool and specified by the manufacturer.

AIR SUPPLY AND CONNECTIONS

    The air supply connection must not hold pressure when air supply is disconnected. 

If an incorrect fitting is used, the tool can remain charged with air after 

disconnecting and thus will be able to work even after the air line is disconnected, 

possibly causing injury.

    Do not use any type of reactive gases, including, but not limited to, oxygen and 

combustible gases, as a power source. Use filtered, lubricated, regulated 

compressed air only. Use of a reactive gas instead of compressed air may cause 

the tool to explode which will cause death or serious personal injury.

    Use only a pressure-regulated compressed air source to limit the air pressure 

supplied to the tool. The regulated pressure must not exceed 100 PSI. If the 

regulator fails, the pressure delivered to the tool must not exceed 200 PSI. The 

tool could explode which will cause death or serious personal injury.

    Always disconnect air supply from tool:

a) before making adjustments.

b) when servicing the tool.

c) when clearing a jam.

d) when tool is not in use.

e) when moving to a different work area, as accidental actuation may occur, 

causing injury.

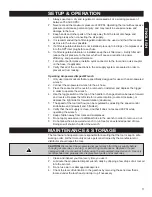
1.    Inspect the air-powered impact wrench prior to each use in order to:

a) ensure that the proper air source is being used; 

b) verify that the tool is in proper working order.

2.    Do not use a tool that is not in proper working order.

3.    Do not use oxygen or any other combustible or bottled gas to power this tool.

4.    Do not use this tool in the presence of flammable liquids or gases.

5.    Only use sockets that are specifically designed for use with this air-powered 

impact wrench.

6.    Verify that the air valve (or trigger) on the air-powered impact wrench is in the “off” 

position before connecting the air-powered impact wrench to the air supply.

7.    This impact wrench requires an air pressure of 90 PSI and air flow according to 

the specifications that appear at the beginning of this Manual. 

8.    Drain the air tank daily. Water in the air line will damage the air-powered impact 

wrench.

9.    Clean the air inlet filter weekly.

10.    The pressure in the line should be increased in order to compensate for an 

unusually long air hose (longer than 26’ [8 m]). The diameter of the hose should 

be 3/8” (10 mm) ID. 

11.    Keep the hose away from heat, oil, and sharp edges. Check the hose for wear, 

and verify that all connections are secure.

12.    Do not use the air-powered impact wrench for a task that it is not designed to 

perform.

13.    Do not use air-powered impact wrench if it is damaged or if there is reason to 

believe that it is defective.

14.    Do not use air-powered impact wrench without having been instructed in its use by 

a qualified person.

15.    Do not carry the air-powered impact wrench by the air hose.

ENGLISH

IMPORTANT SAFETY INSTRUCTIONS FOR AIR-POWERED IMPACT WRENCH

GENERAL SAFETY INSTRUCTIONS

Summary of Contents for 68125020

Page 1: ...88 Notre personnel du service à la clientèle est disponible pour vous aider Pour obtenir de l aide pour le montage de votre produit pour signaler des pièces endommagées ou manquantes ou pour toute autre information veuillez composer notre numéro sans frais 1 866 206 0888 Enregistrez votre produit Nous vous invitons à enregistrer votre produit en ligne afin de faciliter les communications pour ce f...

Page 2: ...sure grave ne tentez pas d utiliser cet outil avant d avoir lu entièrement le manuel et de l avoir compris Conservez ce manuel et consultez Ie fréquemment pour une utilisation sécuritaire par toute personne qui utilise cet outil CONSERVEZ CE MANUEL Gardez ce manuel qui contient les avertissements de sécurité les précautions à prendre le mode de fonctionnement les inspections et l entretien à effec...

Page 3: ...des chaussures de sécurité à semelle antidérapante et un casque en fonction des conditions de travail Portez toujours des lunettes de sécurité Portez toujours des protecteurs auditifs Iorsque vous utilisez l outil Une exposition prolongée à des bruits de grande intensité risque de causer une perte auditive Déconnectez l outil de la source d air avant de le régler Évitez les démarrages accidentels ...

Page 4: ...lisés sur un autre outil ENTRETIEN L outil ne doit être réparé que par un réparateur qualifié Pour réparer l outil n utilisez que des pièces de rechange identiques aux pièces originales Utilisez uniquement les pièces autorisées Utilisez uniquement le lubrifiant pour outils pneumatiques fourni et ou recommandé par le fabricant ALIMENTATION EN AIR ET CONNEXIONS Le connecteur de l outil ne doit pas r...

Page 5: ...re qu elle est défectueuse 14 N utilisez pas la clé à chocs pneumatique avant d avoir été conseillé par une personne qualifiée 15 Ne transportez pas la clé à chocs pneumatique par le boyau d air Cette clé à chocs pneumatique HAUSSMANN XPERT est dotée d un mécanisme à marteau double offrant plus de puissance et des coups équilibrés Elle est également munie d un régulateur de couple à trois position...

Page 6: ...absence d un ensemble filtre régulateur lubrificateur déposez jusqu à 6 gouttes d huile pour compresseurs dans l ouverture d admission à filet NPT avant chaque utilisation 6 Si vous utilisez un ensemble filtre régulateur lubrificateur gardez le filtre à air propre Un filtre sale réduira la pression d air vers l outil ce qui causera une diminution de la puissance de l efficacité et du rendement en ...

Page 7: ...d accessoires usés ou endommagés 4 Vérifiez le niveau de lubrification dans l engrenage en retirant la vis de réglage située sous la tête de l outil et remplissez le au besoin 5 Un perte de puissance ou une action irrégulière peut être attribuable aux causes suivantes a Gaspillage excessif dans la conduite d air humidité ou restriction dans le tuyau d air taille ou type de raccords de tuyau incorr...

Page 8: ...nt chaque utilisation Serrez au besoin PROBLÈME CAUSE PROBABLE MESURE DE CORRECTION L outil fonctionne à une vitesse normale mais perd de la puissance à pleine charge Pièces du moteur usées Embrayage à came usé ou collant en raison d un manque de lubrifiant Lubrifiez le carter d embrayage Vérifiez la présence d un excès d huile d embrayage Les carters d embrayage ne doit être rempli qu à moitié Un...

Page 9: ...tique contre tout défaut de fabrication pour 36 mois suivant la date d achat Cette garantie n affecte pas vos droits légaux En cas de mauvais fonctionnement de votre outil bris pièces manquantes etc veuillez appeler notre ligne de service pour parler à un technicien au 1 866 206 0888 du lundi au vendredi de 8h à 18 h heure normale de l Est RONA se réserve le droit de réparer ou remplacer l outil d...

Page 10: ...ION Goupille Rondelle Rondelle Bride du marteau Cage du marteau Tige du marteau Enclume Joint torique Collet d enclume Douille d enclume Rondelle Joint Revêtement de marteau Rondelle Boulons Languette fixe en acier Corps du pistolet Roulement à billes 24 25 26 27 28 29 30 31 32 33 34 35 36 37 38 39 40 41 AVERTISSEMENT Toutes les réparations doivent être exécutées par le personnel d un centre de se...

Page 11: ...11 SCHÉMA SCHEMATIC DRAWING FRANÇAIS ENGLISH ...

Page 12: ...8 19 20 21 22 23 NO DESCRIPTION Pin Washer Washer Hammer Flange Hammer Cage Hammer Pin Anvil O Ring Anvil collar Anvil bushing Washer Gasket Hammer Case Washer Bolts Fixed steel slice Gun Body Ball Bearing 24 25 26 27 28 29 30 31 32 33 34 35 36 37 38 39 40 41 Please refer to the Schematic Drawing on the preceding page WARNING Repairs should be made by an authorized repair centre Opening this tool ...

Page 13: ...s product but must be supplied by the user WARNING To avoid serious personal injury do not attempt to use this product until you read the manual thoroughly and understand it completely Save this manual and review frequently for continuing safe operation and instructing others who may use this tool SAVE THIS MANUAL Keep this manual for the safety warning precautions operations inspections and maint...

Page 14: ...Do not carry the tool with your finger on the switch or connect the tool to the air supply with the switch on Accessories must be rated for at least the speed of the tool marked on the tool label Wheels and other accessories running over the rated speed can fly apart and result in a risk of injury to persons TOOL USE AND CARE Use clamps or other practical way to secure and support the work piece t...

Page 15: ...ior to each use in order to a ensure that the proper air source is being used b verify that the tool is in proper working order 2 Do not use a tool that is not in proper working order 3 Do not use oxygen or any other combustible or bottled gas to power this tool 4 Do not use this tool in the presence of flammable liquids or gases 5 Only use sockets that are specifically designed for use with this ...

Page 16: ...hammer mechanism for more power and smooth balanced blows It also features an adjustable 3 positions torque regulator and variable speed adjustment It is designed for removing and installing nuts and bolts and automotive lug nuts on tires and for general assembly work Square Drive 1 2 13 mm Bolt capacity 5 8 16 mm No load Speed 7 500 RPM Maximum Torque 420 ft lb Average Air Consumption 5 CFM 142 L...

Page 17: ... trigger in order to operate the wrench 4 Use the toggle switch at the top of the handle to change direction between forward and reverse Depress the left side for reverse rotation counter clockwise or depress the right side for forward rotation clockwise 5 The speed of the tool air flow can be regulated by adjusting the speed control knob between 0 slowest and 5 fastest 6 Verify that the air suppl...

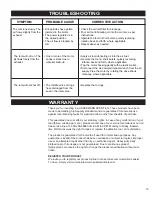
Page 18: ...s worn or sticking due to insufficient lubrication Lubricate the clutch housing Check for excess clutch oil Clutch cases should only be filled halfway Overfilling may cause drag on high speed clutch parts A typical oiled lubricated wrench requires 1 2 oz 15 ml of oil GREASE LUBRICATION NOTE Heat usually indicates insufficient grease in the chamber Harsh operating conditions may require more freque...

Page 19: ...d from the seat in the inlet valve Replace the O rings Thank you for investing in a HAUSSMANN XPERT tool These products have been made to demanding high quality standards and are guaranteed for domestic use against manufacturing faults for a period of 36 months from the date of purchase This guarantee does not affect your statutory rights In case of any malfunction of your tool failure missing par...

Reviews: