background image

13

TABLE OF CONTENTS

ENGLISH

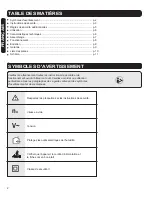
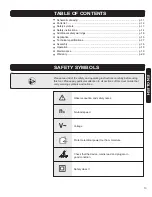
SAFETY SYMBOLS

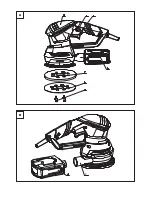
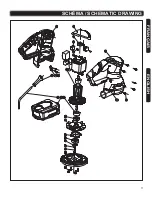
Schematic drawing
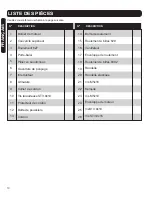
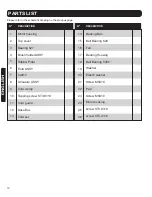
Parts list
Safety symbols 
Safety instructions 
Additional safety warnings
Application 
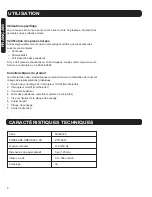
Technical specifications 
Assembly 
Operation
Maintenance
Warranty

p.11
p.12
p.13
p.14
p.16
p.16
p.17
p.18
p.19
p.19
p.20


......................................................................................

.......................................................................................................

.............................................................................................

........................................................................................

...........................................................................

...................................................................................................

................................................................................

......................................................................................................
......................................................................................................

...............................................................................................

.......................................................................................................


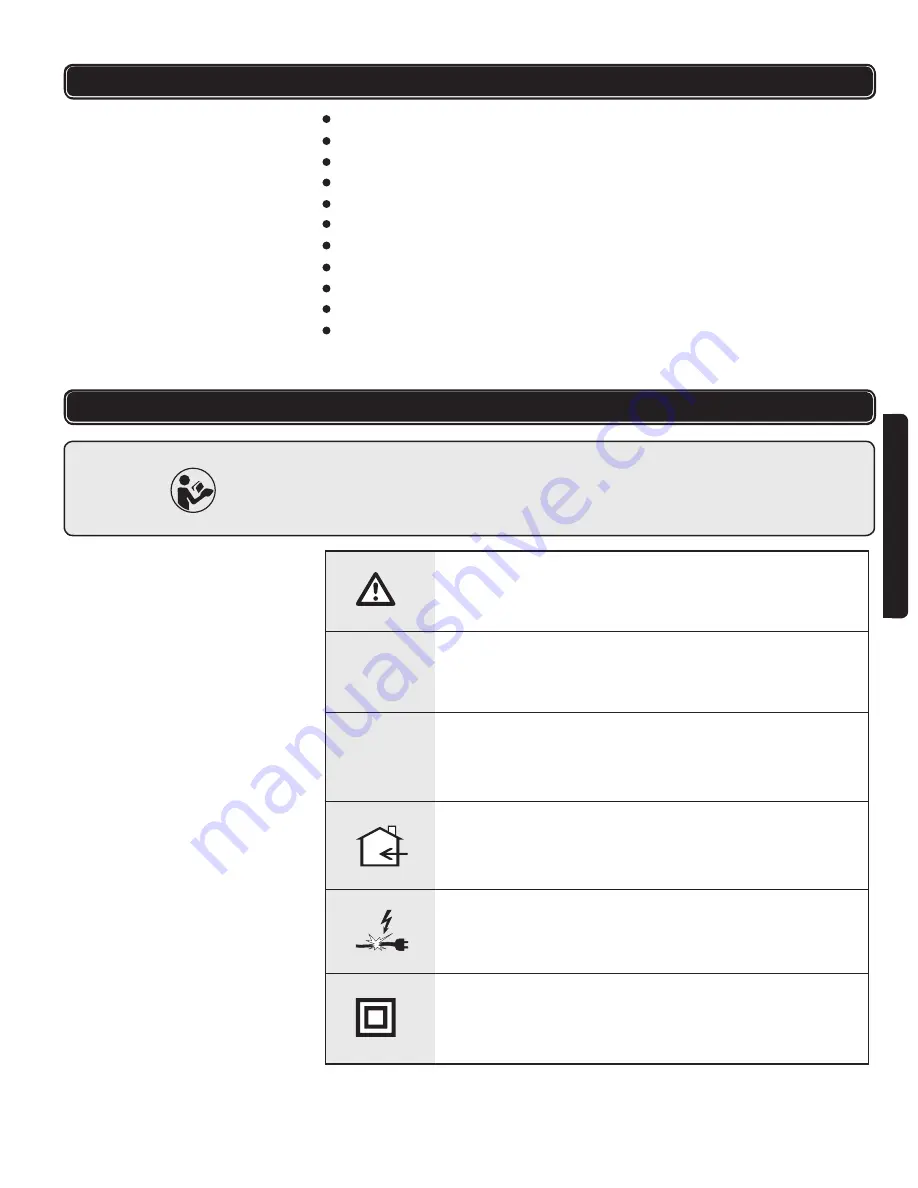
Please read all of the safety and operating instructions carefully before using

this tool. Please pay particular attention to all sections of this User Guide that

carry warning symbols and notices.

Observe caution and safety notes.

No-load speed

Voltage

Protect electrical power tool from moisture

Check that the device, mains lead and plug are in

good condition.

Safety class II

n

o

V~

Summary of Contents for 59595028

Page 1: ...pièces de remplacement seront expédiées de notre usine Pour de l aide immédiate avec ou pour en savoir plus additionnelles sur le produit composez notre numéro sans frais 1 866 206 0888 C PONCEUSE ORBITALE 5 PO Guide de l utilisateur p 2 5 ORBITAL SANDER Operator s manual p 13 PT100623 59595028 CONSERVEZ CE GUIDE Vous aurez besoin de ce guide pour les règles de sécurité le fonctionnement et la gar...

Page 2: ...B A 8 ...

Page 3: ...10 p 11 Veuillez lire attentivement toutes les instructions de sécurité et de fonctionnement avant d utiliser cet outil Veuillez accorder une attention particulière à tous les paragraphes de ce guide contenant des symboles d avertissement et des remarques Respectez les précautions et les instructions de sécurité Vitesse à vide Tension Protégez les outils électriques de l humidité Vérifier que l ap...

Page 4: ...til électrique ou pour débrancher l outil Gardez le cordon à distance de chaleur de l huile des objets pointus et des parties mobiles Un cordon endommagé accroît le risque de choc électrique d Si vous devez faire fonctionner un outil électrique dans un endroit humide utilisez un disjoncteur de fuite de terre GFCI Utiliser ce dispositif réduit le risque de choc électrique e Utilisez une rallonge él...

Page 5: ...remplacer des pièces ou de ranger l outil Ces mesures de sécurité réduisent le risque de démarrer l outil électrique accidentellement d Gardez l outil non utilisé hors de portée des enfants et ne laissez pas de personnes non familières avec cet outil ou ces instructions s en servir Les outils électriques laissés aux mains d utilisateurs inexpérimentés sont dangereux e Entretenez l outil Vérifiez l...

Page 6: ...ravaillée Une pièce maintenue avec des dispositifs de serrage ou un étau est plus stable que lorsqu elle est maintenue avec la main 7 Gardez votre lieu de travail propre Les mélanges de matériaux sont particulièrement dangereux les poudres venant des alliages légers peut provoquer un incendie et une exposition 8 N utilisez jamais l outil électrique avec un cordon endommagé Ne touchez pas le cordon...

Page 7: ...le au 1 866 206 0888 Caractéristiques du produit La numérotation des caractéristiques du produit renvoie à l illustration de l outil sur la page des représentations graphiques 1 Bouton de verrouillage de l interrupteur On Off marche arrêt 2 Interrupteur On Off marche arrêt 3 Couvercle supérieur 4 Boîte des poussières complète système de micro filtre 5 Vis pour fixation de la plaque de ponçage 6 Pa...

Page 8: ... à un grain plus fin pour terminer le travail AVERTISSEMENT Assurez vous toujours que l outil électrique est hors tension et la fiche du courant est débranchée avant d effectuer les réglages et les entretiens Pose du papier abrasif Pour poser le papier abrasif enlevez tout d abord toute la saleté ou les débris de la semelle Puis enlevez le papier de protection du papier abrasif et appliquez le pap...

Page 9: ...acez sa surface de ponçage sur la surface à poncer et déplacez l outil électrique avec une pression modérée sur la pièce à travailler La capacité et la forme de ponçage dépendent principalement du choix du papier abrasif et la pression appliquée Seuls des feuilles abrasives sans défaut peuvent réaliser une bonne capacité de ponçage et prolonger la durée de vie des outils électriques Faites attenti...

Page 10: ...e puissance ou celui professionnel quotidien du produit ne sont pas couverts par la garantie La garantie s étent pas aux locataires Nous nous réservons le droit de modifier les spécifications du produit sans préavis en raison de révolution de la technique ou des conditions économiques AVERTISSEMENT Avant d effectuer tout travail sur l outil débranchez toujours l alimentation AVERTISSEMENT L eau ne...

Page 11: ...verture de ponçage Interrupteur Armature Collier de cordon Vis taraudeuse ST3 9x10 Protecteur de cordon Boîte de poussière Cordon NO DESCRIPTION 14 15 16 17 18 19 20 21 22 23 24 25 26 Boîte de roulement Roulement à billes 629 Ventilateur Enveloppe de roulement Roulement à billes 6002 Rondelle Rondelle élastique Vis M5x16 Semelle Vis M5x10 Enveloppe de moteur VisST3 9x10 Vis ST3 9x16 NO DESCRIPTION...

Page 12: ...11 ENGLISH FRANÇAIS SCHÉMA SCHEMATIC DRAWING ...

Page 13: ... 629 Fan Bearing Housing Ball Bearing 6002 Washer Elastic washer Screw M5X16 Pad Screw M5X10 Motor housing screw ST3 9 10 screw ST3 9 16 NO DESCRIPTION ENGLISH 1 2 3 4 5 6 7 8 9 10 11 12 13 Motor housing Top cover Bearing 627 Brush holder ASSY Rubber Pillar Field ASSY Switch Armature ASSY Cord clamp Tapping screw ST3 9 10 Cord guard Duse Box Cord set ...

Page 14: ...p 13 p 14 p 16 p 16 p 17 p 18 p 19 p 19 p 20 Please read all of the safety and operating instructions carefully before using this tool Please pay particular attention to all sections of this User Guide that carry warning symbols and notices Observe caution and safety notes No load speed Voltage Protect electrical power tool from moisture Check that the device mains lead and plug are in good condit...

Page 15: ... carefully Never use the cord for carrying pulling or unplugging the power tool Keep cord away from heat oil sharp edges and moving parts Damaged or entangled cords increase the risk of electric shock d If operating a power tool in a damp location is unavoidable use a Ground Fault Circuit Interuptor GFCI protected supply Use of a CGFI device reduces the risk of electric shock e When operating a po...

Page 16: ...t of the reach of children and do not allow persons unfamiliar with the power tool or these instructions to operate the power tool Power tools are dangerous in the hands of untrained users e Maintain power tools Check for misalignment or binding of moving parts breakage of parts and any other condition that may affect the power tool s operation If damaged have the power tool repaired before use Ma...

Page 17: ...hands 6 Secure the workpiece A workpiece clamped with clamping devices or in a vice is held more secure than by hand 7 Keep your workplace clean Blends of materials are particularly dangerous Dust from light alloys can burn or explode 8 Never use the power tool with a damaged power cord Do not touch the damaged power cord and pull the power cord plug from the wall as soon as the damage is discover...

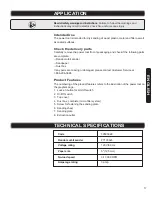
Page 18: ... parts are complete Random orbit sander Sandpaper Dust box If any parts are missing or damaged please contact Customer Service at 1 866 206 0888 Product Features The numbering of the product features refers to the illustration of the power tool on the graphics page 1 Lock on button for On Off switch 2 On Off switch 3 Top cover 4 Dust box complete micro filter system 5 Screw for fastening the sandi...

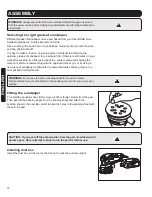
Page 19: ... grade and sanding the marks out before recommencing with the original choice of grit or try using a new piece of sandpaper to eliminate the unwanted marks before going on to a finer grit and finishing the job Fitting the sandpaper To install the sanding sheet first remove all dirt or foreign matter from the pad Then peel off the backing paper from the sanding sheet and attach the sanding sheet to...

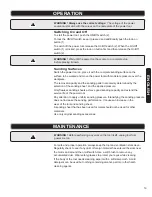
Page 20: ...ieve good sanding capacity and extend the service life of the power tool Pay attention to apply uniform sanding pressure Intensifying the sanding pressure does not increase the sanding performance It causes an increase in the wear of the tool and sanding sheet A sanding sheet that has been used for metal should not be used for other materials Use only original sanding accessories For safe and prop...

Page 21: ... or replace the defective tool at its discretion Normal wear and tear including accessory wear is not covered under guarantee The product is guaranteed for 36 months if used for normal trade purposes Any guarantee is invalid if the product has been overloaded or subject to neglect improper use or an attempted repair other than by an authorized agent Heavy duty daily professional or hire usage are ...

Reviews: