ENGLIS
H
TECHNICaL SPECIFICaTIONS
Code
59595069
Model number
XKS6010002
Electrical Requirements
120V~/60Hz/4.5 AMP
No Load Speed
0-2,800 RPM
Chuck Capacity
3/8" (10 MM)
Weight
3.74 lbs (1.4 KG)
aSSEMBLY
WaRNING!
To prevent serious injury from accidental operation
Turn the power switch of the tool to its “OFF” position and unplug
the tool from its electrical outlet before assembling or making any
adjustments to the tool.
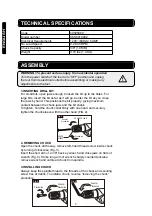
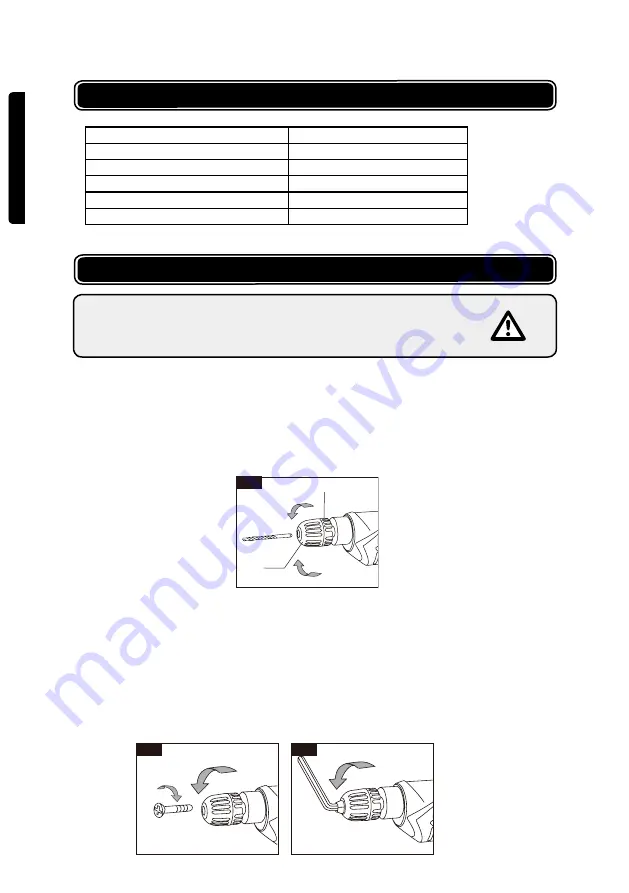
1.INSERTING DRILL BIT
For small bits, open jaws enough to insert the bit up to the flutes. For
large bits, insert the bit as far as it will go. Center the bit as you close
the jaws by hand. This positions the bit properly, giving maximum
contact between the chuck jaws and the bit shank.
To tighten, hold the chuck collar firmly with one hand and securely
tighten the chuck sleeve with the other hand (FIG.2).
2. REMOVING CHUCK
Open the chuck all the way, remove left-hand thread screw inside chuck
by turning it clockwise (Fig. 3).
Insert the short arm of a 3/8" hex key wrench and close jaws on flats of
wrench (Fig. 4). Strike long arm of wrench sharply counterclockwise,
remove wrench and unthread chuck from spindle.
3.INSTaLLING CHUCK
Always keep the spindle threads, the threads of the chuck and securing
screw free of debris. To install a chuck, reverse “removing the chuck”
procedure.
Fig. 3
Clockwise
Counter
Clockwise
Fig. 4
Counter
Clockwise
Fig. 2
Counter
Clockwise
CHUCK COLLAR
Clockwise
CHUCK
SLEEVE
7


