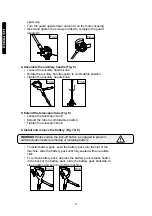
ENGLIS
H
Use the charger in normal room temperature whenever possible. To
prevent overheating, do not cover the charger and do not charge battery
pack in direct sunlight or near heat sources.
Always unplug the charger from the power supply when there is no
battery pack in the cavity.
• Plug the adapter into an appropriate AC power outlet. The green
LED light comes on indicating the adapter is ready for use.
• Connect the plug wire to the charger.
• Insert the battery pack into the charger, the green LED light will
change to red to indicate charge. The battery pack will only fit into
the charger one way. Do not force the battery pack. Be sure that
the battery pack is fully seated in the charger.
• The battery pack will be fully charged after about 1 hour, and the
red LED light will change to green continuously. Unplug the adapter
and remove the battery pack.
• The adapter, charger and battery pack can be left connected with
the green LED indefinitely. The charger will keep the battery pack
fresh and fully charged.
• The best storage place is one that is cool and dry away from direct
sunlight and excess heat or cold.
Note: The battery pack needs to be charged before first use and
whenever it fails to produce sufficient power on jobs that were
easily done before. Recharge discharged batteries as soon as
possible after use or battery life may be greatly diminished
For best results, your battery pack should be charged in a location
where the temperature is between 41°F and 104°F(5°C to 40°C).
Charging time will be increased if the battery is charged in lower or
higher temperature.
The adapter, charger and battery pack maybe become warm when
charging which is a normal condition.
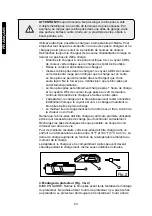
Fig.2
a
C
B
3. Assemble the guard (Fig. 3 & 4)
Warning:
Remove the battery pack before attempting to attach the
guard. Never operate the tool without guard firmly in place. The guard
must always be on the tool to protect the user.
• Push the head rotation pedal to rotate the cutting head to vertical
position, rotate the flower guard loop forward to working position.
• Turn the trimmer upside down so that you are looking down at the
8


