!
ENGLISH
24
CK104-CS
OPERATION
USING THE CUT-OFF SAW
WARNING!
Disconnect the abrasive cut-off saw from the AC power source
eliminating any accidental starting of the motor.
Before using the saw, ensure the wheel has cooled down from any previous
actions. Wear approved leather work gloves when handling the various
workpieces and to protect the hands from a hot cut-off wheel.
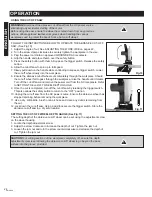
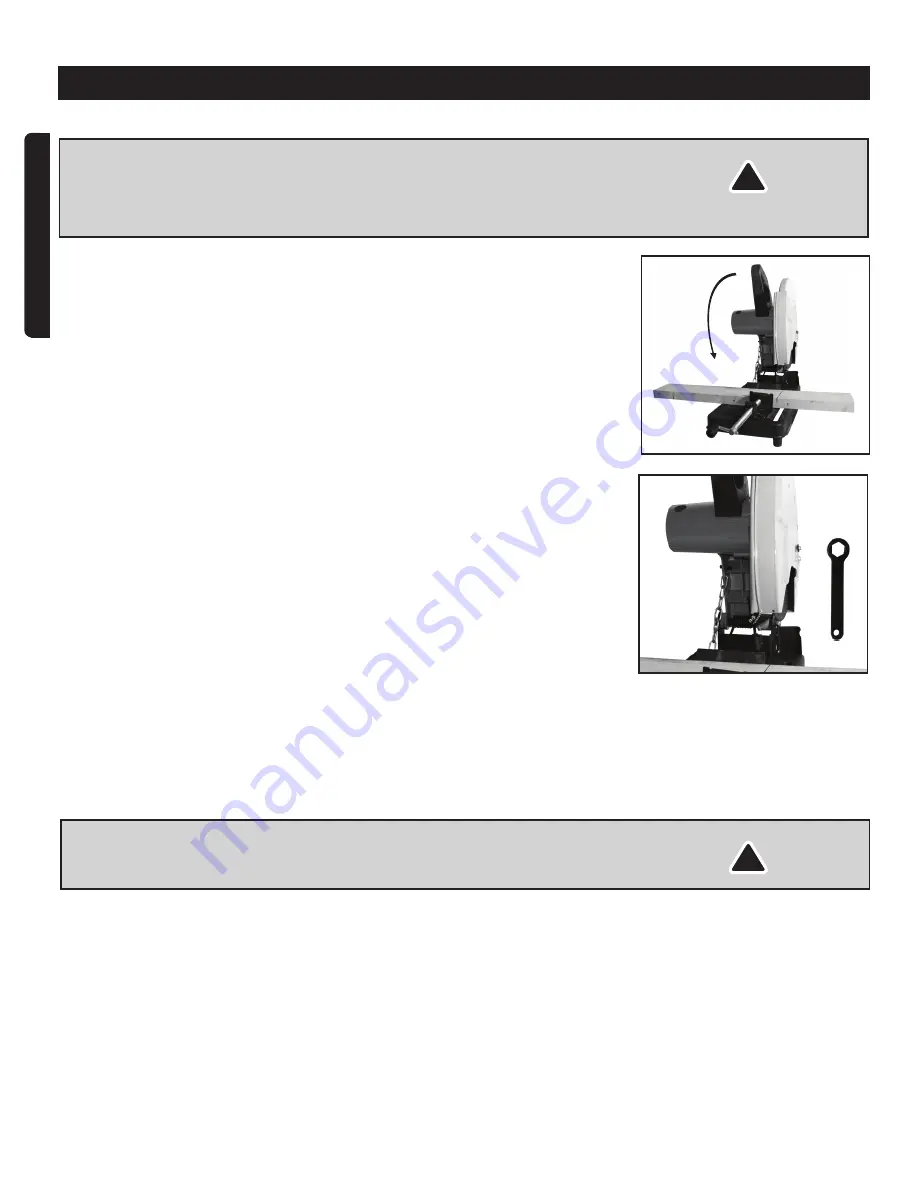
FOLLOW THE INSTRUCTIONS BELOW TO OPERATE THE ABRASIVE CUT-OFF
SAW. (See Fig.10)
1. Adjust the angle of cut. See ADJUSTING THE WORK VISE on pages 22.
2. Turn the screw clamp clockwise to securely tighten the workpiece in the vise.
3. Plug the power cord into an approved GROUNDED AC receptacle.
4. Grip the handle and place thumb over the safety button.
5. Press the safety button with thumb. Squeeze the trigger switch. Release the safety
button.
6. Allow the cut-off saw to spin up to full speed.
7. Slowly pull down on the handle while continuing to squeeze trigger switch. Lower
the cut-off wheel slowly into the workpiece.
8. Ensure the abrasive cut-off wheel cuts completely through the workpiece. Should
the cut-off wheel fail to pass through the workpiece, raise the handle until it clears.
Turn off the cut-off saw and remove the power cord from the AC receptacle. Refer
to SETTING THE cut-OFF WHEEL DEPTH GAUGE.
9. Once the cut is completed, turn off the cut-off saw by releasing the trigger switch.
This also allows the safety button to return to the “OFF” position.
10.Unplug the cut-off saw from the AC power source. Ensure the abrasive wheel has
stopped spinning before removing the workpiece.
11.Use a dry, soft bristle, brush or an air hose and clean any debris remaining from
the cut.
12.Lock down the cut-off saw. Using a pad lock secure the trigger switch. Store the
abrasive cut-off saw in a dry safe location.
SETTING THE CUT-OFF WHEEL DEPTH GAUGE (See Fig.11)
The cutting depth of the abrasive cut-off wheel can be set using the adjustment screw
on the wheel housing.
1. Locate the depth adjustment screw.
2. Adjust the screw clockwise to increase the depth of cut. Tighten the jam nut.
3. Loosen the jam nut and turn the screw counterclockwise to decrease the depth of
cut. Tighten the jam nut.
CAUTION!
For cutting sections of the workpiece completely off, ensure the depth
adjustment screw is set allowing the abrasive cut-off wheel to go beyond the base
surface into the groove provided.
!
Fig.10
Fig.11


