www.havis.com • 1-800-524-9900
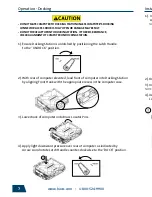
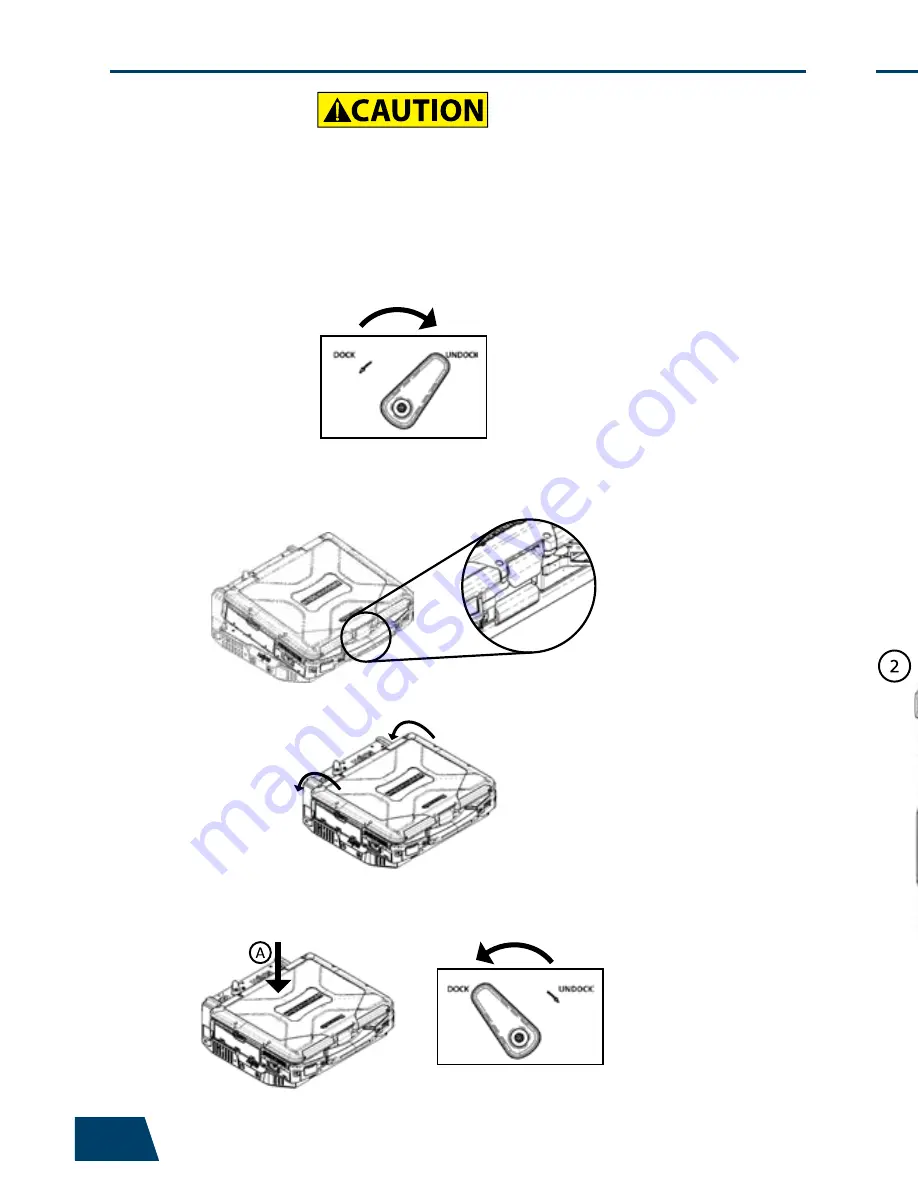
1). Ensure Docking Station is unlatched by positioning the Latch Handle
to the “UNDOCK” position.
2). With rear of computer elevated, load front of computer into Docking Station
by aligning Front Hook with the appropriate recess in the computer case.
3). Lower back of computer onto Brass Locator Pins.
4). Apply light downward pressure over rear of computer as indicated by
Arrow A and rotate Latch Handle counter-clockwise to the “DOCK” position.
7
4
Installation & Cable Management
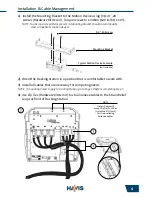
1). Install the Mounting Bracket to the Motion Device using (3) 1/4“-20
screws
(Hardware Kit Item 3)
. Torque screws to 13.4Nm (120 in-lbs) ± 10%.
NOTE: Numerous hole patterns present in Mounting Bracket should accommodate
most competitor’s motion devices.
1/4”-20 Screws
Mounting Bracket
Typical Motion Device Example
(not included)
Operation - Docking
• DO NOT MATE COMPUTER TO DOCKING STATION UNLESS COMPUTER’S DOCKING
CONNECTOR ACCESS DOOR IS FULLY OPEN OR DAMAGE MAY RESULT.
• DO NOT FORCE LAPTOP ONTO DOCKING STATION. IF THERE IS RESISTANCE,
CHECK ALIGNMENT OF COMPUTER ON DOCKING STATION.
2). Orient the Docking Station in a position that is comfortable to work with.
3). Install all cables that are necessary for computing needs.
NOTE: If mounting Power Supply to Docking Station, go to Page 10 before completing Step 3
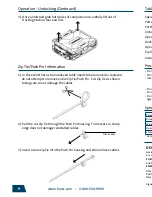
4). Use Zip Ties
(Hardware Kit Item 4)
to strain relieve cables to the Strain Relief
Loops at front of Docking Station.
NOTE:
Holes shown will
accept Zip Tie/Push Pins
(Hardware Kit Item 1)
for strain relieving
Antenna cables.


