background image

OWNER’S HANDBOOK

(English Version)
FROM SERIAL NO: 486V001001

HANDBOOK: 486038 (Rev.1.)

Issue : 20.10.00

Harrier

48

CODE 486V

Summary of Contents for 486V

Page 1: ...OWNER S HANDBOOK English Version FROM SERIAL NO 486V001001 HANDBOOK 486038 Rev 1 Issue 20 10 00 Harrier 48 CODE 486V...

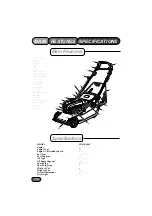
Page 2: ...ons 1044 x 514 x 1377mm Dry Weight 49 Kg 1 Spark Plug Lead 2 Primer Bulb 3 Engine Cover 4 Air Cleaner 5 Fuel Cap 6 Serial Number Label 7 Oil Filler Cap Dipstick 8 Handlebar Securing Knob 9 Rear Deflec...

Page 3: ...list Diagram 1 31 Customer Info Notes 1 2 Main Features Specifications 1 3 Contents 1 4 Introduction 1 5 Warranty 1 6 1 9 Safety Precautions 1 9 Safety Symbols 1 9 Decal Symbols 1 10 Assembling the Mo...

Page 4: ...ntended use This mower should be operated serviced and repaired only by persons who are familiar with its particular characteristics and who are acquainted with the relevant safety procedures The safe...

Page 5: ...pplicable Only machines fitted with a genuine Hayter friction disc or crankshaft support bearing which are used in accordance with the recommended operating and maintenance procedures are covered This...

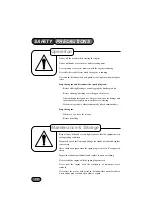
Page 6: ...d that the user is responsible for accidents or hazards occurring to other people or their property While mowing always wear substantial footwear and long trousers Do not operate the equipment when ba...

Page 7: ...y to avoid kickback and prevent hand or arm injury Mow only in daylight or good artificial light Avoid using the mower on wet grass where feasible Always be sure of your footing on slopes Walk never r...

Page 8: ...y repairs are made before re starting If the mower starts to vibrate abnormally check immediately Stop the engine Whenever you leave the mower Before refuelling Keep all nuts bolts and screws tight to...

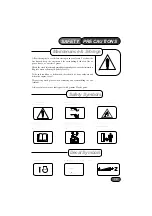
Page 9: ...n removing and reassembling the cut terblade Always replace worn or faulty parts with genuine Hayter parts Maintenance Storage SAFETY PRECAUTIONS 1 9 Safety Symbols Safety Alert Be aware to the possib...

Page 10: ...ebar in position Take care to ensure that the control cables do not become snagged at the pivot point Unscrew the two handlebar securing Knobs to release the handlebar brace then loosen the two nyloc...

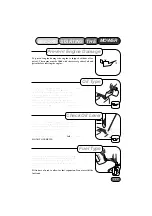
Page 11: ...s of use refer to Maintenance S chedule C lean around the oil filler cap before removing With the mower on a level surface unscrew and remove the oil filler dipstick Wipe oil from it with a clean clot...

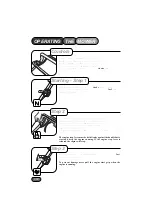
Page 12: ...r with the engine stop lever with your left hand With your right hand hold the engine start grip and pull slowly until resistance is felt then pull rap idly to crank the engine C arefully return the s...

Page 13: ...aise the front wheels just above ground level and steer in the required direction To prevent accidents do not raise the front of the mower exces sively when making a turn Never raise the rear of the m...

Page 14: ...rous projectiles Inspect the area for hidden obstruc tions which when contacted by the cutterblade could risk health and safety Remember the location of these obstructions and ensure that you mow arou...

Page 15: ...hird of grass height in one cut The cutterblade is driven by the engine via a friction disc to help pre vent damage occurring to the engine crankshaft and cutting mecha nism when a hidden obstruction...

Page 16: ...ck the condition of guards and safety devices and the cutterblade C hange the engine oil if continuously operating under heavy load or high ambient temperature S ervice the air cleaner Lubricate wheel...

Page 17: ...eaner Loosen casing clamp screw 1 and move the governor lever 2 in the direction of screw 1 as far as posible Move the throttle control to the choke position Tighten casing clamp screw S hould only be...

Page 18: ...eaner is kept uppermost to prevent engine damage 6 Remove the oil filler dipstick and drain the oil into a suitable container 7 Refill with new oil of the recommended S AE viscosity grade Refer to B e...

Page 19: ...e Never spray the engine with water during cleaning Water can contaminate the fuel Always clean with a brush or compressed air Grass and debris may clog the engine s air cooling system especially afte...

Page 20: ...nuts and bolts are tight Replace missing or damaged items immediately C heck the clutch cable operation every 25 operating hours and adjust if necessary The clutch cable is adjusted correctly when the...

Page 21: ...has been removed The cutterblade has sharp edges ALWAYS wear strong gloves to protect your hands when working on the cutterblade DO NOT rotate tools towards the cut ting edges to avoid the risk of in...

Page 22: ...de from the mower and clean using a brush and water Inspect the cutterblade for signs of damage S harpen both cutting edges with a flat file to restore performance Ensure that the cutterblade is balan...

Page 23: ...ecessary D rain fuel from the engine by operating the engine until it stops D isconnect the spark plug lead C hange the engine oil Remove the engine spark plug and pour 1 5 ml of engine oil into the e...

Page 24: ...e height of cut Fuel starvation Fill fuel tank Engine cold S et throttle to choke position Incorrect contaminated fuel D rain fuel tank and fill with correct fuel S park plug lead disconnected C onnec...

Page 25: ...dry grass C ut height too low Increase cut height Grassbag full Empty grassbag Airflow through the C lean the grassbag grassbag is restricted Engine speed too slow S et throttle to fast position Mower...

Page 26: ...S UD B URY S UFFO LK ENGLAND 26 0 1 9 9 D irectives complied with 9 8 3 7 EC Essential Health S afety Requirements Relating to the D esign C onstruction of Machinery and S afety C omponents 8 4 5 3 8...

Page 27: ...ch 3 0 6 0 9 4 W 1 22 S crew 0 9 6 8 7 2 23 C able Guide 4 8 0 1 23 1 24 B racket C able C lutch 3 0 6 1 0 8 1 25 S crew 0 9 7 0 4 1 26 C able C lutch 4 8 0 0 9 4 1 27 Grassbag Assy 4 8 6 0 21 1 Inclu...

Page 28: ...3 7 1 6 8 Rod C onnecting 4 8 0 0 4 5 1 6 9 Plate S ecuring 2 1 9 0 3 7 2 7 0 Filler Throwplate 4 8 0 0 1 7 W 1 7 1 Pulley S procket Fixed S peed 4 8 6 0 3 0 1 7 2 B elt V APTO 4 8 6 0 3 5 1 7 3 Wash...

Page 29: ...9 6 6 4 1 0 1 Handle Grip 4 8 0 1 0 6 1 1 0 2 B race S upport 4 8 6 0 3 9 W 2 1 0 3 B racket HO C 4 8 0 1 5 7 W 1 1 0 4 Torsion S pring HO C 4 8 0 1 3 2 1 1 0 5 Rivet 2 1 0 6 S crew 0 9 6 3 4 2 1 0 7...

Page 30: ...26 27 28 29 109 113 114 30 31 32 35 96 95 107 47 45 111 60 60 59 33 34 37 38 39 39 40 41 42 48 49 49 49 49 50 50 43 44 51 51 52 52 52 106 53 54 65 65 62 63 54 54 26 54 54 54 54 54 54 54 54 54 54 70 64...

Page 31: ...1 31 Mower S erial No Engine Model Type C ode Notes CUSTOMER INFORMATION NOTES...

Reviews: