background image

9

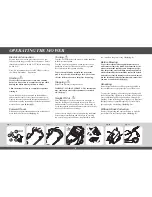
Heavy Growth

Areas of heavy growth should be mown without 

collecting the clippings. If collection is required, first 

mow the area without the grassbag at the maximum 

height of cut setting. Allow the grass clippings to dry 

out and then mow the area at the maximum height of cut 

setting with the grassbag fitted. Reduce the height of cut 

and mow the area again as necessary until the required 

finish is obtained.

To prevent damage to your lawn do not remove more 

than one third of grass height in one cut. 

(Refer fig.12)

Non Grassed Areas

When moving the mower across non-grassed areas, stop 

the motor and set the mower to the maximum height of 

cut to protect the cutting mechanism.


Safe Mower Practice

WARNING: PREVENT ACCIDENTS 

- Take extreme 

care not to mow across the supply cable. If this should 

occur, switch off immediately and disconnect the plug 

from the power supply. Carefully examine the cable for 

cuts and damage. A defective cable must be replaced 

before the mower is used again. Always be aware of the 

location of the supply cable in relation to the mower and 

the grass area. Do not allow the cable to become hidden 

in uncut grass. Keep the cable over the cut area at all 

times. A cable which is out of sight, is out of mind and 

this could lead to hazardous situation.

Plan a ‘cutting scheme’ which works away from the 

power supply point and ensures that the cable is trailed 

out over the cut area. Work up and down the lawn in 

rows. Turn the machine round at the end of the row and 

step across the cable so that the cable is trailed along in 

the cut area on the return run.

When working around flower beds, prevent the cable 

from trailing across cultivated area by positioning a stake 

at the corner of the bed. Do not allow the cable to be 

pulled around sharp obstructions. Stop mowing imme-

diately if cable resistance is felt and remove the obstruc-

tion. Do not allow the cable to become entangled.

WARNING: PREVENT ACCIDENTS - Switch off at 

the mains, remove the plug before adjusting, cleaning 

or if the cable is entangled.

Overloading Protection

Do not let the motor labour or slow down through being 

overloaded in work. When this situation occurs, raise 

the front of the mower slightly by bearing down on the 

handlebar, allow the motor to reach maximum speed and 

proceed to mow at a slower pace. Alternatively re adjust 

to a higher cut position. If the motor continues to labour, 

switch off and remove the plug from the mains supply. 

Remove and empty the grassbag. Examine the discharge 

chute and remove any blockage. Turn the machine on 

its side and clear the obstruction from the cutterblade 

and the underside of the mower deck. Place the machine 

upright and replace the grassbag. Re adjust to a higher 

cut position if necessary. Re start the mower and proceed 

to mow at a pace which does not over the mower.

IMPORTANT: PREVENT DAMAGE - DO NOT con-

tinue to operate the motor in an overload condition. 

If this does occur, stop mowing and allow the motor 

to run at maximum speed for one minute. This will 

allow the motor to cool down to its normal working 

temperature.

OPERATING THE MOWER

Fig. 12

Summary of Contents for Envoy 36 100E

Page 1: ...Original Version EN ISSUE 14 06 11 PART NUMBER 111 5099 A OWNER S HANDBOOK Envoy 36 CODE 100E ...

Page 2: ...he Mower 8 10 Electrical Connection 8 Starting 8 Forward Travel 8 Turning 8 Stopping 8 Height of Cut 8 Before Mowing 8 Grassbag 8 Without Grass Collection 8 Heavy Growth 9 Non Grassed Areas 9 Safe Mower Practice 9 Overloading Protection 9 Maintenance Schedule 10 Mower Maintenance 10 11 Grassbag 10 Deck Housing 10 Securing Nuts and Bolts 10 Lubrication 10 Cutterblade Removal 10 11 Cutterblade Sharp...

Page 3: ...persons who are familiar with its particular characteristics and who are acquainted with the relevant safety proce dures The safety precautions listed in this handbook and all other generally recognised regula tions on safety must be observed at all times Use of non standard parts or any arbitrary modifications carried out on this machine may relieve Hayter Limited of liability for any resulting d...

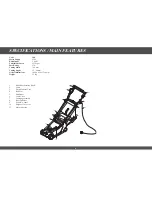
Page 4: ... Speed 2950 rpm Fuse Rating 13A Cutting width 360 mm Cutting height 13 60 mm Overall dimensions 1040 x 450 x 1360 mm Weight 22 Kg 1 Handlebar Securing Knob 2 Cable 3 Switch Control Unit 4 Bail Arm 5 Handlebar 6 Cable Cleat 7 Grassbag Assembly 8 Rear Deflector 9 Serial No Label 10 Height of Cut Lever 11 Motor Housing ...

Page 5: ... While mowing always wear substantial footwear and long trousers Do not operate the equipment when barefoot or wearing sandals Thoroughly inspect the area where the mower is to be used and remove all objects which may be thrown by the machine A damaged cutterblade or loose fixing bolt are major hazards Before use always visually inspect the cutting mechanism to ensure that it is in good condition ...

Page 6: ...he mower Never pick up or carry a mower whilst it is running or connected to the mains supply Do not lift the rear deflector whilst the mower is in operation particularly when using without a grassbag Maintenance Storage Keep all nuts bolts and screws tight to ensure that the equipment is in safe operating condition Carefully examine the supply cable for signs of damage or ageing Replace immediate...

Page 7: ...o allow the handlebar to pivot Unfold the handlebar to the operating position Tighten all handlebar knobs to secure in position Refer fig 2 Take care to ensure that the power cable does not become snagged at the pivot points Grassbag Attachment Once the grassbag is assembled Raise the rear deflec tor pass the grassbag under the handlebar and hook into position Lower the rear deflector to rest on t...

Page 8: ... cutterblade may continue to rotate after the mower is switched off Refer fig 7 Height Of Cut Move the height of cut lever sideways to disengage it from the locking notch then push forwards to lower or pull backwards to raise the height of cut Release the le ver in the required position and ensure that it locks firmly into one of the seven notch settings Always select a height of cut to suit opera...

Page 9: ...he machine round at the end of the row and step across the cable so that the cable is trailed along in the cut area on the return run When working around flower beds prevent the cable from trailing across cultivated area by positioning a stake at the corner of the bed Do not allow the cable to be pulled around sharp obstructions Stop mowing imme diately if cable resistance is felt and remove the o...

Page 10: ...materials Securing Nuts Bolts Regularly check that all securing nuts and bolts are tight Replace missing or damaged items immediately Bolt Cutterblade fixing torque 20Nm Plastic screws Bottom of handlebar torque 3 5Nm General screws Used on plastic parts 1 5Nm Note Use manual hand tools only Lubrication Lubricate the pivot points and linkages with oil every 25 operating hours Cutterblade Removal T...

Page 11: ...n Unscrew the bottom two securing knobs sufficiently to allow both top and middle sections to be folded forwards To ensure that your mower is maintained in good work ing order it is important that the following procedure is adopted when the mower is stored for periods in excess of one month Refer to the Maintenance section as neces sary Clean all areas of the mower and ensure that the grassbag is ...

Page 12: ... and rake occasionally As a general rule the grass clippings should be removed each time you mow If weather conditions are dry and hot and the grass is weed free leave the clippings on the lawn to help maintain ground moisture August Keep mowing regularly and watering as necessary Fill any cracks caused by drought with a mixture of sharp sand and soil In dry weather conditions leave the grass long...

Page 13: ...excessively after switching OFF 1 Faulty brake unit 1 Contact your Hayter dealer Motor vibrates exces sively 1 Mounting bolt loose 2 Cutterblade bolt loose 3 Cutterblade out of balance 1 Tighten bolts 2 Tighten bolt 3 Balance cutterblade Uneven cut 1 Undulating ground contours 2 Cutterblade worn 3 Cutterblade out of balance 4 Wheels roller damaged 1 Change direction of travel 2 Sharpen the cutterb...

Page 14: ...f non genuine Hayter parts are fitted This warranty does not cover minor mechanical adjustments unless they are due to defective material or workmanship Consult the Owner s Handbook or a Hayter Authorised Service Dealer for assistance when making these adjustments The machines are not warranted for commercial use To make a warranty claim return the unit to a Hayter authorised service dealer along ...

Page 15: ...15 NOTES NOTES ...

Page 16: ...Number Date 2nd Year 24 months We certify that this service has been carried out by an Authorised Hayter Service Dealer Date Owner s Name Serial Number Date Note for dealer Please retain this voucher for your records Note for dealer Please retain this voucher for your records 2nd Year 24 months Hayter Limited Spellbrook Bishop s Stortford Herts CM23 4BU England Website www hayter co uk 20 CUSTOMER...

Reviews: