background image

OPERATING THE SCARIFIER

9

Fig. 12

Fig. 14

Fig. 13

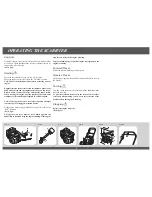
Slopes 

To prevent engine damage, do not use the Scarifi er on slopes 
greater than 20 degrees. 

(Refer fi g.11)

Knife Blade Adjustment

To adjust the knife blade depth, grip the lever and pull sideways 
to disengage it from the locking notch. Push forwards to lower 
or pull backwards to raise the scarifying depth. Finally release 
the lever at the required position and ensure it locks fi rmly into 
one of the six setting notches.

Always select a depth to suit operating conditions. Aim to 
prevent engine overload and blockages by being prepared to 
make two height adjustments.

Position 1: Blades completely lifted for moving the machine and 
for starting.
Position 2 to 6: Work positions - cutting depth increases by 
about 5 mm for each position. 

(Refer fi g.12)

Before Scarifying 

To prevent accidents, thoroughly inspect the area and 
remove all objects which when contacted by the Scarifi er 

knife blade could become dangerous projectiles. Inspect the 
area for hidden obstructions which when contacted by the 
knife blade could risk health and safety or result in damage 
to the Scarifi er. Remember the location of these obstructions 
and ensure that you scarify around them. 
(Refer fi g.13)

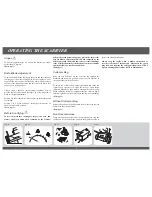
Collector Bag

Raise the rear defl ector, lift the collector bag through the 
handlebar and hook into position. Lower the rear defl ector  to 
rest against the rear of the Scarifi er. 

To empty the collector bag, empty the thatch and shake the 
collector bag vigorously to clean the airways. Good thatch 
collection depends on good air fl ow through the collector bag. 
When collecting thatch it is important that the collector bag is 
emptied regularly to prevent blockages and engine overloading. 

(Refer fi g.14)

Without Collector Bag

Remove the collector bag and operate the Scarifi er with the rear 
defl ector in the closed position.

(Refer fi g.15)

Non Grassed Areas

When moving the Scarifi er across non-grassed areas, stop the 
engine and set the knife blade height to the highest position to 

protect the cutting mechanism. 

Always stop the engine when a hidden obstruction or 
excessive vibration is encountered. Disconnect the spark 
plug lead and examine the cutting mechanism. ALWAYS 
replace a damaged knife blade. Refer to Maintenance.

Fig. 15

1

2

3

4

5

6

Fig. 11

20

Summary of Contents for Scarifier 110H

Page 1: ...les Scale THIS UNPUBLISHED DOCUMENT CONTAINS HAYTER CONFIDENTIAL AND PROPRIETARY INFORMATION IT MAY NOT BE WHOLLY OR PARTIALLY COPIED DISCLOSED TO OTHERS OR USED FOR ANY PURPOSE WITHOUT WRITTEN PERMIS...

Page 2: ...Scarifier Code 110H Original Version EN Issued 10 06 14 From Serial Number 314000001 and up Part number 111 7500 Rev A...

Page 3: ...ype 7 Operating the Scarifier 8 10 Controls 8 Starting 8 Forward Travel 8 Reverse Travel 8 Turning 8 Stopping 8 Slopes 9 Knife Blade Adjustment 9 Before Scarifying 9 Collector Bag 9 Without Collector...

Page 4: ...y persons who are familiar with its particular characteristics and who are acquainted with the relevant safety procedures The safety precautions listed in this handbook and all other generally recogni...

Page 5: ...n Guaranteed Sound Power 93 dB A Measured Sound Power 92 dB A Sound Pressure at Operator Ear 81 dB A Vibration at handle 5 5 ms2 1 Blade Depth Adjuster 9 Exhaust Guard 2 Air Filter 10 Rear Deflector 3...

Page 6: ...t do not attempt to start the engine move the machine away from the area of spillage and avoid creating any source of ignition until the petrol vapours have dissipated Replace all fuel tank and contai...

Page 7: ...ne After striking a foreign object Inspect the machine for damage and ensure necessary repairs are made before re starting and operating If the machine starts to vibrate abnormally check immediately S...

Page 8: ...life of your engine it is important that the oil is changed after the first 5 hours of use Check Oil Level Before adding or checking the oil Place engine level Clean the oil fill area of any debris R...

Page 9: ...If the engine does not start after repeated attempts contact your local Briggs Stratton dealer As the engine warms up move the choke control lever B to the RUN position Refer fig 9 The engine stop le...

Page 10: ...by the knife blade could risk health and safety or result in damage to the Scarifier Remember the location of these obstructions and ensure that you scarify around them Refer fig 13 Collector Bag Rai...

Page 11: ...eck the oil level Remove thatch debris from around the engine exhaust exhaust guard air ways in the top cowl underside of the deck housing and from the collector bag and check for signs of damage Chec...

Page 12: ...ed 1 Remove the fastener A and the cover B 2 Remove the fastener C and the filter D 3 Remove the pre cleaner E if equipped from the filter To loosen debris gently tap the filter on a hard surface If t...

Page 13: ...to the inner control cables at the point of entry and exit from their outer casting Storage To store the handlebar unscrew the 2 small securing knobs sufficiently to allow it to be pivoted forwards t...

Page 14: ...it of the warranty the Warranty Registration must be completed online within 14 days of purchase by your dealer If the selling dealer has not completed the Warranty Registration please complete online...

Page 15: ...tisfaction and for any other purpose which we tell you about We may share your information with our parent The Toro Company or with our affiliates dealers or other business partners in connection with...

Page 16: ...NOTES 15...
Page 17: ...Limited Spellbrook Bishop s Stortford Hertfordshire CM23 4BU England Tel 44 0 1279 723444 Fax 44 0 1279 600338 www hayter co uk DEALER DETAILS DEALER DETAILS SERIAL NUM BER LABEL SERIAL NUM BER LABEL...

Reviews: