background image

SAFETY PRECAUTIONS

6

Operation cont 

Always replace worn or faulty parts with genuine Hayter parts.

This machine contains spring loaded assemblies which could 
cause a hazard when disassembled and re-assembled, this 
maintenance should only be carried out by a Hayter authorised 
dealer.

Release the engine stop lever and ensure that the blades have 
stopped before tilting the Scarifi er.

Stop the blades when transporting the machine over ground 
conditions other than grass.

Never operate the machine with defective guards, or without 
safety devices in place.

Start the engine carefully, with feet well away from the knife 
blade.

Do not tilt the Scarifi er when starting the engine.

Do not start the engine if standing in front of the discharge chute.

Do not put hands or feet near or under rotating parts.

Never lift the rear defl ector, pick up or carry the machine whilst 

the engine is running.

Never touch the exhaust, exhaust guard or cooling fi ns when the 
engine is hot.

THE KNIFE BLADE CAN CONTINUE TO ROTATE 
AFTER THE MACHINE IS SWITCHED OFF.

Stop the engine and disconnect the spark plug lead:

•  Before clearing blockages or unclogging the discharge 

chute;

• 

Before cleaning, checking or working on the machine;

• 

After striking a foreign object. Inspect the machine for 
damage and ensure necessary repairs are made before re-
starting and operating;

•  If the machine starts to vibrate abnormally (check 

immediately).

Stop the engine:

• 

Whenever you leave the Scarifi er;

• Before 

refuelling.

Maintenance & Storage 

Keep all nuts, bolts and screws tight to ensure that the equipment 
is in safe operating condition.

Frequently check fuel lines and fi ttings for cracks or leaks and 

replace if necessary.

Check the rear defl ector and collector bag frequently for wear 
or deterioration.

Replace worn or damaged parts for safety.

Inspect the exhaust periodically and replace if worn or leaking.

Never store the Scarifi er with petrol in the tank within an 
enclosed area where fumes may reach an open fl ame or spark.

Allow the engine to cool before storing in any enclosure.

To reduce the fi re hazard, keep the engine and the surrounding 
deck area free of grass, leaves or excessive grease.

If the fuel tank has to be drained, this should be done outdoors 
and when the engine is cool.

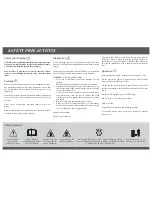
Control Symbols

S T O P

1

2

3

4

5

6

The engine is shipped wiithout oil. DO NOT START until the sump 

has been fi lled with oil. DO NOT FILL OVER MAXIMUM LEVEL. 

Before starting, refer to the attached manufacturers engine manual.

Stop Engine And Remove The Spark Plug 

Lead Before Working On The Scarifi er

Engine Stop

Knife Blade Depth Adjustment

Safety Symbols

Summary of Contents for Scarifier 110H

Page 1: ...les Scale THIS UNPUBLISHED DOCUMENT CONTAINS HAYTER CONFIDENTIAL AND PROPRIETARY INFORMATION IT MAY NOT BE WHOLLY OR PARTIALLY COPIED DISCLOSED TO OTHERS OR USED FOR ANY PURPOSE WITHOUT WRITTEN PERMIS...

Page 2: ...Scarifier Code 110H Original Version EN Issued 10 06 14 From Serial Number 314000001 and up Part number 111 7500 Rev A...

Page 3: ...ype 7 Operating the Scarifier 8 10 Controls 8 Starting 8 Forward Travel 8 Reverse Travel 8 Turning 8 Stopping 8 Slopes 9 Knife Blade Adjustment 9 Before Scarifying 9 Collector Bag 9 Without Collector...

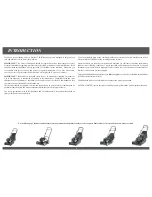
Page 4: ...y persons who are familiar with its particular characteristics and who are acquainted with the relevant safety procedures The safety precautions listed in this handbook and all other generally recogni...

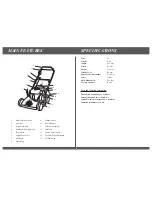
Page 5: ...n Guaranteed Sound Power 93 dB A Measured Sound Power 92 dB A Sound Pressure at Operator Ear 81 dB A Vibration at handle 5 5 ms2 1 Blade Depth Adjuster 9 Exhaust Guard 2 Air Filter 10 Rear Deflector 3...

Page 6: ...t do not attempt to start the engine move the machine away from the area of spillage and avoid creating any source of ignition until the petrol vapours have dissipated Replace all fuel tank and contai...

Page 7: ...ne After striking a foreign object Inspect the machine for damage and ensure necessary repairs are made before re starting and operating If the machine starts to vibrate abnormally check immediately S...

Page 8: ...life of your engine it is important that the oil is changed after the first 5 hours of use Check Oil Level Before adding or checking the oil Place engine level Clean the oil fill area of any debris R...

Page 9: ...If the engine does not start after repeated attempts contact your local Briggs Stratton dealer As the engine warms up move the choke control lever B to the RUN position Refer fig 9 The engine stop le...

Page 10: ...by the knife blade could risk health and safety or result in damage to the Scarifier Remember the location of these obstructions and ensure that you scarify around them Refer fig 13 Collector Bag Rai...

Page 11: ...eck the oil level Remove thatch debris from around the engine exhaust exhaust guard air ways in the top cowl underside of the deck housing and from the collector bag and check for signs of damage Chec...

Page 12: ...ed 1 Remove the fastener A and the cover B 2 Remove the fastener C and the filter D 3 Remove the pre cleaner E if equipped from the filter To loosen debris gently tap the filter on a hard surface If t...

Page 13: ...to the inner control cables at the point of entry and exit from their outer casting Storage To store the handlebar unscrew the 2 small securing knobs sufficiently to allow it to be pivoted forwards t...

Page 14: ...it of the warranty the Warranty Registration must be completed online within 14 days of purchase by your dealer If the selling dealer has not completed the Warranty Registration please complete online...

Page 15: ...tisfaction and for any other purpose which we tell you about We may share your information with our parent The Toro Company or with our affiliates dealers or other business partners in connection with...

Page 16: ...NOTES 15...
Page 17: ...Limited Spellbrook Bishop s Stortford Hertfordshire CM23 4BU England Tel 44 0 1279 723444 Fax 44 0 1279 600338 www hayter co uk DEALER DETAILS DEALER DETAILS SERIAL NUM BER LABEL SERIAL NUM BER LABEL...

Reviews: