background image

© 2002, Hayton Systems

Page  29

10. Troubleshooting

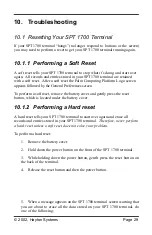
10.1  Resetting Your SPT 1700 Terminal

If your SPT 1700 terminal “hangs” (no longer respond to  buttons  or  the  screen)

you may need to perform a reset to get your SPT 1700 terminal running again.

10.1.1 Performing a Soft Reset

A soft reset tells your SPT 1700 terminal to stop what it’s doing and start over

again.  All records and entries stored in your SPT 1700 terminal are retained

with a soft reset.  After a soft reset the Palm Computing Platform Logo screen

appears followed by the General Preferences screen.

To perform a soft reset, remove the battery cover and gently press the reset

button, which is located under the battery cover.

10.1.2  Performing a Hard reset

A hard reset tells your SPT 1700 terminal to start over again and erase all

records and entries stored in your SPT 1700 terminal. 

 Therefore, never perform

a hard reset unless a soft reset does not solve your problem.

To perform a hard reset:

1. Remove the battery cover.

2. Hold down the power button on the front of the SPT 1700 terminal.

3. While holding down the power button, gentlt  press the  reset button  on

the back of the terminal.

4. Release the reset button and then the power button.

5. When a message appears on the SPT 1700 terminal screen warning that

you are about to erase all the data stored on your SPT 1700  terminal,  do

one of the following:

Summary of Contents for HPK003

Page 1: ...ATS User Manual Verizon Asset Tracking System HPK003 Contractor Kit...

Page 2: ......

Page 3: ...key Point Drive 200 Arlington WA 98223 800 990 8360 fax 360 659 6823 www haytonsystems com This document contains Hayton Systems Confidential and Proprietary Information Users shall maintain such Conf...

Page 4: ...ION TYPE 16 7 3 EDITING RECORDS 17 7 4 GRID VIEW 18 7 4 1 Marking Records 19 7 4 2 Marking A Range of Records 20 8 UTILITIES 21 8 1 AUDIT DOWNLOAD 23 8 2 FIND 24 9 TRANSACTIONS 25 9 1 RETIREMENT X 25...

Page 5: ...APPENDIX A GRAFFITI CHARACTERS 31 APPENDIX B COMMON ERRORS 33 GLOSSARY 34...

Page 6: ...greater data integrity superior data communications capability and greater application capability This combination of features allows ATS to support on line validations for improved data accuracy In a...

Page 7: ...apter 9 pin to 25 pin Serial Charging Cable H15012 H15010 SPT1700 Soft Case for Terminal and Cables Hard Carrying Case for the entire kit H15007 H15006 Desktop Software CD ATS License and Support Agre...

Page 8: ...0 2D Scanner H15004 Modem Cradle with cable H15008 Power Supply H15009 Power Supply Cord H15006 Hard Carrying Case for the entire kit H15011 Spare Battery Lithium Ion H15013 Stylus 5 Pack H15012 Modem...

Page 9: ...nd a green light means it is fully charged 4 Remove the terminal from the yellow carry pouch Place it in the cradle for approximately 30 minutes to charge the battery fully The status light for the ba...

Page 10: ...pping on its icon from the Application Launcher 15 Complete the information required in ATS Register This should all be self explanatory except for Logon and Password Please contact your Verizon liais...

Page 11: ...welcome screen for the ATS version you have downloaded If you asked checked the boxes for both ATS versions neither will run automatically Instead you will see the Application Launcher Select the ATS...

Page 12: ...o see a menu of the applications and to switch between application categories The terminal stores applications in three areas or categories The categories are Main VERIZON and System Do not modify or...

Page 13: ...ed to display information and enter data Be sure to use only a recommended plastic tipped stylus when writing on this screen UTIL The utility functions provide functions such as record deletion audit...

Page 14: ...ou not use these applications in your terminal These applications could have a detrimental effect on the ATS application and the system may automatically remove these applications during an upload to...

Page 15: ...up the keypad by tapping the abc or 123 keys on the bottom corners of the writing pad The custom keypad looks like this The custom keypad allows you to scroll through the current set of data fields an...

Page 16: ...ap Set Time or Set Date to display these screens Adjust the time values using the up down arrows Press to set the time Select today s date be sure to set select the correct year Press to set the date...

Page 17: ...upper right and the terminal displays a list of all categories You can then select the desired category from the list The terminal must connect to the server and download the current version of ATS Th...

Page 18: ...each time the terminal is used Tap the user s initials on the top line of any other ATS screen to access these Settings Tap after entering all Settings data Exit ATS by tapping User Select your user n...

Page 19: ...ser edit user information or delete a user from the list returns you to the Settings screen Adding or Editing a User Tap to create a new user or to edit an existing user Use this Edit User screen to e...

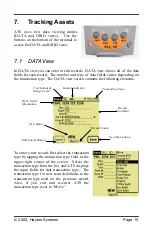
Page 20: ...ins the following elements To enter a new record first select the transaction type by tapping the transaction type field in the upper right corner of the screen Select the transaction type from the li...

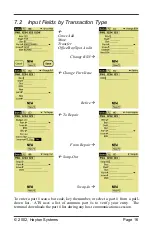
Page 21: ...t Audit Change BSN fl Change Part Issue Retire fl To Repair From Repair fl Swap Out Swap In To enter a part scan a bar code key the number or select a part from a pull down list ATS uses a list of com...

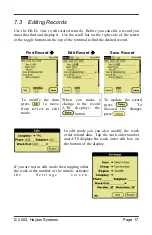
Page 22: ...ord Edit Record Save Record To modify the data press to move from review to edit mode When you make a change to the record ATS displays the button To update the record press To discard the changes pre...

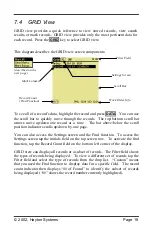
Page 23: ...one page You can also access the Settings screen and the Find function To access the Settings screen tap the initials field on the top screen row To activate the find function tap the Record Count fie...

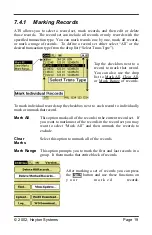
Page 24: ...also use the drop list to Mark All Clear All or Mark Range of records To mark individual records tap the checkbox next to each record to individually mark or unmark that record Mark All This option m...

Page 25: ...lecting the first and last records in the group Tap and then tap a record from the list This record will be the first in the group of marked records After you select the first record the terminal disp...

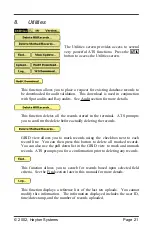
Page 26: ...the delete before actually deleting the records GRID view allows you to mark records using the checkbox next to each record line You can then press this button to delete all marked records You can al...

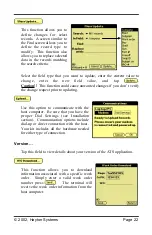
Page 27: ...ed changes if you don t verify the change request prior to updating Use this option to communicate with the host computer Be sure that you have the proper Dial Settings see Installation section Commun...

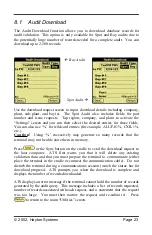
Page 28: ...may generate so many records that the terminal may not be able store them in memory Press or the Sync button on the cradle to send the download request to the host computer ATS first warns you that i...

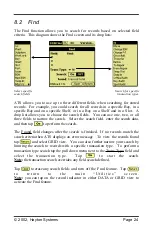
Page 29: ...e search field enter the search data and then tap to perform the search The Found field changes after the search is finished If no records match the search criteria then ATS displays an error message...

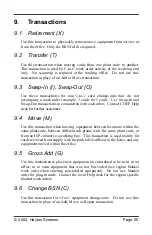
Page 30: ...ach other Contact COEP Help desk for further assistance 9 4 Move M Use this transaction when moving equipment between locations within the same plant code between different sub plants with the same pl...

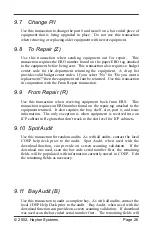
Page 31: ...om ERS This transaction requires an ERO number found on the repair tag attached to the equipment returned It also requires the bay shelf slot part and issue information The only exception is when equi...

Page 32: ...t the remaining fields as necessary Scan the entire bay 9 12 Whole Office Use this transaction for complete office auditing As with all audits contact the local COEP Help Desk prior to the audit There...

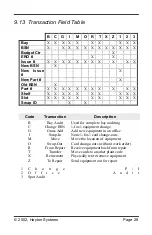
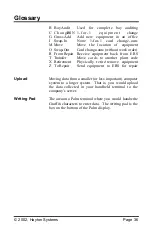
Page 33: ...Code Transaction Description B Bay Audit Used for complete bay auditing C Change BSN 1 for 1 equipment change G Gross Add Add new equipment in an office I Swap In None 1 for 1 card change outs M Move...

Page 34: ...remove the battery cover and gently press the reset button which is located under the battery cover 10 1 2 Performing a Hard reset A hard reset tells your SPT 1700 terminal to start over again and er...

Page 35: ...e front panel of the SPT1700 terminal to complete the hard reset and display the Digitizer screen b Press any other button to perform a soft reset Note With a hard reset the current date and time are...

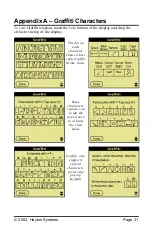
Page 36: ...ch the very bottom of the display and drag the stylus to the top of the display The dot on each character shows where each Graffiti stroke starts Some characters require you to tap the screen once to...

Page 37: ...yton Systems Page 32 A 0 Space B 1 Backspace C 2 Return D 3 Caps Shift E 4 Caps Lock F 5 Menu Cmd G 6 Cursor Left H 7 Cursor Right I 8 Short Cut J 9 Space K Tap Once to use the shifted characters belo...

Page 38: ...ure you put the alpha character first in the slot field Example Channel 14 in the B digroup of a 9004B D4 channel bank shelf should be bar coded as position slot C02 Channel 11 in A digroup would be s...

Page 39: ...ber used on the asset Categories The Palm terminal allows you to group applications into categories and step through these categories using the Application Launcher button CO Central Office COE Centra...

Page 40: ...drag the stylus to the top of the display Restorer The Restorer program connects to the server and downloads the current version of ATS This method of loading the application ensures that you always...

Page 41: ...eive equipment back from ERS T Transfer Move cards to another plant code X Retirement Physically retire remove equipment Z To Repair Send equipment to ERS for repair Upload Moving data from a smaller...

Reviews: