
USE ONLY HAYWARD GENUINE REPLACEMENT PARTS
Page 17 of 24
Max-Flo VS Pump
IS2300VSP Rev C
6.11.
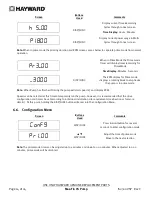
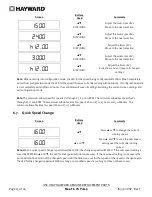
Reset to Factory Settings
Screen
Buttons
Used
Comments
RUN
STOP
Press and Hold RUN/STOP and apply
power to the pump
Note:
The pump may be set back to factory settings. To reset the pump to factory settings remove power from the
pump. Press and Hold the RUN/STOP button and apply power to the pump. When the pump turns back on it will
display the message above and reset all settings back to factory settings.
7.
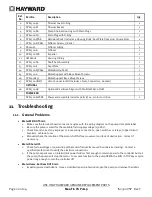
Maintenance
Clean strainer basket regularly. Do NOT strike basket to clean. Inspect strainer cover gasket regularly and replace as
necessary.
Hayward pumps have self-lubricating motor bearings and shaft seals. No lubrication is necessary.
Keep motor clean. Insure motor air vents are free from obstruction to avoid damage. Do NOT use water to hose off
motor.
Occasionally, shaft seals must be replaced, due to wear or damage. Replace with genuine Hayward seal assembly
kit. See “Shaft Seal Change Instructions” in this manual.
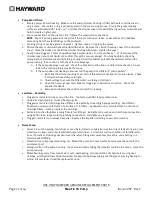
8.
Storage / Winterization
WARNING
– Separation Hazard
.
Do not purge the system with compressed air. Purging the system with
compressed air can cause components to explode, with risk of severe injury or death to anyone nearby. Use only a
low pressure (below 5 PSI), high volume blower when air purging the pump, filter, or piping.
ATTENTION
– Allowing the pump to freeze with water in it will void the warranty.
ATTENTION
– Use ONLY propylene glycol as antifreeze in your pool/spa system. Propylene glycol is non-
toxic and will not damage plastic system components; other anti-freezes are highly toxic and may damage plastic
components in the system.
Drain all water from pump and piping when expecting freezing temperatures or when storing pump for a long time
(see instructions below). Gravity drain system as far as possible.
Keep motor dry and covered during storage. To avoid condensation/corrosion problems, do NOT cover or wrap pump
with plastic film or bags.
8.1.
Storing Pump For Winterization
WARNING
–
To avoid dangerous or fatal electrical shock hazard, turn OFF power to motor before draining
pump. Failure to disconnect power may result in serious personal injury or death.
1.
Drain water level below all inlets to the pool.
2.
Remove drain plugs and strainer cover from strainer housing.
3.
Disconnect pump from mounting pad, wiring (after power has been turned OFF), and piping.
4.
Once the pump is fully drained of water, re-install the strainer cover and drain plugs. Store pump in a dry area.


