background image

Roadstar Installation Instruction Manual 

Page 5 of 8 


Connecting power supply and control contacts 

 
After placing SIM card and antenna, next step of installation is connecting power supply and contacts. 
 
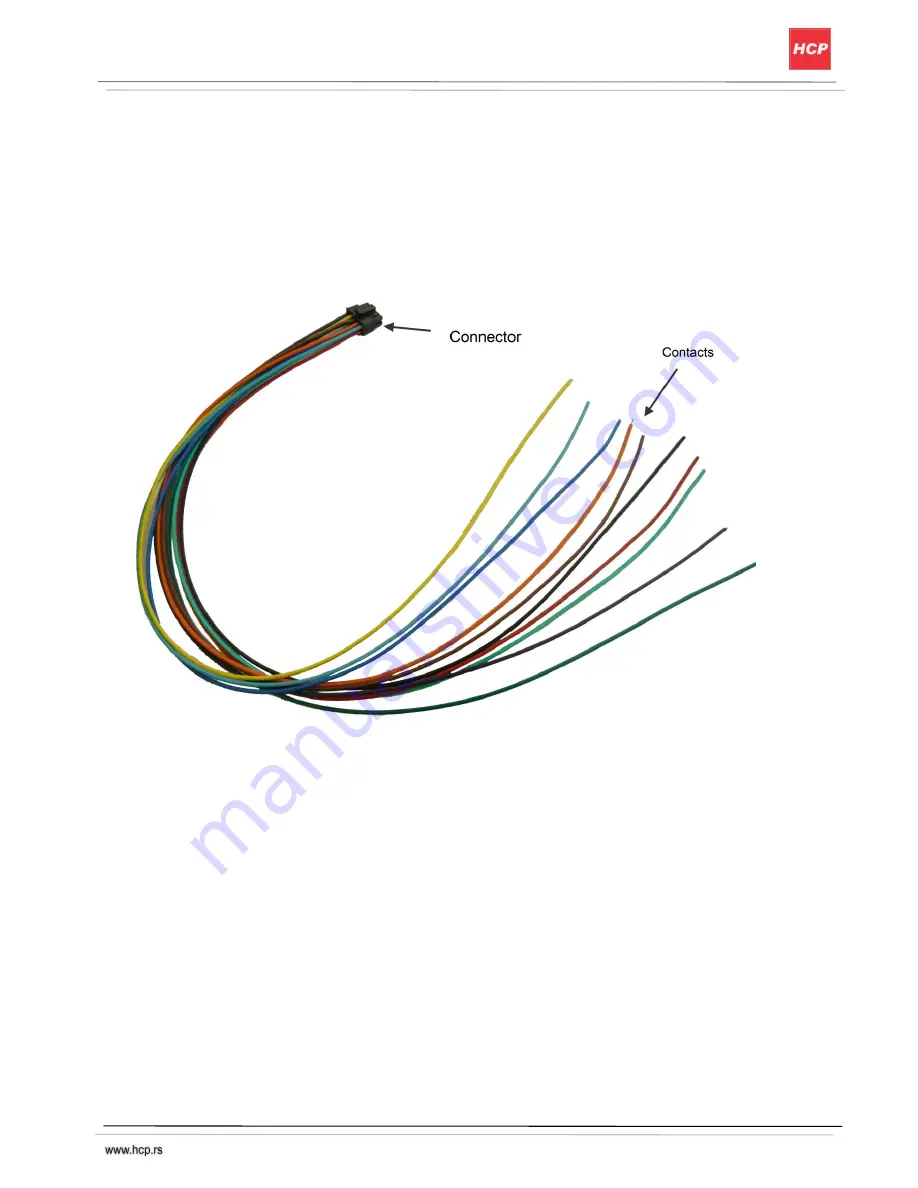
On the following picture is shown 10-wire cable which is connected to device. Cable has connector on 
one side, and it is connected to modem, and on the other sides are contacts which will be described. 


Picture 3 – 10-wire cable 

Summary of Contents for Roadstar

Page 1: ...Roadstar Installation Instruction Manual ...

Page 2: ...nditions for Roadstar read carefuly following text Ambient temperature from 30 C to 70 C Do not install device near strong electromagnetic field or heating source Do not place device near water or other liquids Install GSM GPS antena below glass or plastic Avoid installation below metal surfaces which can disturb GSM GPS signal receiving and transmission Supply device with voltage as described in ...

Page 3: ...acing SIM card When finished place board back to the housing and put back removed screws NOTE Software on Roadstar automaticaly sets parameters for GPRS for most SIM cards of different mobile operators In case you need to set different parameters check document Roadstar Configuration Manual for details Placing antenna Next step in installation is placing antenna Roadstar has two connectors for ann...

Page 4: ...install antenna on a proper place where GSM and GPS signal receiving and transmission will not be disturbed so that device could work correct Avoid placing antenna below metal or simmilar surfaces which can disturb signal receiving and transmission Best place to put it is on the front or back glass of the vehicle ...

Page 5: ...ng SIM card and antenna next step of installation is connecting power supply and contacts On the following picture is shown 10 wire cable which is connected to device Cable has connector on one side and it is connected to modem and on the other sides are contacts which will be described Picture 3 10 wire cable ...

Page 6: ...DC 2 Tirquoise DI_2 Digital input 2 0V 24V DC 3 Dark blue DI_1 Digital input 1 0V 24V DC 4 Dark green DI_4 Digital input 4 or impulsator 0V 24V DC 5 Black GND Ground 0V 6 Light blue DI_3 Digital input 3 0V 24V DC 7 Orange DO_1 Digital output 1 200mA 8 Brown DO_2 Digital output 2 200mA 9 Yellow AI_1 Analog input 1 0V 24V DC A Purple AI_2 Analog input 2 0V 24V DC Table 1 10 wire cable contact descri...

Page 7: ...ed on take care not to exceed 24V DC because device could be damaged NOTE Do not connect contact number 3 directly to engine key contacts Contact number 4 impulsator connect to tachograph Take care that maximum voltage connected to this contact does not exceed 24V DC Contact number 6 door state open closed connect to contact on a vehicle which detects if door is opened or closed Take care that max...

Page 8: ...ameter Min Typ Max Unit Supply voltage Vcc 8 12 30 V Supply current Ic 500 mA Ambient temperature 30 25 65 C Table 2 Recommended values Vehicle tracking After successful performing of all previous steps for installation modem inside a vehicle you are ready to track a vehicle using www tracking rs system For more information about tracking using this system check document System for Vehicle Trackin...

Reviews: