3 of 4
3.
Starting with the top, separate each tree section and stand gently, being sure not to roughly handle as it could
cause damage to the parts. TIP: If there is difficulty separating the tree sections, apply a small amount of
lubricant where the poles join.
4.
Compress each tree section by turning it upside down and squeezing the branches together so that it will fit
more easily into the storage box or container. You can also tie a ribbon or cord around the sections to secure
the branches closer together for storage.
5.
Place all the parts gently back into the storage box. The box will help prevent the tree from being damaged
should it get bumped in your garage, basement, or other storage location. Tape the box shut to keep out any
dust or insects. When packing up the tree, please ensure that there is no undue strain or stress on the light sets
to ensure they do not get cut, frayed, or damaged.
6.
Be sure to store the tree in a cool, dry area free of water and moisture to prevent mold and mildew from
accumulating and a musty odor developing. Exposing your tree to excessive heat or humidity may damage your
tree. DO NOT STORE TREE IN A DAMP AREA OR IN AN AREA WHERE THE TEMPERATURE EXCEEDS 100ºF. STORE
THE CARTON FLAT AND
NOT
UPRIGHT ON ITS SHORT END.
T
ROUBLESHOOTING
G
UIDE
F
OR
L
IGHT
S
ETS
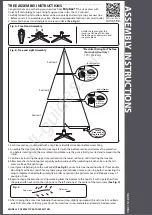
If your lights are not working, following are some troubleshooting steps to try:
1.
Check that the light set plugs are properly connected to your home wall outlet or other power source.
2.
Check that there is power to the wall outlet or power source.
3.
Check that all the plugs within the tree are securely connected and positioned correctly.
4.
Check for loose bulbs or poor contacts in bulb sockets. Follow along the non-working light set and ensure each
bulb is seated firmly inside each socket with its tab securely “locked”. DO NOT TWIST BULBS.
5.
Look for any broken, burned out, or missing bulbs and replace as needed.
6.
Replace non-working, missing, or broken bulbs as soon as discovered to avoid reducing the longevity of the light
set. Not replacing bulbs promptly will cause too much voltage to go to the remaining lit bulbs.
7.
Replace only with bulbs that came with the product or recommended by the manufacturer. Spare bulbs were
included with your purchase.
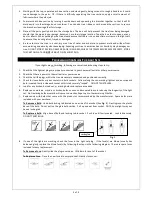
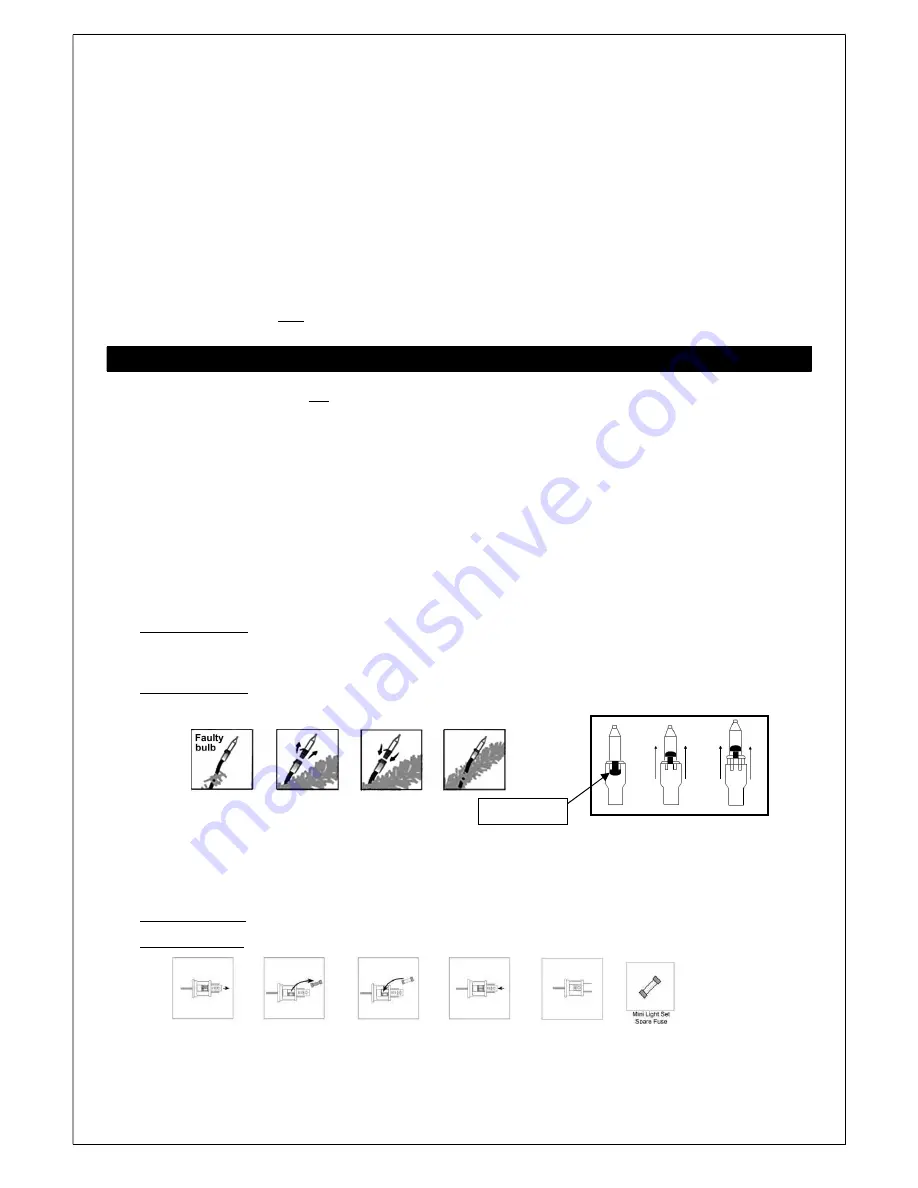
To Remove a Bulb
: Undo bulb locking tab located on one side of the socket (See
Fig. 1
). Gently grasp the plastic
base of the bulb. Do not pull on the glass bulb section. Pull up and out from socket. NOTE: Some lights may not
have a locking tab.
To Replace a Bulb
: Align base of bulb and locking tab to socket. Push in until firmly seated. Lock tab securely.
DO NOT TWIST BULB.
8.
If none of the lights are working, check the fuses in the light set plug. If the fuse(s) are blown (usually has
darkened glass), replace the blown fuse(s) by following the steps in the following diagram. There are spare fuses
included for easy replacement.
To Remove a Fuse
: Gently slide the plug cover open. Lift blown fuse out of the socket.
To Replace a Fuse
: Place the new fuse into empty socket. Gently close cover.
Fig. 1
Locking Tab