Disclaimer:
3
rd
party and/or custom firmware providing extra features are not covered in this manual.
19
4K Linker – User Manual
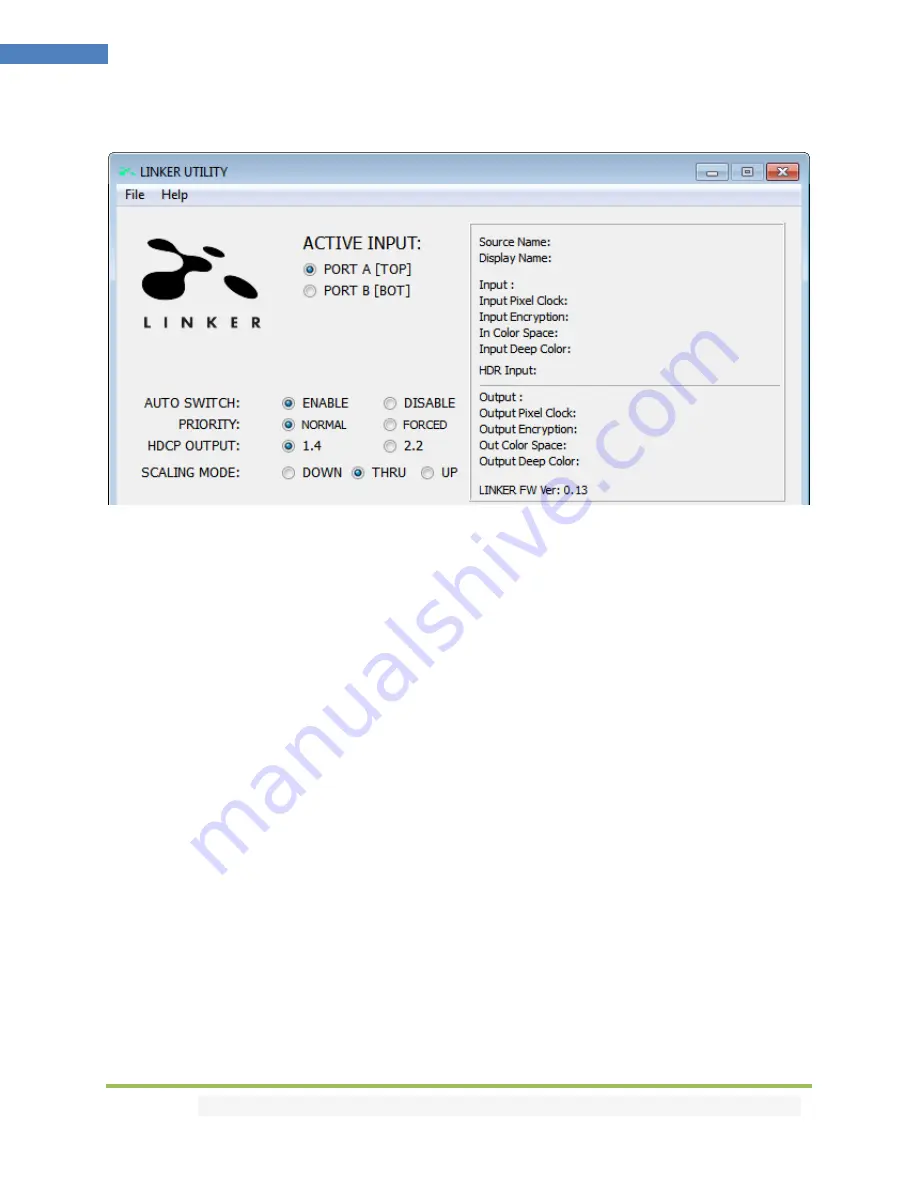
The TOP SECTION of the USB GUI for Windows PC:
Active Input
:
Allow you to select the current active input port. Similarly to what you can do from the
push button on the unit (see page 8)
Auto Switch
:
When activated, the Auto Switch feature will force the Linker unit to automatically switch
to the active signal if the selected signal is lost.
Input Priority
: When in FORCED input priority mode, as soon as a new active input is detected, Linker
will switch to it.
HDCP Output
:
Allow you to select/force the HDCP revision of the Output Port.
Scaling Mode
:
Allow you to select HDMI resolution Downscale, Pass-Thru (default) or Upscale. Similarly
to what you can do from the push button on the unit (see page 9)
The right boxed area will provide you with the following information:
Source Name
: When available it will display information about the source device in use.
Display Name
: When available it will display information about the display in use.
Input
: Display Input signal resolution and refresh rate.
Input Pixel Clock:
Display incoming signal bandwidth
Input Encryption
: HDCP encryption information at Input.
In Color Space:
Display Color Space of Incoming signal.
Input Deep Color:
Display Deep Color of Incoming signal.
HDR Input:
Display HDR signal information
Output
: Display Output signal resolution and refresh rate.
Output Pixel Clock:
Display Output signal bandwidth
Output Encryption
: HDCP encryption information at Output.
Out Color Space:
Display Color Space of Outgoing signal.
Output Deep Color:
Display Deep Color of Outgoing signal.
LINKER FW Ver:
on the last line indicates the current FW version of your Linker unit.


