4 Planning and installation – Installing the heating system
32
T
RANSPORTING
WITH
A
PALLET
TRUCK
1.
Transport the boiler with a pallet truck in compliance with the
minimum clearances to the required installation site.
✎
See section “4.2 Structural requirements”, under “Required room
sizes and minimum clearances”.
2.
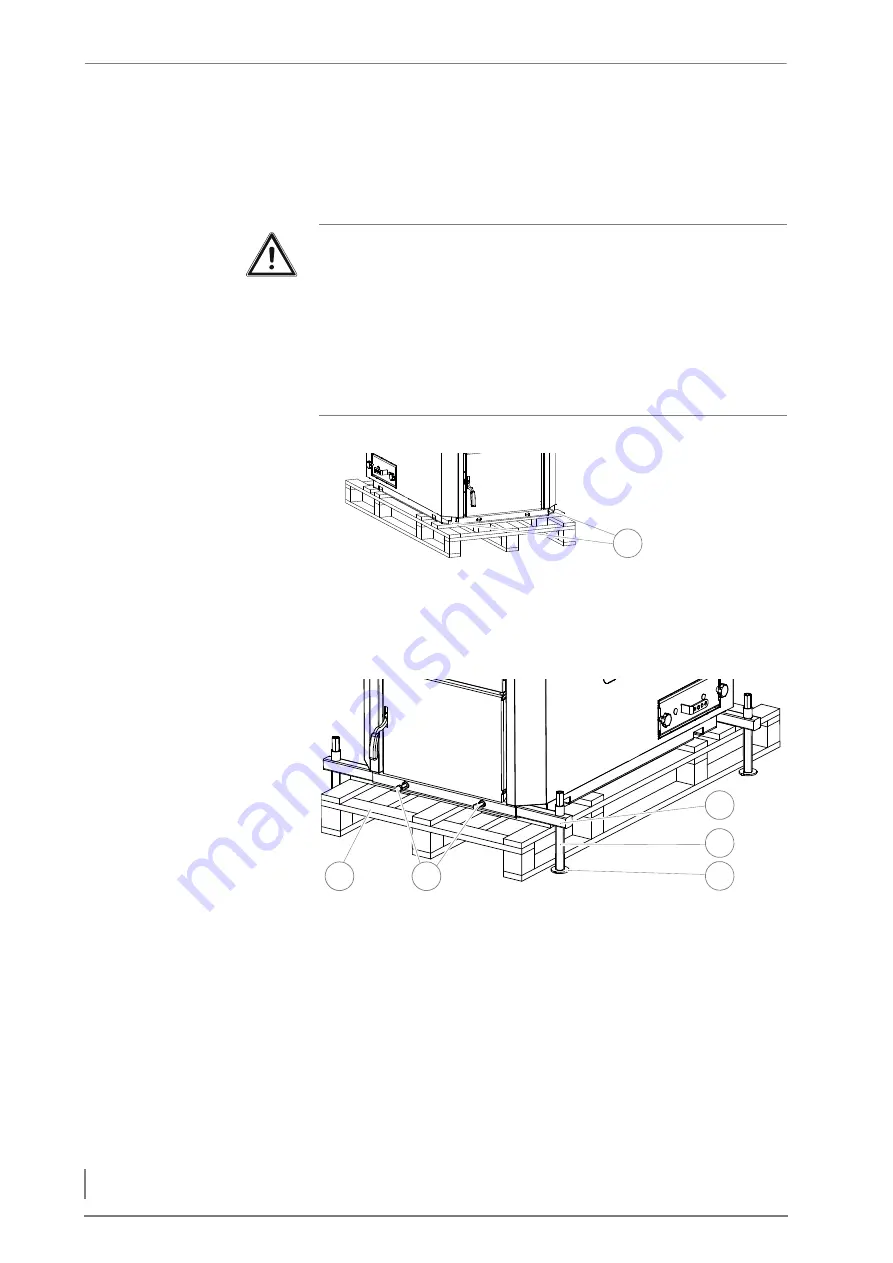
Undo the M8 nuts (SW13) (1) on the 4 corners of the boiler.
3.
Remove the four screws with which the boiler is fixed to the pallet.
4.
Push each of the square shafts (3) into the guides intended for
them.
5.
Secure the square shafts with the M12 screws (SW19) (2).
6.
Place the respective spacer plates (5) under the installation aid.
7.
Turn each of the M16 spindles (4) (SW24) until the boiler is
completely supported on the installation aid.
8.
Remove the pallet (1).
Important!
When using the installation aid, observe the required minimum
clearance of 60 cm to the side walls in order to be able to later
remove the aid.
Also observe the minimum clearance of 150 cm in front of and
behind the boiler so that you can remove the pallet.
The final installation position of the boiler must be adjusted
afterwards if necessary.
Figure 4/5 - Removing screws
1
Figure 4/6 - Attaching the installation aid
3
1
2
4
5


