7 Cleaning and servicing the heating system – Procedure
79
3.
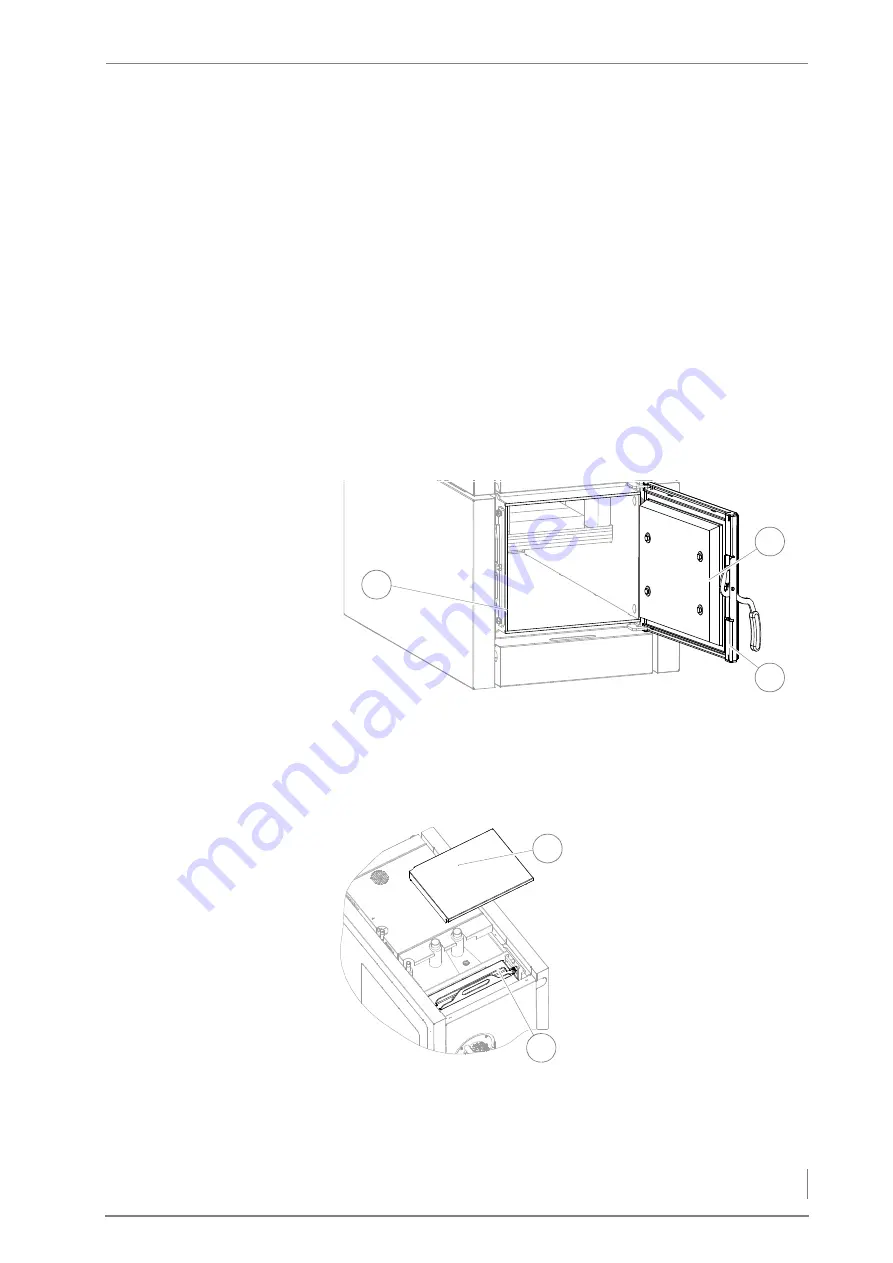
Clamp a sheet of paper (approx. 30 cm long and 2 cm wide)
between the contact surface (3) and the seal (2) of the fuel
chamber door.
4.
Close the fuel chamber door (1).
5.
Pull on the paper.
✓
If the paper moves, the door is not properly sealed.
✓
If the paper does not move, the door is properly sealed.
6.
If necessary, position the locking plate so that the door closes
firmly again.
7.
Repeat the procedure from step 2 to step 6 until you have
inspected all four of the contact surfaces (3).
8.
Remove the paper and close the fuel chamber door (1).
✓
The inspection of the fuel chamber door is complete.
C
OMBUSTION
CHAMBER
DOOR
9.
Check the sealing of the ash door (1) exactly as described above
under “Fuel chamber door”.
✓
The combustion chamber door has been checked for tightness.
C
LEANING
SHAFT
LID
Figure 7/16 - Checking the combustion chamber door for leaks
3
1
2
10.
Lift off the cover (1) of the
cleaning shaft lid (2).
11.
Make sure that the cleaning
shaft lid (2) does not leak.
12.
If necessary, tighten the two
M8 wing nuts.
✓
The inspection of the cleaning
shaft lid seal is complete.
Figure 7/17 - Checking the cleaning shaft lid for leaks
1
2
Summary of Contents for F20
Page 1: ...hdg bavaria com HDG F20 25 30 HDG F40 50 Operating manual ...
Page 2: ......
Page 87: ......


