background image


- 4 – 


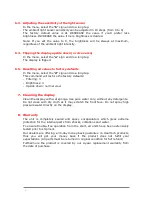
6.3.


Adjusting the sensitivity of the light sensor 

In the menu, select the “

b

” sign and do a 

long tap

The ambient light sensor sensitivity can be adjusted in 10 steps (from 0 to 9). 
The  factory  default  value  is 

4

.  DECREASE  the  value  if  you’d  prefer  less 

brightness. INCREASE the value if more brightness is desired. 

Note: 

If  you  set  the  value  to  9,  the  brightness  will  be  always  at  maximum, 

regardless of the ambient light intensity. 


6.4.


Flipping the display upside down (or vice versa) 

In the menu, select the “

u

” sign and do a 

long tap

The display is flipped. 


6.5.


Resetting all values to factory defaults 

In the menu, select the “

d

” sign and do a 

long tap

This command will restore the factory defaults: 

Filtering: 3 

Brightness: 4 

Upside down: normal view 


7.


Cleaning the display 

Clean the display with wet sponge. Use pure water only, without any detergents. 

Do not clean with dry cloth as it may scratch the front face. Do not spray high 
pressure water directly on the display. 


8.


Warranty 

The  unit  is  completely  sealed  and  epoxy  encapsulated,  which  gives  extreme 

protection for the internal parts from shocks, vibrations and water. 
To ensure trouble-free operation from the start, all units have been extensively 
tested prior to shipment. 
Our dealers are offering a 30-day money-back guarantee on HealTech products, 
thus  you  will  get  your  money  back  if  the  product  does  not  fulfill  your 

expectations. (All parts must be returned in original condition for full refund.) 
Furthermore  the  product  is  covered  by  our  2-year  replacement  warranty  from 
the date of purchase. 


Summary of Contents for GPDT-S01

Page 1: ...uster 2 Specifications Supply voltage 8V to 24V Maximum supply current at 12V 80 mA Reverse polarity and transient protection on all leads Unit size 20 x 30 x 13 mm 0 7 x 1 2 x 0 5 inches Operating temp 40C to 80C 40F to 176F Waterproof IP68 3 Features Fast and accurate Instant and accurate indication of the selected gear for added control and safety The sampling period can be adjusted to make the...

Page 2: ...ctor is also referred as SDS or Mode select switch coupler in the Suzuki manuals It may have a black cap or dummy plug without wires attached to it Detach the cover cap or dummy plug and connect the GIpro plug Route the cable to the mounting location along the frame Peel the green plastic off from the back of the unit and mount the display Secure the cable with the cable ties supplied 5 Operation ...

Page 3: ...to neutral Cycle the ignition key to start over To review or change a parameter use the following controls Short tap tap and release the touch sensor next menu item increasing the value Long tap hold your finger on the touch sensor until the display changes select ok 6 1 Reading the firmware version In the menu select the C sign and do a long tap After this command the firmware version number is s...

Page 4: ... the factory defaults Filtering 3 Brightness 4 Upside down normal view 7 Cleaning the display Clean the display with wet sponge Use pure water only without any detergents Do not clean with dry cloth as it may scratch the front face Do not spray high pressure water directly on the display 8 Warranty The unit is completely sealed and epoxy encapsulated which gives extreme protection for the internal...

Reviews: