


7
10
HOW TO USE THE MANUAL MODE
Make sure that the power cord is plugged into a
220–240 volt outlet. Follow the steps below to use the
manual mode of the console.
Turn on the power.
If you just plugged in the power cord or moved
the pedals, the power will already be on. The
power can also be turned on by pressing any
button on the console.
Select the manual mode.
When the power
is first turned on,
the manual mode
will automatically
be selected and
the manual mode
indicator will light.
If a different mode is selected, press the MODE
button repeatedly to select the manual mode.
Begin striding and adjust the resistance.
When the MANU-
AL mode is select-
ed, the resistance
of the pedals will
be at the minimum
setting. As you
exercise, adjust
the resistance as desired by pressing the RESIS.
button. Pressing the upper arrow on the button
will increase the resistance; pressing the lower
arrow will decrease the resistance.
If you stop exercising for twenty seconds or
longer, or if you press the START/PAUSE button,
a tone will sound, the console will pause, and the
TIME display will begin to flash. In addition, the
resistance of the pedals will return to the mini-
mum setting. To restart the console, press the
START/PAUSE button or simply begin striding.
Follow your progress with the four displays.
As you exercise, the four displays will provide
continuous feedback (see paragraphs 3, 4, 5, and
6 on page 9).
Turn off the power.
If the pedals are not moved and the console but-
tons are not pressed for ten minutes, the power
will turn off automatically.
HOW TO USE THE WORKOUT PROGRAMS
Turn on the power.
See step 1 at the left.
Select one of the six workout programs.
Press the MODE
button repeatedly to
select the desired
program. An indica-
tor will light to show
which program you
have selected.
Programs 1, 2, and
3 are twenty-minute
programs; programs
4, 5, and 6 are thirty-
minute programs.
Start the program.
Press the START/PAUSE button and begin strid-
ing. As you exercise, the resistance of the pedals
will periodically change as shown by the profiles
on the left side of the console. (Note: If the resis-
tance is too high or too low, it can be adjusted
with the RESIS. button. Pressing the upper arrow
on the button will increase all resistance settings
of the program; pressing the lower arrow will
decrease all resistance settings.) The program
will continue until no time remains in the TIME
display.
To pause the program before the program is com-
pleted, press the START/PAUSE button. A tone
will sound, the console will pause, and the TIME
display will begin to flash. In addition, the resis-
tance of the pedals will return to the minimum
setting. (Note: The program will also automatically
pause if the pedals are not moved for twenty sec-
onds.) To restart the program, press the START/
PAUSE button or simply begin striding. After a
moment, the resistance of the pedals will return
to the current program setting.
Follow your progress with the four displays.
During the program, the four displays will provide
continuous feedback.
Turn off the power.
If the pedals are not moved and the console but-
tons are not pressed for ten minutes, the power
will turn off automatically.
1
1
2
2
3
4
5
3
4
5
Indicator
Indicator
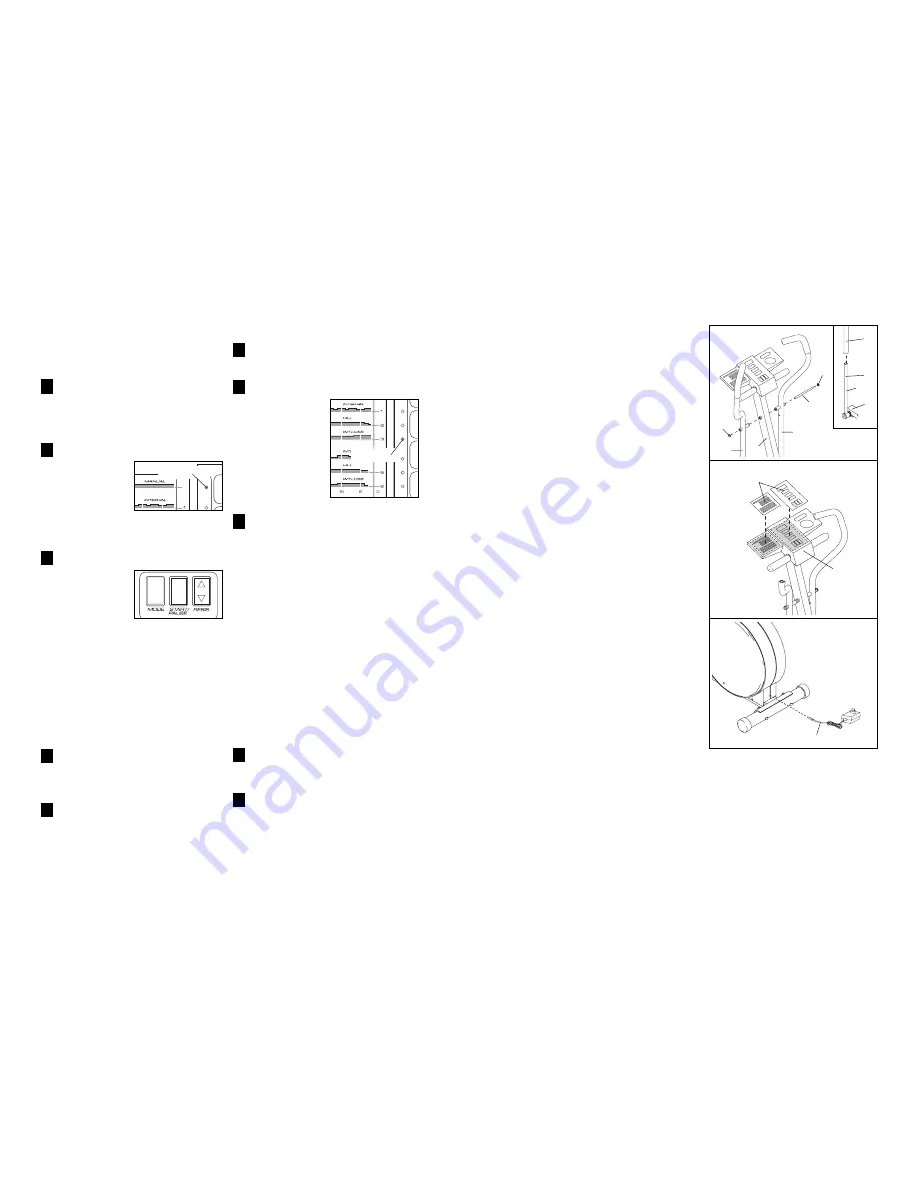
12. Make sure that all parts of the elliptical crosstrainer are properly tightened. Note: Some parts may be
left over after assembly is complete. To protect the floor or carpet, place a mat under the elliptical
crosstrainer.
11. Plug the Power Cord (7) into the jack at the rear of
the elliptical crosstrainer. Make sure to keep the
Power Cord away from walkways and heated sur-
faces.
10. Remove the clear plastic from the Console (6).
All of the information on the Console (6) is printed in
English. The included overlays contain the same
information in four other languages. If English is not
your native language, find the overlay that is printed
in your native language. Do not peel the backing off
the overlay yet. Place one section of the overlay on
the Console in the position shown and hold it firmly in
place with one hand. With your other hand, lift one
side of the overlay and peel off part of the backing.
Press the overlay firmly in place. Lift the other side of
the overlay and peel off the remaining backing. Press
the overlay firmly onto the Console.
Attach the other section of the overlay in the same way.
9. Refer to the inset drawing. Apply a small amount of
the included clear lubricant to a paper towel; rub a
thin film of lubricant onto the Chrome Extension Tube
(63) on the right Pedal Arm (12). Slide the Chrome
Extension Tube into the Right Upper Body Arm (11).
Assemble the Left Upper Body Arm (10) and the other
Chrome Extension Tube (63) in the same way.
Tap a 5/8” Axle Cap (50) onto one end of the Axle (8).
Insert the Axle through the Right Upper Body Arm (11)
and then through the Upright (3). Slide the Left Upper
Body Arm (10) onto the Axle. Tap another 5/8” Axle
Cap onto the Axle.
10
6
Overlay
11
7
8
3
9
63
Lube
12
11
10
11
50
50


