

Installation of Recessed Ultrasonic Cleaners
Due to the difficulty in working with silicone, installation of recessed ultrasonic
units should be done by a skilled tradesperson to obtain the best results.
1. A GFI equipped outlet should be inside the cabinet near the location of the
cleaner. A qualified electrician can install this if needed.
2. Use the supplied template to layout an opening in the counter-top for the
ultrasonic cleaner. Make the opening in the desired location.
3. Dispense a bead of silicone adhesive around the opening. Place the
flange over the opening and press down. Wipe up any excess silicone.
4. Insert the ultrasonic unit into the cut-out through the flange.
5. Dispense a bead of silicone around the lip of the tank (on top of the
flange) to seal the unit and smooth it for desired aesthetics.
6. Determine location for timer in proximity to cleaning unit and GFI outlet
location. Make opening and install the timer box by removing the
faceplate and securing the box to the cabinetry.
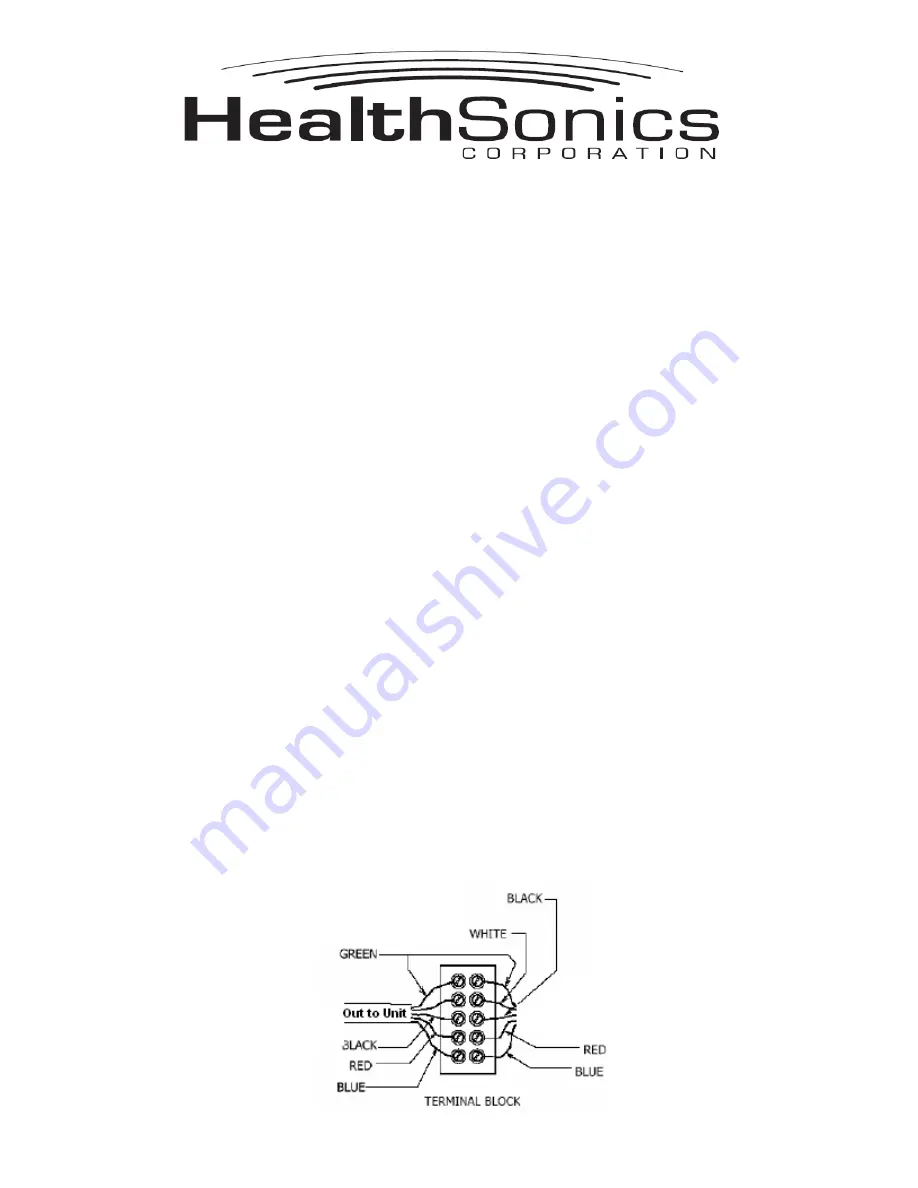
7. With the timer box open, feed the interconnect wire from the ultrasonic unit
through the opening in the timer box with the power cord. Allow 4” excess
wire inside box. Tighten the clamp holding both cords in place. (NOTE:
Blue and Red wires may not be needed)
8. On the inside of the timer box, secure matching colored wires opposite of
each other in terminal block as show below.
9. Replace faceplate onto the timer box.


