Hearth & Home Technologies • Grand Oak Gas Log Sets • 4004-320 2/2011
6
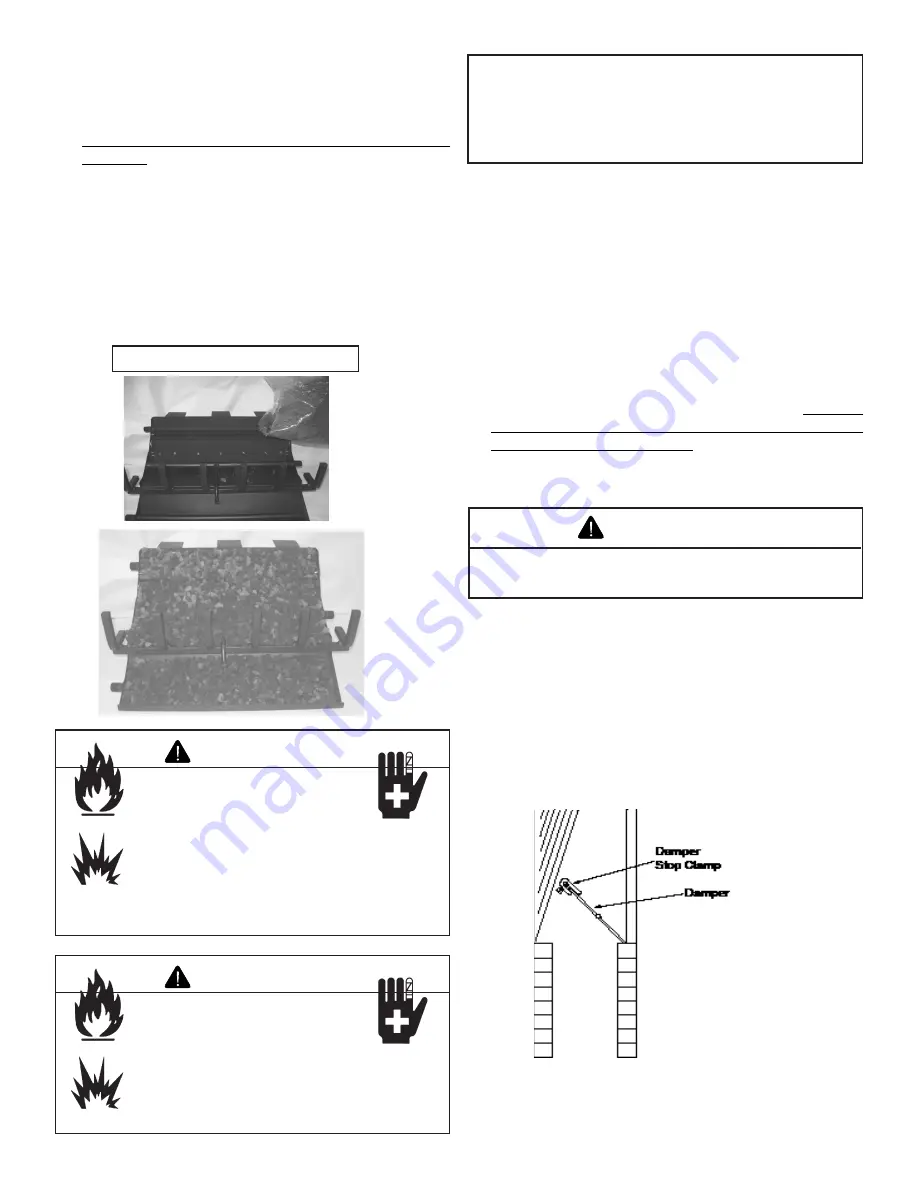
H. Lava Rock Installation
• Pour Lava Rock into the burner pans to the point where
the burner pipe is covered. See Figure 5.. Be sure not to
cover pilot assembly.
•
Inspect the pilot burner to ensure it is clear of any
lava rock
.
• The gas burns at the point of the least resistance. In
case of an uneven flame pattern it may be necessary to
adjust the materials in the pans (using an object such as
a screwdriver) to achieve the desired effect.
• Place desired amount of lava granules on the floor of the
fireplace. (Lava granules may contain moisture which,
when heating, may cause it to pop out during installation
and set-up.) Ensure the controls and switches are
unobstructed after the granules are installed.
Figure 5
Lava
Fire Risk
Explosion Risk
Personal Injury Risk
Failure to position the parts in accordance
with the diagrams provided with the log
packages or failure to use only parts
approved with this appliance may result in
property damage or personal injury.
WARNING
Fire Risk
Explosion Risk
Personal Injury Risk
An explosion could occur if a connection is
made directly to an unregulated propane
(LP) tank.
WARNING
I. Inspect the Venting System
The fireplace venting system is designed and constructed to
develop a positive flow adequate to remove flue gases to the
outside atmosphere. See fireplace installation instructions.
Note:
The state of Massachusetts requires that the
chimney flue damper, when used with gas logs, be welded
open or completely removed. In the Commonwealth of
Massachusetts this appliance must be installed by a
licensed plumber or gasfitter.
• The gas burns at the point of the least resistance. In
case of an uneven flame pattern it may be necessary to
adjust the materials in the pans (using an object such as
a screwdriver) to achieve the desired effect.
• Place desired amount of lava granules on the floor of the
fireplace. (Lava granules may contain moisture which,
when heating, may cause it to pop out during installation
and set-up.) Ensure that the controls and switches are
unobstructed after the granules are installed. DO NOT
COVER THE AIR MIXER LOCATED ON THE LOWER
LEFT SIDE OF THE BURNER.
• Place logs as shown in Sections S thru Z.
• Place accent logs around burner on floor of fireplace.
J. Damper Stop Installation Instructions
Included in the burner assembly box is a damper stop clamp
which attaches to the damper, if fireplace is constructed
with a damper, as shown (Figure 8). Install the clamp to the
damper ensuring that the minimum requirements (Tables 1
and 2) are achieved. Use a 7/16 in. wrench to secure the
clamp to the damper. If the damper clamp provided does
not fit your application, other means of securing the proper
opening must be provided by the installer.
Figure 8 Damper Stop Clamp
• Logs can get very hot. Handle only when they are
cool.
CAUTION


