36
Hearth & Home Technologies • B41L-AU Installation Manual • 2570-980 Rev. C • 7/20
7
7
Venting and Chimneys
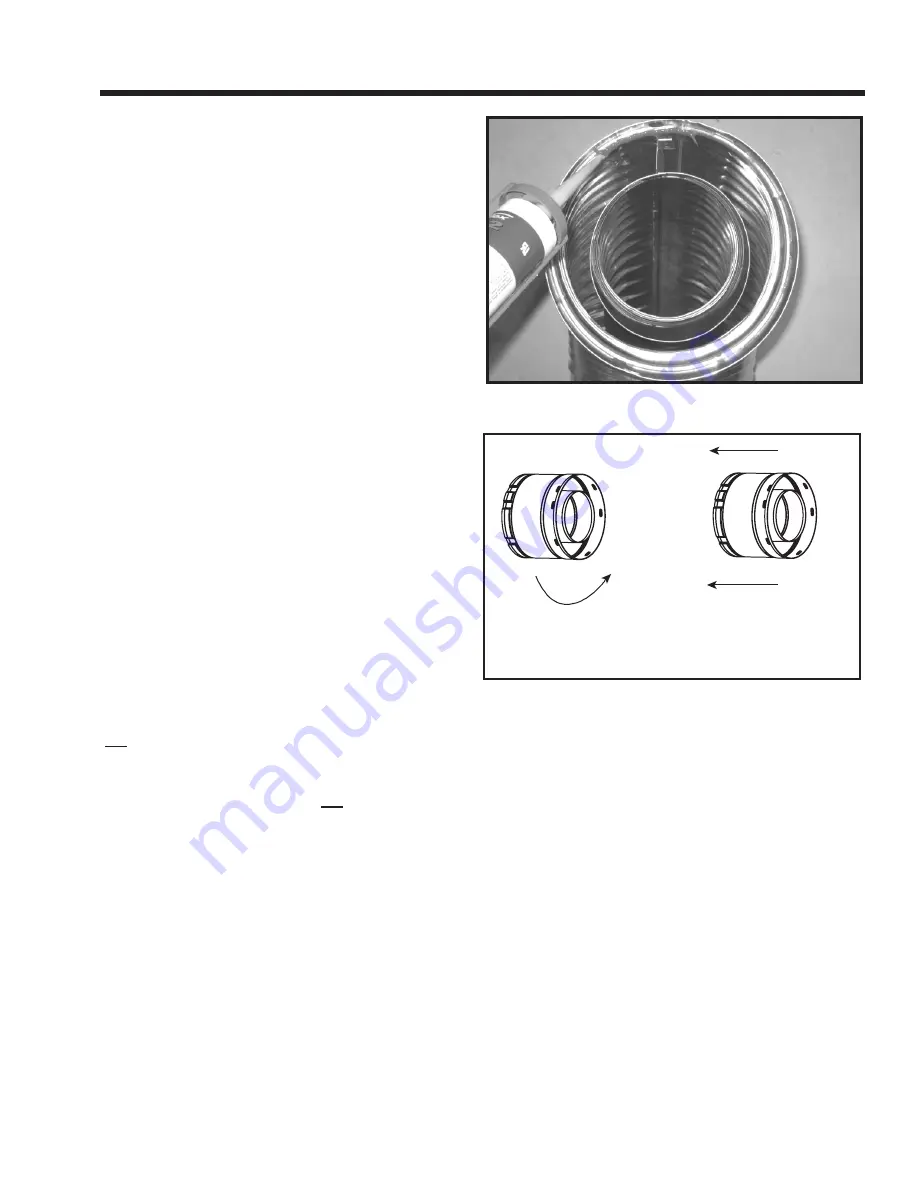
Figure 7.1 High Temperature Silicone Sealant
A . Assemble Vent Sections
(SLP Only)
To attach the first vent component to the starting collars
of the appliance:
• Lock the vent components into place by sliding the pipe
section onto the collar.
• Align the seam of the pipe and seam of collar to allow
engagement. Rotate the vent component to lock into
place. Use this procedure for all vent components. See
Figure 7.2.
• Slide the gasket over the first vent section and place it
flush to the appliance. This will prevent cold air infiltration.
Caulk with a minimum of 300 ºF (149 ºC) continuous
exposure rating may be used to hold the part in place.
• Continue adding vent components, locking each
succeeding component into place.
• Ensure that each succeeding vent component is securely
fitted and locked into the preceding component.
t is acceptable to use screws no longer than 1/2 in. (13 mm)
to hold outer pipe sections together. If predrilling holes,
DO
NOT
penetrate inner pipe.
Requirement for
Commercial, Multi-family (Multi-level ex-
ceeding two stories), or High-Rise Applications
All outer pipe joints must be sealed using one of the meth
-
ods below, including the slip section that connects directly
to the horizontal termination cap.
• Apply a bead of silicone sealant (300 ºF (149 ºC) mini
-
mum continuous exposure rating) inside the female
outer pipe joint prior to joining sections. See Figure
7.1
OR
Apply a bead of silicone sealant (300 ºF (149 ºC) mini
-
mum continuous exposure rating) to the outside of
connecting joint after joining sections
OR
Apply aluminum foil tape (300 ºF minimum continuous
exposure rating) to the outside of connecting joint after
joining sections. On horizontal pipe runs, it is recom
-
mended that the tape seam is positioned on the bottom
side of the vent pipe.
• Only outer pipes need to be sealed. All unit collar, pipe,
slip section, elbow and cap outer flues shall be sealed
in this manner, unless otherwise stated.
Figure 7.2 Adding Venting Components
Note: Align seams to engage pipe,
then rotate counterclockwise to lock


