Hearthstone Quality Home Heating Products, Inc
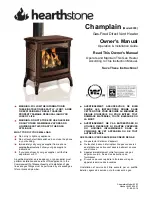
CHAMPLAIN Model 8303
11
Security Chimneys International Ltd
(Secure Vent)
2125 Monterey, Laval, Quebec
Canada, H7L 3T6
450-973-9999
ICC, Inc.
400 J-F Kennedy, St. Jerome, Quebec
Canada, J7Y 4B7
450-565-6336
Metal-Fab, Inc.
P.O. Box 1138
Wichita, Kansas 67201
316-943-2351
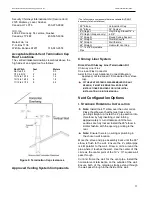
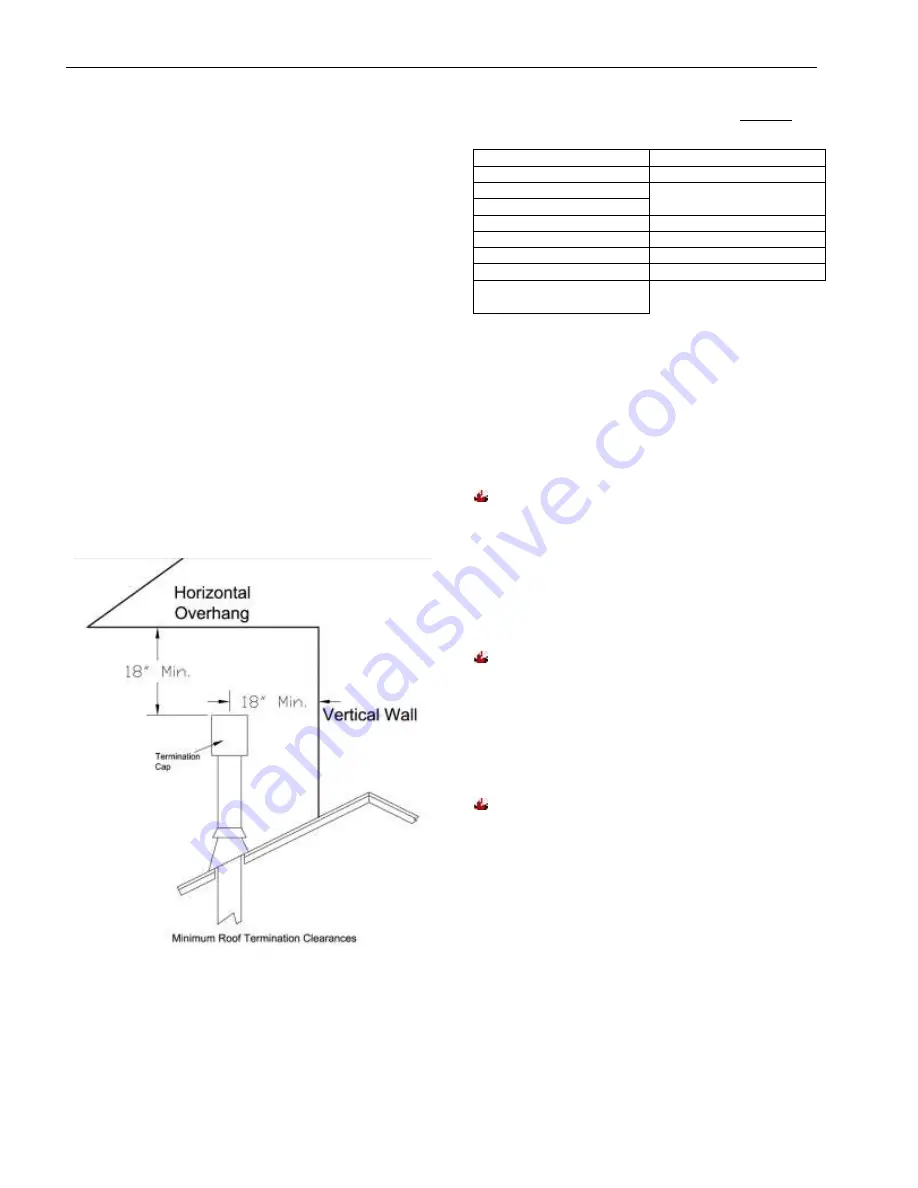
Acceptable Direct-Vent Termination Cap
Roof Locations
The vent/air intake termination clearances above the
high side of an angled roof as follows:
Roof Pitch
Feet
Meters
Flat to 6/12
1
0.3
7/12 to 9/12
2
0.6
10/12 to 12/12
4
1.2
13/12 to 16/12
6
1.8
17/12 to 21/12
8
2.4
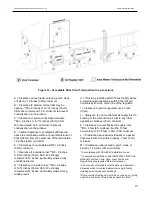
Figure 9: Termination Cap clearances
Approved Venting System Components
(The following are components that are available, BUT NOT
necessary for all installations)
90
0
Elbow
Vertical Vent Cap
45
0
Elbow
36” Snorkel
6" Straight
Vinyl Siding Standoff 4” x
6 5/8"
9" Straight (Simpson only)
12" Straight
Round Ceiling Support
24" Straight
Thimble Covers
36" Straight
Wall thimble
48" Straight
Horizontal Vent Cap
11"-14 5/8" Adjustable
Pipe
Chimney Liner System
Direct-Vent Chimney Liner Termination Kit
Chimney Liner Flex
Co-Linear Flex Connector
Axial to Co-Linear Appliance Connect (Masonry
approved, not to exceed
16’ measured from stove
top).
I
F THE VENT SYSTEM IS DISASSEMBLED FOR ANY
REASON
,
IT MUST BE REINSTALLED PER THE
INSTRUCTIONS PROVIDED FOR IN THE INITIAL
INSTALLATION OR IN THIS MANUAL
.
Vent Configuration Options
I.
S
TANDARD
H
ORIZONTAL
I
NSTALLATION
Note:
Install the 45º elbow over the outer collar.
Place the elbow so that the twist lock end is
pointing straight
up. Install the 2’ pipe section into
this elbow by fully inserting it, and turning
approximately ¼ turn clockwise until the two
sections are fully locked. Install the 90º elbow in
similar fashion with the opening pointing to the
rear.
Note:
Ensure there is no wiring or plumbing in
the chosen wall location.
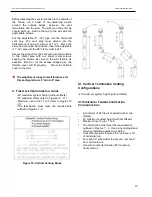
Move the stove and pipe assembly back until the 90º
elbow is flush to the wall. Ensure the
2’ vertical pipe
is still parallel to the wall. Draw a circle around the
pipe where it touches the wall. Use the center of this
circle as the center point of the 10”
x
10” square wall
pass through.
Cut and frame the wall for the vent pipe.
Install the
horizontal vent termination on the outside of the wall.
Ensure both of the retaining straps extend through
the wall pass through to the inside of the wall.

