Hearthstone Quality Home Heating Products, Inc
CHAMPLAIN Model 8303
12
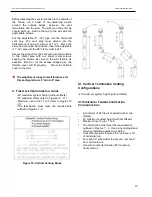
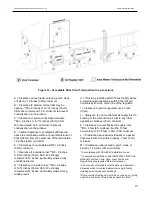
Before attaching the vent termination to the outside of
the house, run a bead of non-hardening mastic
around the outside edges, between the vent
termination and the wall. The arrow on the end cap
should point up. Secure the cap to the wall with the
appropriate screws.
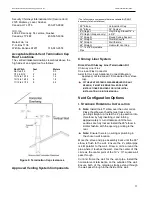
Put the adjustable (11”-14”) pipe into the horizontal
vent cap, (the vent pipe must extend into the
horizontal vent cap a minimum of 1 ¼”). Move the
stove and vent pipe into position, insert the adjustable
(11”-14”) pipe into the 90° elbow, twist lock it.
Secure the straps from the horizontal vent termination
to the interior pipe with two sheet metal screws,
keeping the screws as close to the wall thimble as
possible. Bend or cut the excess strapping so the
thimble cover will fit properly. Screw the thimble
cover to the wall.
The adjustment range for wall thickness for
this confi
guration is 3”min to 9”max.
II.
F
IREPLACE
V
ENTING
I
NSTALLATIONS
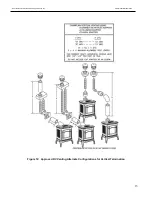
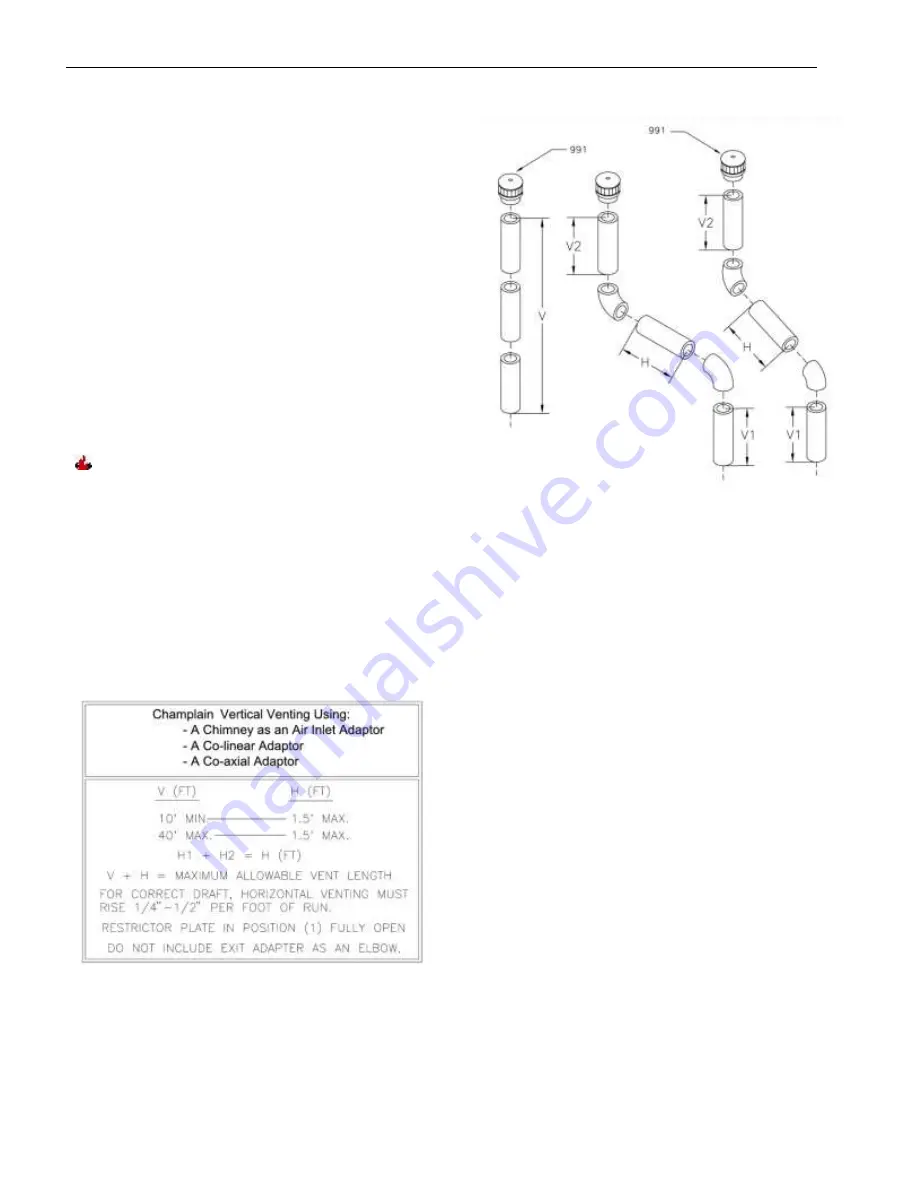
-40' maximum system height (without offsets)
-14' maximum offset
(refer to Figures 10 - 11)
-Maximum rise to run = 1 to 5
(refer to Figures 10
-13)
-
The termination must meet the requirements
outlined in
Figures 7
-
9.
Figure 10: Vertical Venting Rules
III. Vertical Termination Venting
Configurations
-40' maximum system height (without offset)
IV.
H
ORIZONTAL
T
ERMINATION
V
ENTING
C
ONFIGURATIONS
•
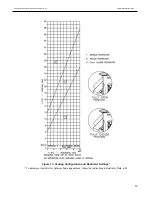
A minimum of 24" rise is required (with or w/o
offsets)
•
40' maximum system height (without offsets)
•
Maximum rise to run = 1 to 5
•
The termination must meet the requirements
outlined in
Figures 7 - 9.
Use a vinyl siding stand
off when installing against vinyl siding.
•
Horizontal sections require a 1/4" rise every 12"
of horizontal run.
•
For each 90° elbow after the second, remove 5'
from horizontal run.
•
Use with snorkel termination 45" maximum
horizontal run

