background image

HearthStone Quality Home Heating Products Inc 

®


 Model  8220


19

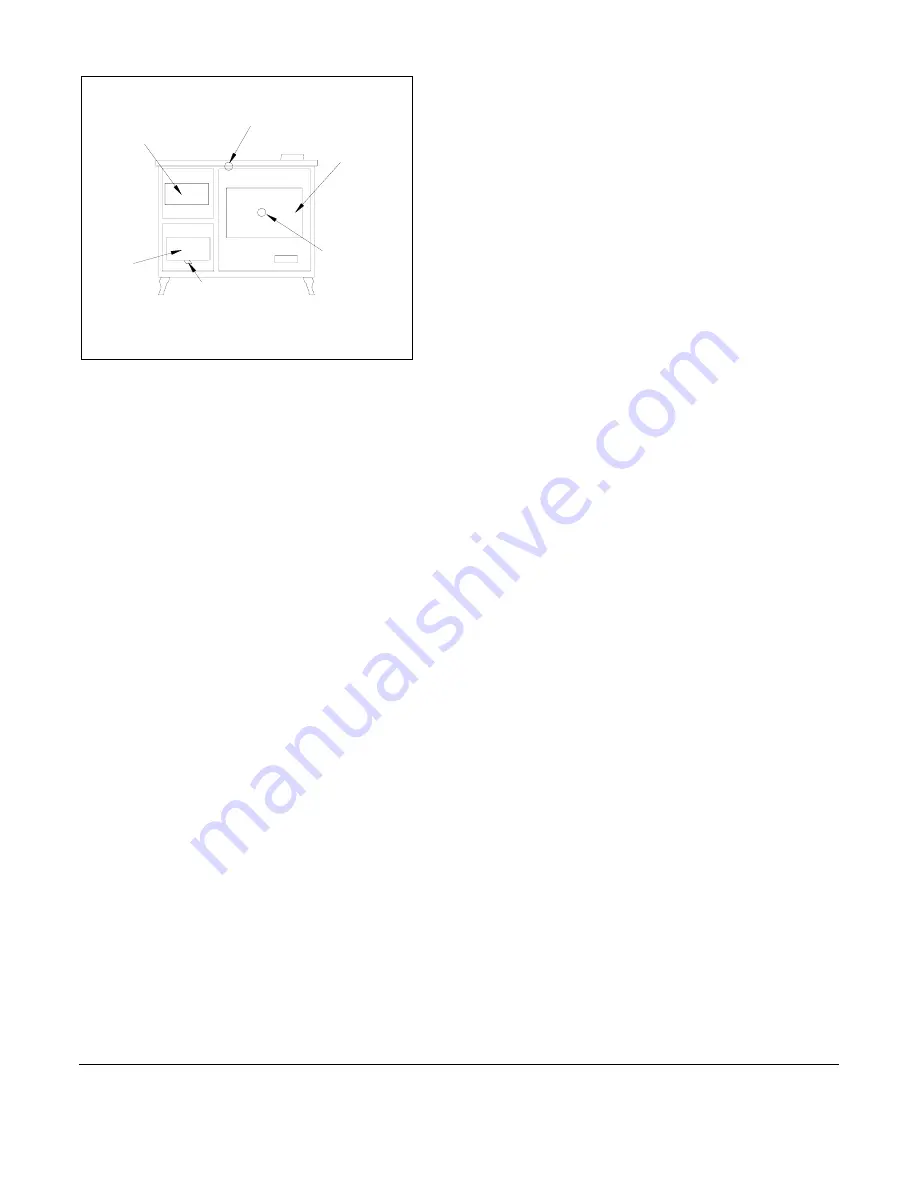
Ash Pan 
Door

Primary Air 
Control

Oven 
Thermometer

Flue Bypass

Fuel Loading 
Door

Oven Door


Figure 2 Controls and Features 


Operating Your Deva 

Wood Stove 

 
WARNING: 

DO NOT INSTALL IN A SLEEPING ROOM 


WARNING: 

HOT WHILE IN OPERATION.  KEEP 
CHILDREN, CLOTHING AND FURNITURE 
AWAY.  CONTACT MAY CAUSE SKIN BURNS. 

 
Please read this entire chapter before lighting 
your first fire.  It explains the controls and 
features of your wood stove, how to choose 
firewood, and how to use your stove on a daily 
basis. 
 

C

ONTROLS 

A

ND 

F

EATURES 


Before lighting any fires,


become familiar with 

the location and operation of your stove's 
controls and features and learn how to use them.  
For your own safety, do not modify these 
features in any way. 


FLUE BYPASS SYSTEM: 

When starting a fire 

in a cold Deva 100 you will need to use the flue 
bypass system. This is the handle at the top 

center of your stove that pushes and pulls in and 
out. To open the bypass, pull the handle out. 
This opens a “bypass” channel that allows the 
hot gases to heat up the chimney quicker. This 
bypass allows for a direct outlet of the flue 
gases and smoke.  With the bypass closed the 
gases follow the normal route around the oven 
and then out. You should keep the bypass open 
until your flue has established a draft. Once a 
draft has been established push the bypass 
closed. This will ensure the most efficient use of 
your Deva.  
*Burning the Deva 100 with the bypass open 
will not allow the oven to reach maximum 
temperatures. 
 

FUEL LOADING DOOR HANDLE

:  The fuel 

loading door allows you to load wood into your 
stove. To open the door, lift the handle to the 9 
o’clock position and pull the door.  To latch the 
door, lower the handle to the 6 o’clock position.  
Pull gently on the door to make sure it is 
properly latched. 


Summary of Contents for Deva 100

Page 1: ...isk of fire follow the installation instructions Failure to follow these instructions may result in property damage bodily injury or even death SAVE THESE INSTRUCTIONS FOR FUTURE REFERENCE Deva 100 Model 8220 6400 40460 Revised 10 12 07 CONTACT LOCAL AUTHORITIES HAVING JURISDICTION BUILDING DEPARTMENT or FIRE OFFICIALS ABOUT PERMITS REQUIRED RESTRICTIONS AND INSTALLATION INSPECTION IN YOUR AREA ...

Page 2: ...HearthStone Quality Home Heating Products Inc 2 Model 8220 ...

Page 3: ...0 Components of a Venting System 12 Installing a Venting System 13 CONNECTING YOUR WOOD FIRED COOKSTOVE 14 Connecting to a Prefabricated Metal Chimney 14 OPERATING YOUR DEVA 100 WOOD STOVE 19 CONTROLS AND FEATURES 19 CHOOSING FIREWOOD 20 BUILDING A FIRE 21 Building A Fire For Everyday Use 21 Burn Rate 22 Over Fire Caution 22 Removal And Disposal Of Ashes 22 MAINTENANCE 23 Creosote Formation And Ne...

Page 4: ...e these instructions as well as national state and local building codes to install your cookstove Be sure to maintain the designated stovepipe and cookstove clearances to walls ceilings hearth and other combustible surfaces This will help reduce the risk of fire Failure to follow these instructions can result in property damage bodily injury and even death Locate your cookstove in a safe convenien...

Page 5: ...ORMATION Read and understand this Owner s Manual thoroughly before installing and using this stove Make sure to install your stove According to the manufacturer s recommendations In accordance with all applicable codes With the proper sized chimney When using your stove Warn children and others unfamiliar with wood fired cookstoves the danger of touching hot radiating surfaces of your stove For yo...

Page 6: ...urn drip into the firebox will may create an ignition Other safety guidelines Keep all combustible items such as furniture drapes clothing and other items at least 36 0 92 m from the cookstove See page 100 for more clearance to combustible information Install a smoke detector Keep a fire extinguisher handy We recommend the type rated A B C Dispose of ashes properly See page 22 PERIODIC CHECKLIST P...

Page 7: ...ney fire follow these instructions 1 If the fire is too threatening leave the area and call the fire department immediately If not perform the next three steps 2 Close the primary air control 3 Close the stovepipe damper if present 4 Keep all doors to the stove closed WARNING DO NOT ATTEMPT TO PUT OUT A STOVEPIPE OR CHIMNEY FIRE BY THROWING WATER ONTO THE STOVE STOVEPIPE OR CHIMNEY THE EXTREMELY H...

Page 8: ...eat Output 46 000 BTUs per hour of cordwood based on independent laboratory test results Maximum Log Length 17 43 cm fuel loading door Height 33 3 4 85 cm Width 40 102 cm Depth 23 3 4 60 cm Fuel loading door dimension 7 x 9 3 4 18 cm x 25 cm Stovepipe Size 6 15 2 cm diameter 2 1 2 23 3 4 33 3 4 40 23 1 4 26 3 4 7 6 33 1 2 6 3 4 6 17 3 4 6 Front ...

Page 9: ...must carefully consider the clearances to all of these combustibles before actually connecting your cookstove When considering these clearances also decide the kind of floor the stove will rest on Depending on your floor you can install your stove as it is or use a floor protector some types of flooring may require additional floor protection Please use this section to plan how to locate your stov...

Page 10: ...or s specification to an R value do one of the following If the R value is given use that value no conversion is needed If a K factor is given with a required thickness T in inches use this formula R value 1 K x T If a C factor is given use the formula R value 1 C To determine the R value of the proposed alternate floor protector Use either the K factor or the C factor formula explained above to c...

Page 11: ... 63 160cm with single wall connector Minimum alcove width is 58 147cm with double wall connector Clearances Single wall connector Double walls connector Top Exit Rear Exit Top Exit Rear Exit in cm in cm in cm in cm A 10 26 4 11 4 11 4 11 B 10 26 4 11 4 11 4 11 C 16 41 16 41 14 36 16 41 D 21 5 55 n a n a 19 5 50 n a n a ALCOVE Top exit connector Clearances Single wall connector Double wall connecto...

Page 12: ...necessary that if you install all of these components they must remain within the clearances to combustibles discussed earlier to install your stove safely To protect against the possibility of a house fire you must properly install and constantly maintain the venting system Upon inspection immediately replace rusted cracked or broken components The chimney connector is the stovepipe from the wood...

Page 13: ...through or chimney support package also keeps the walls from igniting You must use one when connecting through a wall or ceiling to a prefabricated chimney Only install this stove to a lined masonry chimney or an approved high temperature prefabricated residential type building heating appliance chimney Do not connect this stove to a chimney serving another appliance you will compromise the safe o...

Page 14: ...CONNECTING TO A PREFABRICATED METAL CHIMNEY When connecting the Deva 100 to a prefabricated metal chimney you must follow precisely the manufacturer s installation instructions Use only Type HT 2100 deg F prefabricated metal chimneys listed per UL 103 or ULC S629 standards WARNING DO NOT CONNECT THE STOVE TO A CHIMNEY FLUE SERVING ANOTHER APPLIANCE Make sure the size of the chimney s flue is appro...

Page 15: ...vepipe Shield Insulation Access door Masonry Chimney Chimney Sections Tee clean out Adjustable Roof Flashing Storm Collar Chimnet Cap Chimney is supported by Tee Support Bracket Chimney is supported by Ceiling Whenever possible choose an interior chimney An interior chimney heats up more quickly and retains its heat thus promotes a better draft and discourages the formation of creosote An exterior...

Page 16: ...tove until the chimney is safe for use Make sure the chimney s cleanout is complete and working properly To avoid a loss of draft the cleanout must close off completely If allowed to cool your stove will perform poorly and creosote will build up in the chimney Make sure the size of the chimney s flue is appropriate for this stove and that it is not too large Use a masonry chimney with an 8 x 8 203...

Page 17: ...eet 0 9 m higher than the highest part of the roof opening through which it passes At least 2 feet 0 6 m higher than any part of the roof within 10 feet 3 m measured horizontally from the top of the chimney This stove requires a minimum chimney height of 13 feet 4 m The maximum allowable chimney height is 30 feet 9 m ...

Page 18: ...HearthStone Quality Home Heating Products Inc Model 8220 18 ...

Page 19: ...g a fire in a cold Deva 100 you will need to use the flue bypass system This is the handle at the top center of your stove that pushes and pulls in and out To open the bypass pull the handle out This opens a bypass channel that allows the hot gases to heat up the chimney quicker This bypass allows for a direct outlet of the flue gases and smoke With the bypass closed the gases follow the normal ro...

Page 20: ...OR ANY OTHER MATERIALS AS FUEL THEY ARE NOT SAFE DO NOT BURN GARBAGE The quality of your firewood affects heat output duration of burn and performance of your stove Softwoods generally burn hotter and faster while hardwoods burn longer and produce more coals Density and moisture content are two critical factors to consider when purchasing wood for your stove The following is a list of wood species...

Page 21: ...to 431 mm long 2 Open the flue bypass system by pulling the handle out completely as described on page 18 3 Fully open the primary air control by pushing the lever toward the left of the stove 4 Light the paper under the kindling Leave the door slightly ajar momentarily until the kindling has started to burn and draft begins to pull 5 Close the door and allow the fire to burn 6 Once the kindling i...

Page 22: ...al cordwood OPERATOR ERROR Make sure all the gaskets are in good condition Replace worn out or compressed gaskets Do not burn the stove with the fuel loading door or ash pan door in the open position Monitoring the temperature is the best way to determine that the stove is over firing If you suspect that your stove is over firing contact your dealer immediately Damage done by over firing is not co...

Page 23: ...ccumulated it should be removed to reduce the risk of a chimney fire The venting system must be inspected at the stove connection and at the chimney top Cooler surfaces tend to build creosote deposits quicker so it is important to check the chimney at the top where it is coolest as well as from the bottom near the stove Accumulated creosote should be removed with a cleaning brush specifically desi...

Page 24: ...If you replace the glass yourself wear work gloves and safety glasses The procedure for the fuel loading door glass and glass gasket replacement is as follows 1 Remove the top hinge straight up and away from the stove 2 Remove the door by pulling it up and away from the stove 2 Place the door face down on a flat smooth surface 3 Apply penetrating oil to the 2 screws in the retention frame Remove t...

Page 25: ...ys promote a stronger draft Other draft guidelines are as follows AN AIRTIGHT HOUSE If your home is super insulated or especially well sealed the infiltration air supply to the interior of the house may be inadequate This phenomenon of air starvation within the building can be exacerbated if exhaust fans such as clothes dryers bathroom fans or cook stove exhaust fans are in operation within the ho...

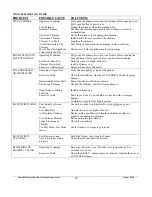
Page 26: ...LLED OR SHORT BURN Unsealed or Open Door Close the door tightly or replace the gaskets Excessive Draft Check the installation Operate at LOW BURN Install stovepipe damper Deteriorated Cement Seals Reseal the stove with furnace cement Extra Long Chimney Shorten the chimney Install stovepipe damper High Winds or Hilltop Location Install a chimney cap Excessive Draft Draft in excess of 0 1 wc should ...

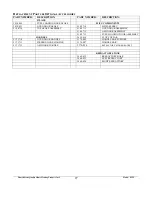
Page 27: ...S 91 59710 SIDE ASSEBLY 91 58710 TOP GLASS ASSEMBLY 91 58711 OVEN DOOR ASSEMBLY 91 58712 ASH DOOR ASSEMBLY 91 58713 FUEL LOADING DOOR ASSEMBLY HANDLES 2650 016 FLUE COLLAR 91 71710 OVEN DOOR HANDLE 5170 005 HANDLE BAR SUPPORT 91 71711 FIREBOX DOOR HANDLE 5170 007 HANDLE BAR 91 71712 ASH DOOR HANDLE 5170 010 REFRACTORY STONE BRACKET REFRACTORY STONE 3060 432 REFRACTORY BASE 3060 433 LEFT REFRACTORY...

Page 28: ...TE AND INS TRUCTIONS INSPECT AND CLEAN CHIMNEY AND CONNECTOR FREQUENTLY UNDER CERTAIN CONDITIONS OF USE CREOSOTE BUILDUP MAY OCCUR RAPIDLY VENT REQUIREMENTS When installed on a combustible floor minimal hearth protection must be a non combustible material with an R value of at least 0 89 underneath the cookstove that extends 16 US 46cm CAN ear exit of the stove the floor protection must extend und...

Page 29: ...anniversary of the Purchase Date Ceramic cook top LIMITED ONE YEAR WARRANTY HearthStone warrants the following parts of the wood burning cookstove against the following occurrences that result from defects in material and workmanship Enamel Finish against peeling or fading excluding chipping mechanical abrasion chemical abrasion or crazing Stove cement and all gaskets against breakage or deteriora...

Page 30: ...TICULAR PURPOSE SHALL APPLY TO THE SUBJECT COOKSTOVE SOME STATES DO NOT ALLOW LIMITATIONS ON HOW LONG AN IMPLIED WARRANTY LASTS SO THE ABOVE LIMITATION MAY NOT APPLY TO YOU THE WARRANTIES CONTAINED IN THIS DOCUMENT EXTEND ONLY TO THE ORIGINAL PURCHASER OF THE COOKSTOVE WARRANTED HEREUNDER THEY DO NOT EXTEND TO ANY SUBSEQUENT OWNERS UNDER NO CIRCUMSTANCES SHALL HEARTHSTONE BE LIABLE TO THE ORIGINAL...

Page 31: ...r all shipping costs related to shipping Cookstove parts to and from HearthStone or a Dealer as the case may be Shipping cost for the Cookstove Within the first 1st year after the Purchase Date if the Original Purchaser is instructed to return the Cookstove to HearthStone or a Dealer for repair HearthStone will pay fifty percent 50 and the Original Purchaser will pay fifty percent 50 of the shippi...

Reviews: