background image

Hearthstone 

Quality Home Heating Products, Inc 

®                                                                                                                                                                     Manchester Model 8360           

26 

C

REOSOTE 

F

ORMATION 

&


R

EMOVAL 


When wood burns slowly at low temperatures, it may 
produce  tar  and  other  organic  vapors,  which 
combine  with  expelled  moisture  to  form  creosote. 
These  creosote  vapors  condense  in  the  relatively 
cool chimney flue of a slow-burning fire. As a result, 
creosote  residue  accumulates  on  the  flue  lining. 
When ignited, this creosote makes an extremely hot 
fire, which may damage the chimney or even destroy 
the house. When burning wood, inspect the chimney 
connector  and  chimney  at  least  once  every  two 
months  during  the  heating  season  to  determine  if 
there is a creosote buildup.  

If  a  creosote  build-up  occurs,  inspect  the  stovepipe 
connector and chimney more often, at least monthly 
during  the 

heating 

season 

to  monitor 

the 

accumulation. If a creosote residue greater that 1/4" 
(6 mm) accumulates, remove it to reduce the risk of 
a chimney fire. 

Prevention 

Burn the stove with the primary air control fully open 
for  35  -  45  minutes  daily  to  burn  out  creosote 
deposits  from  within  the  stove  and  the  venting 
system. 

After  reloading  with  wood,  burn  the  stove  with  the 
primary  air  control  fully  open  for  15  to  20  minutes. 
This manner of operation ensures early engagement 
of the secondary combustion system that minimizes 
creosote buildup in the chimney. 

If  your  glass  always  remains  dirty,  your  operating 
temperatures  are  too  low  or  your  wood  is  wet; 
therefore, there is a higher risk of creosote buildup. 

Inspect  the  venting  system  at  the  stove  connection 

and

  at  the  chimney  top.  Cooler  surfaces  tend  to 

build  creosote  deposits  faster,  so  it  is  important  to 
check the chimney at the top (where it is coolest) as 
well as from the bottom near the stove. 

Cleaning 

Remove  accumulated  creosote  with  a  cleaning 
brush  specifically  designed  for  the  type  of  chimney 
in  use. We  recommend  you  use  a  certified  chimney 
sweep  to  perform  this  service.  Contact  your  dealer 
for  the  name  of  a  certified  chimney  sweep  in  your 
area (your dealer may be a certified sweep!).  

We  recommend  that  before  each  heating  season 
you have the entire system professionally inspected, 
cleaned and repaired, if necessary. 

G

ASKETS 


Replace  door  gasket  material  every  two  to  three 
seasons,  or  whenever  it  becomes  deteriorated  or 
loose,  depending  on  stove  use.  If  the  door  seal 
leaks,  a  new  gasket  will  ensure  a  tight  seal  and 
improve stove performance.  

We 

recommend 

you 

only 

use 

Hearthstone 

replacement gaskets when you need to replace your 
door gasket. Contact your dealer for a gasket kit that 
includes instructions, and the gasket for your stove. 

G

LASS


The  glass  used  in  our  stoves  is  actually  not  plain 
glass, but a tough, clear ceramic material capable of 
operating  at  temperatures  up  to  2300°  F.  Do  not 
operate  the  stove  with  a  broken  door  glass.  Do  not 
abuse the front door by striking or slamming. 

When  necessary,  clean  the  glass.  We  recommend 
using  a  damp  paper  towel  dipped  in  gray  ash.  Rub 
the  inside  of  the  glass  with  a  circular  motion. When 
all  the  deposits  are  removed,  clean  up  with  window 
cleaner  or  with  commercial  stove  glass  cleaners, 
which  are  available  from  your  local  dealer.  Never 
attempt to clean the glass while the fire is burning or 
while the glass is hot. Remove deposits by following 
the  instructions  provided  with  the  cleaner. Wipe  the 
cleaner  off  with  a  soft  cloth,  or  black  &  white 
newsprint. 

Important:

    scratching  or  etching  the  glass 

will  weaken  the  integrity  of  the  glass.  Do  not 
use  a  razor  blade,  steel  wool,  or  any  other 
abrasive  material  to  clean  the  glass.  Use  a 
cleaner 

specifically 

manufactured 

for 

woodstoves only. 

The  front  door  glass  is  a  ceramic,  thermal  shock-
resistant  glass,  made  specifically  for  use  in 
woodstoves.  Do  not  use  any  replacement  glass 
other  than  the  ceramic  glass  manufactured  and 
supplied  for  use  in  this  woodstove.  Replacement 
glass is available through your local dealer. 

Replace  the  door  glass  immediately  if  broken  or 
chipped.  Contact  your  local  dealer  for  replacement 
glass.  The  glass  kit  includes  instructions  and 
everything  needed  for  the  repair.  If  you  replace  the 
glass yourself, wear work gloves and safety glasses. 

Required Glass Kit:

 PN: 93-58300


(Glass with 

gasket applied). 


Summary of Contents for Manchester 8360

Page 1: ...W MANCHESTER WOOD STOVE If this room heater is not properly installed a house fire may result To reduce the risk of fire follow the installation instructions Failure to follow these instructions can result in property damage bodily injury or even death Conforms to UL Std 1482 Certified to ULC Std S627 CONTACT LOCAL AUTHORITIES WITH JURISDICTION BUILDING DEPARTMENT or FIRE OFFICIALS ABOUT PERMITS R...

Page 2: ...Hearthstone Quality Home Heating Products Inc Manchester Model 8360 1 Intentionally Blank ...

Page 3: ...STIBLE SURFACE REQUIRED CLEARANCES 9 CHIMNEY CONNECTOR SYSTEMS AND CLEARANCES 10 OUTSIDE AIR SUPPLY 12 VENTING COMPONENTS CONFIGURATION REQUIREMENTS 13 INSTALLING IN A MOBILE HOME 18 OPERATION 19 CONTROLS AND FEATURES 19 CHOOSING FIREWOOD 21 BUILDING A FIRE 22 NORMAL OPERATION 22 MAINTENANCE 25 GLASS REPLACEMENT PROCEDURES 25 CREOSOTE FORMATION REMOVAL 26 GASKETS 26 GLASS 26 TROUBLESHOOTING 27 TRO...

Page 4: ...tions can result in fire property damage bodily injury and even death Install the stove in a safe open area away from traffic flow doors and hallways If possible try to install the stove near an existing chimney and chimney connector It is extremely important to install this stove with the proper clearance from combustible surfaces You can purchase specific connector pipe and special wall covering...

Page 5: ...he ash pan is damaged or not present Never use a wood grate or other device to elevate the fire Never allow logs in the firebox to hit the glass when the door is closed Never slam the door or use the door to force wood in to the stove Never over fire your stove See page 24 Never put articles of clothing or candles on a hot stove Never connect the stove to a flue used by another appliance Other saf...

Page 6: ...6 At the End of Every Season Dismantle the chimney connector and clean it thoroughly Replace any pieces that show signs of rust or deterioration Inspect and if necessary clean your chimney Clean out the inside of the stove thoroughly Inspect all door gasket material and replace if worn frayed cracked or extremely hard EMERGENCY PROCEDURES If you have a stovepipe or chimney fire follow these instru...

Page 7: ...ssions 3 0 gph Burn Time Up to 10 hrs Heat Life Up to 13 hours Note The amount and weight of wood contained per cubic foot of firebox volume can vary from 15 to 36 lbs per cubic foot depending on type of wood moisture content packing density and other factors Stove Dimensions Height 32 1 8 81 6cm Width 30 1 4 76 83cm Depth 20 50 80cm Weight 520 lbs 236 kg Connector Size 6 152 mm diameter Metal Chi...

Page 8: ...d chimney chase You must carefully consider the clearances to all of these combustibles before actually connecting your stove If the floor is made of combustible material then a non combustible floor protector is required between the floor and the stove An example of a non combustible floor protector is a hearth constructed with a continuous layer of tile brick slate glass or another non combustib...

Page 9: ...he minimum floor protection must be met under the stove and extend beyond the stove as follows The minimum floor protection for US installations is 48in x 36 3 4in The minimum floor protection for installations in Canada is 56in x 44in Installations in Canada require 18 45 72 cm of floor protection on both side and front Rear clearance required only if stovepipe runs horizontally back above the to...

Page 10: ...h Close Clearance Heat Shield 18 46cm 10 26cm 15 39cm 33 625 86cm 9 23cm Double Wall Connector No Close Clearance Heat Shield 16 41cm 16 41cm 21 54cm 31 625 81cm 9 23cm Double Wall Connector With Close Clearance Heat Shield 16 41cm 6 16cm 11 28cm 31 625 81cm 9 23cm Alcove Clearances inches Unprotected Surfaces Protected Surfaces NFPA 211 Minimum alcove width 62 25 159cm See NFPA 211 Maximum alcove...

Page 11: ...e Elbow With Heat Shield Without Heat Shield With Heat Shield Without Heat Shield A A A A 18 or More 10 16 6 16 Less Than 18 14 16 10 16 Direct Rear Exit n a 14 n a 6 For double wall pipe clearance to ceiling refer to pipe manufacturer specifications Close Clearance Heatshield kit 93 68600 See Parallel Clearance to Combustibles for clearances to the sides of the stove ...

Page 12: ...Hearthstone Quality Home Heating Products Inc Manchester Model 8360 11 Chimney Connector Systems and Clearances ...

Page 13: ...f the house to the hearth keep in mind the need to avoid structural members of the house The outside air kit attaches to the back of the stove Refer to the instructions provided with the kit for installation Figure 6 Outside Air Kit Detail The International Residential Code IRC does not allow the outside air duct to terminate higher than the appliance Some building officials also do not like to se...

Page 14: ...Upon inspection immediately replace rusted cracked or broken components The chimney connector is the stovepipe from the woodstove to the chimney The chimney connector stovepipe is 6 152 mm diameter 24 MSG or 25 MSG blued steel connector pipe Do not use aluminum or galvanized steel pipe they cannot withstand the extreme temperatures of a wood fire The thimble is a manufactured or site constructed d...

Page 15: ...here are two ways to install a prefabricated metal chimney An interior installation where the chimney passes inside the residence through the ceiling and roof An exterior installation where the chimney passes through the wall behind the stove then up the outside of the residence Whenever possible choose an interior chimney An interior chimney heats up quickly and retains its heat thus promotes a b...

Page 16: ...r insulated or wrapped liner or the space around the liner filled with vermiculite or suitable material these keep the liner warmer for better performance Ensure any equivalent flue liner is a listed chimney liner system meeting type HT requirements or other approved material Interior chimney requirements Must have at least 2 51 mm clearance to combustible materials Must install fire stops at the ...

Page 17: ...Hearthstone Quality Home Heating Products Inc Manchester Model 8360 16 Figure 7 Typical Chimney Configurations ...

Page 18: ...Hearthstone Quality Home Heating Products Inc Manchester Model 8360 17 Figure 8 Chimney Height Requirements 3 0 MINIMUM 10 0 2 0 MINIMUM 3 0 MINIMUM 2 0 MINIMUM ...

Page 19: ...nd trim any UL or ULC approved equipment is acceptable WARNING DO NOT INSTALL IN A SLEEPING ROOM IN A MOBILE HOME CAUTION MAINTAIN THE STRUCTURAL INTEGRITY OF THE MOBILE HOME WALLS FLOOR CEILING AND ROOF WHEN INSTALLING AND USING YOUR STOVE Burning any fuel other than wood in this unit could generate dangerous levels of carbon monoxide within the living space THE FRONT DOOR SIDE DOOR AND ASH PAN D...

Page 20: ...le and swing the door away from the stove To latch the door push the door tightly towards the firebox then continue to push the handle in and down until it latches shut Gently pull on the door handle to make sure it is properly latched ASH PAN This becomes hot during operation It is best to remove the ash pan only after the stove cools To access the ash pan you must open the ash door Grip the ash ...

Page 21: ...ir control allows you to regulate the amount of air entering the firebox Generally the more air allowed into the firebox the faster the rate of burn conversely less air creates a slower burn For maximum air flow move the lever to the left as far as possible move the lever as far right as possible for minimum air flow does not close completely Figure 13 Air Control Low Position ...

Page 22: ...u Content Common Name Lb cord MBTU cord High Osage Orange Hedge 4 728 32 9 Hickory Shagbark 4 327 27 7 Hop Hornbeam Ironwood 4 267 27 3 Beech Blue Ironwood 3 890 26 8 Birch Black 3 890 26 8 Locust Black 3 890 26 8 Hickory Bitternut 3 832 26 7 Locust Honey 3 832 26 7 Apple 4 100 26 5 Mulberry 3 712 25 8 Oak White 4 012 25 7 Medium High Beech European 3 757 24 Maple Sugar 3 757 24 Oak Red 3 757 24 A...

Page 23: ...ill dissipate over time You can alleviate these odors by opening a few windows or otherwise creating additional ventilation around your stove If any odor persists contact your dealer or an authorized service technician If you adhere to the operating procedures in this manual the steel cast iron and refractory components of your stove will give you many years of trouble free use With use the color ...

Page 24: ...t can promote the accumulation of creosote Inspect the venting system frequently if using low burn rates consistently MEDIUM LOW BURN With the primary air control in the low position lightly tap the lever to the left a little less than 1 16 A medium low burn rate is the typical setting and is preferable if the stove is unattended At this burn rate a little goes a long way MEDIUM HIGH BURN With the...

Page 25: ...RT UP AND LOADING REMOVAL AND DISPOSAL OF ASHES Remove ashes only when the stove is cold Use the provided protective fireplace glove if the ash pan is warm Exercise extreme caution when handling storing or disposing of ashes The ash pan is located behind the ash door at the bottom front of the stove The ash pan collects burned ash from a fire and allows you to remove the ash conveniently from your...

Page 26: ...and place a small amount of anti seize compound in each one 7 Place the gasketed new glass onto the door Ensure sticker is on the exterior face of the glass 8 Important Center the glass and ensure that the edges of the glass are parallel with the edges of the opening 9 Check glass position again centered and parallel then screw the glass retainer clips back on the door using a crisscross pattern T...

Page 27: ... your area your dealer may be a certified sweep We recommend that before each heating season you have the entire system professionally inspected cleaned and repaired if necessary GASKETS Replace door gasket material every two to three seasons or whenever it becomes deteriorated or loose depending on stove use If the door seal leaks a new gasket will ensure a tight seal and improve stove performanc...

Page 28: ...lines are as follows An AIRTIGHT HOUSE The air supply infiltration to the interior of the house may be inadequate if your home is super insulated or especially well sealed This phenomenon of air starvation within the building is exacerbated if exhaust fans such as clothes dryers bathroom fans or cook stove exhaust fans are in operation within the home Outfitting your stove with the optional outsid...

Page 29: ...cy of burns and avoid using poor quality or green wood UNCONTROLLED OR SHORT BURN Unsealed or Open Door Close the door tightly or replace the gaskets Excessive Draft Check the installation Operate at LOW BURN Install stovepipe damper Draft in excess of 0 1 wc should be corrected with a stovepipe damper s Extra Long Chimney Shorten the chimney Install stovepipe damper s Oversized Chimney Reline the...

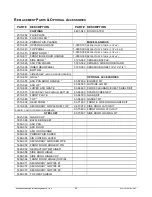
Page 30: ...55 ASH PAN DOOR HANDLE 93 57600 BLOWER KIT 2310 660 ASH LIP 93 53500 OUTSIDE AIR KIT 2310 665 LOWER ASH GRATE 93 68600 CLOSE CLEARANCE HEAT SHIELD KIT 2310 670 SECONDARY AIR PLENUM BOTTOM 93 69600 SPARK SCREEN KIT 2310 675 FRONT PLATE 93 58300 GLASS KIT 2310 685 TOP 93 58600 GASKET KIT 2310 690 REAR PANEL 93 71600 FRONT SIDE DOOR HANDLE KIT 2310 695 SECONDARY AIR PLENUM TOP 94 73910 SIDE DOOR LATC...

Page 31: ...Hearthstone Quality Home Heating Products Inc Manchester Model 8360 30 Safety Label ...

Page 32: ...onestoves com or send a completed and signed Warranty Registration Form which is enclosed in the Woodstove warranty packet to the following address Hearthstone Quality Home Heating Products Inc Warranty Department 317 Stafford Avenue Morrisville VT 05661 NOTE SENDING IN THE SIGNED WARRANTY REGISTRATION FORM IS NOT REQUIRED AS A CONDITION OF WARRANTY COVERAGE OR HEARTHSTONE S PERFORMANCE ...

Page 33: ...Hearthstone Quality Home Heating Products Inc Manchester Model 8360 32 Notes ...

Reviews: