Hearthstone
Quality
Home
Heating
Products ,
Inc.
ODEL
8521
Sterling
“G”
B-Vent
12
Lighting the Unit for the First Time
Once the Sterling has been set in place and
connected as described above, the unit is ready to
be lit for the first time. Each Sterling is tested prior
to shipment by the manufacturer, so ignition should
take place without failure. However, a number of
small adjustments may be necessary to compensate
for variations in gas pressure, altitude and other
factors particular to each installation. Lighting the
Sterling for the first time and adjustments to the unit
should be performed by qualified service personnel.
W
ARNING
P
RIOR
T
O
F
IRST
L
IGHTING OF
U
NIT
S
MOKE AND
F
UMES
W
ARNING
When lit for the first time the Sterling will emit
some smoke and fumes. This is normal
"off-
gassing"
of the paints and oils used in the assembly
and manufacturing of the unit. Open windows to
vent the room as necessary. The off-gassing and
fumes will subside after the first 10 to 20 minutes of
operation.
B
REAK
-I
N
W
ARNING
The natural stones used in the assembly of the
Sterling were polished using a water-based polishing
system prior to assembly of the unit. Any residual
moisture in the stones must be dried out slowly to
avoid damaging the stones. This is accomplished
by adhering to the following break-in procedure.
When lit the first three times, the Sterling should
be burned for no more than 10 minutes, then
allowed to cool for 1 to 2 hours. This gentle
warming and cooling of the unit will allow any
residual moisture in the stones to evaporate slowly.
Once this break-in procedure has been completed,
the Sterling can be burned at will with no time
restrictions on the length of burn.
P
ILOT
L
IGHT
W
ARNING
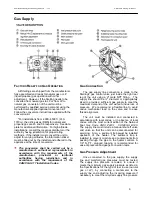
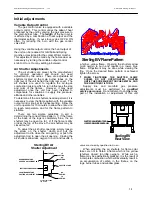
The Sterling has a piezoelectric spark igniter (the
push button located just above the gas control valve
behind the valve access door) which ignites the pilot
light by means of a spark at the pilot light assembly.
Do not attempt to light the unit with a match or by
any means other than the piezoelectric spark.
I
NSTRUCTIONS
P
RIOR
T
O
F
IRST
L
IGHTING
OF
U
NIT
B
EFORE
L
IGHTING
, smell all around the appliance
area for gas. Be sure to smell next to the floor
because some gases are heavier than air and will
settle on the floor. If you smell gas immediately
follow the
What To Do If You Smell Gas Warning on
the cover of this manual.
Use only your hand to turn the gas control knob.
Never use tools. If the knob will not push in or turn
by hand, don't try to repair it; call a qualified service
technician. Any force or attempt to repair may result
in fire or explosion.
WARNING:
DO NOT USE THIS APPLIANCE IF ANY
PART HAS BEEN UNDER WATER. IMMEDIATELY
CALL A QUALIFIED SERVICE TECHNICIAN TO
INSPECT THE APPLIANCE AND TO REPLACE
ANY PART OF THE CONTROL SYSTEM AND ANY
GAS CONTROL WHICH HAS BEEN UNDER
WATER.
As an additional safety precaution prior to lighting
the unit for the first time, wait 5 minutes to allow any
residual gas within the unit to dissipate. If you do
not smell gas after this five minute period, proceed
with the lighting procedure. If you do smell gas, do
not proceed with the lighting procedure. Instead,
immediately refer to the
What To Do If You Smell
Gas Warning on the cover of this manual.
Prepare for the lighting procedure by adjusting the
thermostat to its lowest setting or
"OFF"
position. If
the gas control knob is not in the
"OFF"
position, turn
the knob fully clockwise to
"OFF"
. Locate the
variable output control and turn it fully clockwise to
the highest setting.


