OWNER’S MANUAL MODEL: 8745 TUCSON Vent-Free HEATER
-16-
* If the knob does not pop out when released,
stop and immediately call a qualified service
technician or gas supplier.
* If the pilot will not stay lit after several tries,
turn the gas control knob clockwise to
“OFF”
and call a qualified service
technician or gas supplier.
7.
After the pilot lights, turn the gas control
knob counterclockwise to
“ON”.
8.
Select the “
ON”
or “
T-STAT”
position of
the On/Off/T-stat switch. Shut the gas
control valve access door.
9.
If the “
T-STAT”
position was selected,
set thermostat to
“ON”
and set the desired
temperature setting.
NOTE:
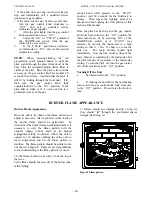
When pressing/clicking the red
piezoelectric spark ignition button to light the
pilot, watch through the glass (front door) of the
unit. Click the red ignitor button until a flame is
visible at the pilot. Once the pilot is lit, continue
to press on the gas control knob for another 20
seconds, then release. Ascertain that the pilot is
still lit by looking through the front door. If lit,
then turn the gas control knob fully
counterclockwise to the
“ON”
position. If the
pilot fails to light or if it went out due to a
premature release of the gas
control knob while pressed in the
“PILOT”
position, wait 60 seconds for the Interlock to
release. Then repeat the lighting process as
described in the Lighting the Unit portion of this
section of the manual.
Once the pilot has been lit, and the gas control
knob has been turned to the
“ON”
position, the
main burners are lit by selecting “
ON”
of the
On/Off/T-stat switch, or if “
T-STAT”
was
selected, by moving the thermostat to a high
setting so that it
“calls”
for heat (i.e. turns the
unit on). The main burners should light
immediately. Note that the on/off cycling of the
main burners is controlled by the thermostat, but
the pilot remains lit regardless of the thermostat
setting. To turn the pilot off, turn the gas control
valve fully clockwise to the
“Off”
position.
Turning Off the Unit
1.
Set thermostat to the
“Off”
position.
2.
If shutting the unit off for the non-heating
season, turn the gas control knob fully clockwise
to the
“Off”
position. Do not force the knob to
turn.
BURNER FLAME APPEARANCE
Burner Flame Appearance
Once the unit is lit, observe the flame pattern and
adjust as necessary. Also a periodic visual check of
the burner flame should be performed. To
determine if the burner flame needs adjustment, it is
necessary to view the flame pattern with the
variable output control knob at its highest
setting(turned fully clockwise). Allow the unit to
operate for 10 minutes enabling the entire unit to
reach temperature and for the flame pattern to
stabilize. The flame pattern should be similar to the
one shown in Figure 8. There are several guidelines
to aid in determining if the flame pattern is correct:
11) the flame should not be dirty or lick the top of
the stove
2) the flame should not raise off of the burner tube,
called “lifting”
3) flames should not impinge heavily on log set,
they should “fit” through the pre-formed spaces
designed in the log set
Figure 8 Flame pattern

