Hearthstone Quality Home Heating Products, Inc.
WAITSFIELD Model 8770
23
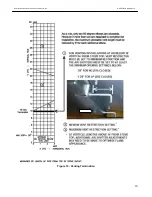
conversion plug by screwing it clockwise until it
bottoms out. The low pressure orifice must also be
changed (
see Figures 20-25
, pages 21 -23).
NOTE: Do NOT adjust and/or alter any components
marked with tamper indicating paint.
To Switch the Valve to LP Operation:
(
Refer to Figures 18-25)
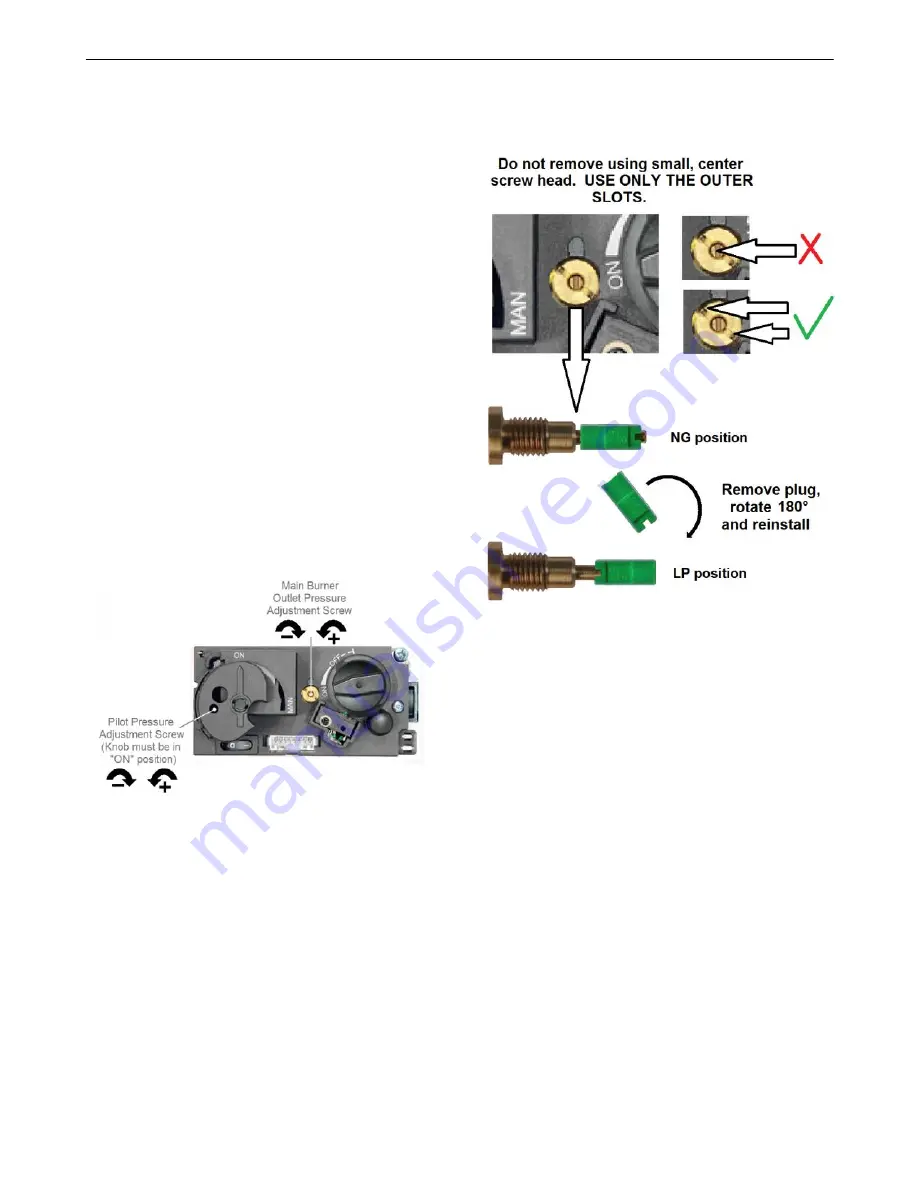
1. Remove the conversion plug from the valve
body.
2. Carefully and without turning the adjusting
screw, grasp the plastic conversion plug at
the end of the pressure screw and remove it
from the shaft by gently pulling away from
the screw head.
3. Flip the conversion plug 180
0
.
4. Slide the conversion plug back on the
pressure screw shaft and gently push until is
clicks in place.
5. Reinstall the screw assembly using only the
outer screw head slot for driving and seat it
fully in the valve.
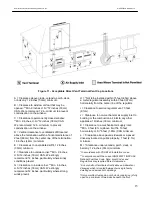
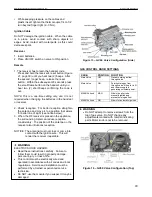
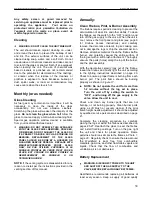
Figure 18
– GV60 Valve Top
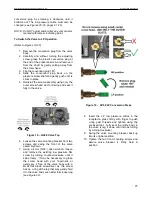
6. Loosen the valve mounting bracket front two
screws and swing the front of the valve
assembly down.
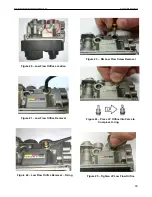
7. Using a 4mm (5/32”) allen wrench, loosen
and remove the existing low pressure NG
screw by turning counter-clockwise until it
spins freely. It may be necessary to grasp
the screw head with your fingernails or
gently pry it free of the valve body with a
small flat blade screwdriver as the screw
has an o-ring at the top that may gently hold
it in the valve body even after fully loosening
(see Figure 22).
Figure 19 - GV60 LP Conversion Steps
8. Insert the LP low pressure orifice in the
receptacle, press firmly with finger to push
o-ring past threads and tighten using the
enclosed tool. Fully seat the orifice body in
the valve (snug it down until it stops turning
by turning clockwise).
9. Swing the valve mounting bracket back up
into its original position.
10. Tighten the two front mounting screws and
assure valve bracket is firmly held in
position.

