


6
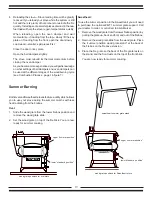
Assembly
Oval / Sweetheart
Before removing the oval stove from the skid, the flu body
must first be attached to the stove back. Follow the instructions
below.
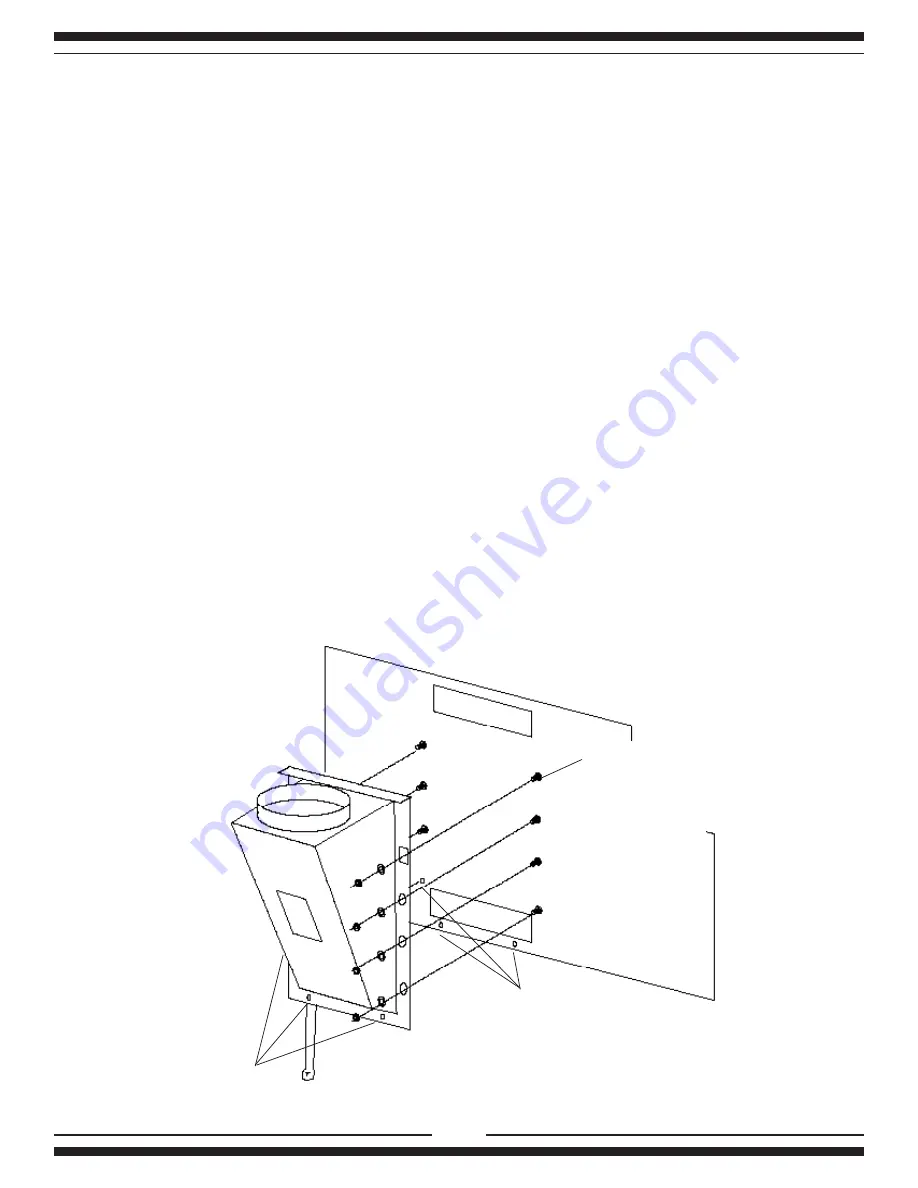
1) Unscrew the flu body from the skid and set aside.
2) Unscrew 3 sheet metal screws (2 along the bottom of the
oven at the bottom and 1 along left side - see illustration)
3) Remove the first level only
of nuts and washers from the
screws extending out the back of the stove (7pcs)
4) Place flu body on back of stove so that the nuts on the
screws fit inside the holes in the flange on each side of the
flu body.
5) While holding the flu body in place, attach the flu to the
stove by putting on a washer and nut on each screw, hand
tight only.
6) Install the sheet metal screws along the bottom and side
of the flu body, and tighten up.(3 places)
7) Tighten up the remaining nuts (7 places)
Back of stove
Remove 3 sheet
metal screws before
installing flu body
Do not remove
these nuts
from the screws,
nuts fit
through holes
in flu body.
Only remove the first
level of nuts and washers
Reinstall 3 sheet metal
screws after installing
flu body
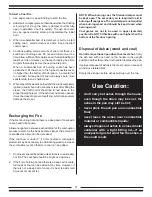
Warning:
The stove is very heavy. Since the legs may dig
into a soft floor, do not locate the stove, or even set it to rest,
on a surface that could be imprinted.
We recommend that 3 or 4 persons be available to assist
in the lifting of the stove, and that gloves should be worn to
protect hands from cuts.
1) First, remove the screws that are holding the flu body to
the skid and remove the flu body.
2) Next, unscrew the two lag bolts which are securing the
front and back of the firebox base. Lighten the stove
by removing the keyplate and lids.
3) Look under the oven and note that the stove must be
lifted up, over the wooden brace located there.
4) With 2 persons on the heavier, firebox side (left), and one
person on the other side, lift the stove up, off of the skid
and onto its new location.
5) If possible, have a fourth person remove the skid while
the others lift.


