background image

Heat & Glo  •  350TSI-P-CEM  •  2033-973  Rev. G  •  4/17

10

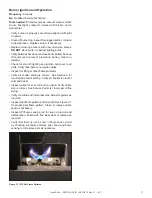
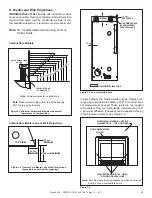
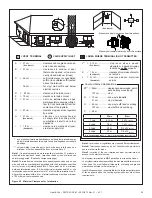
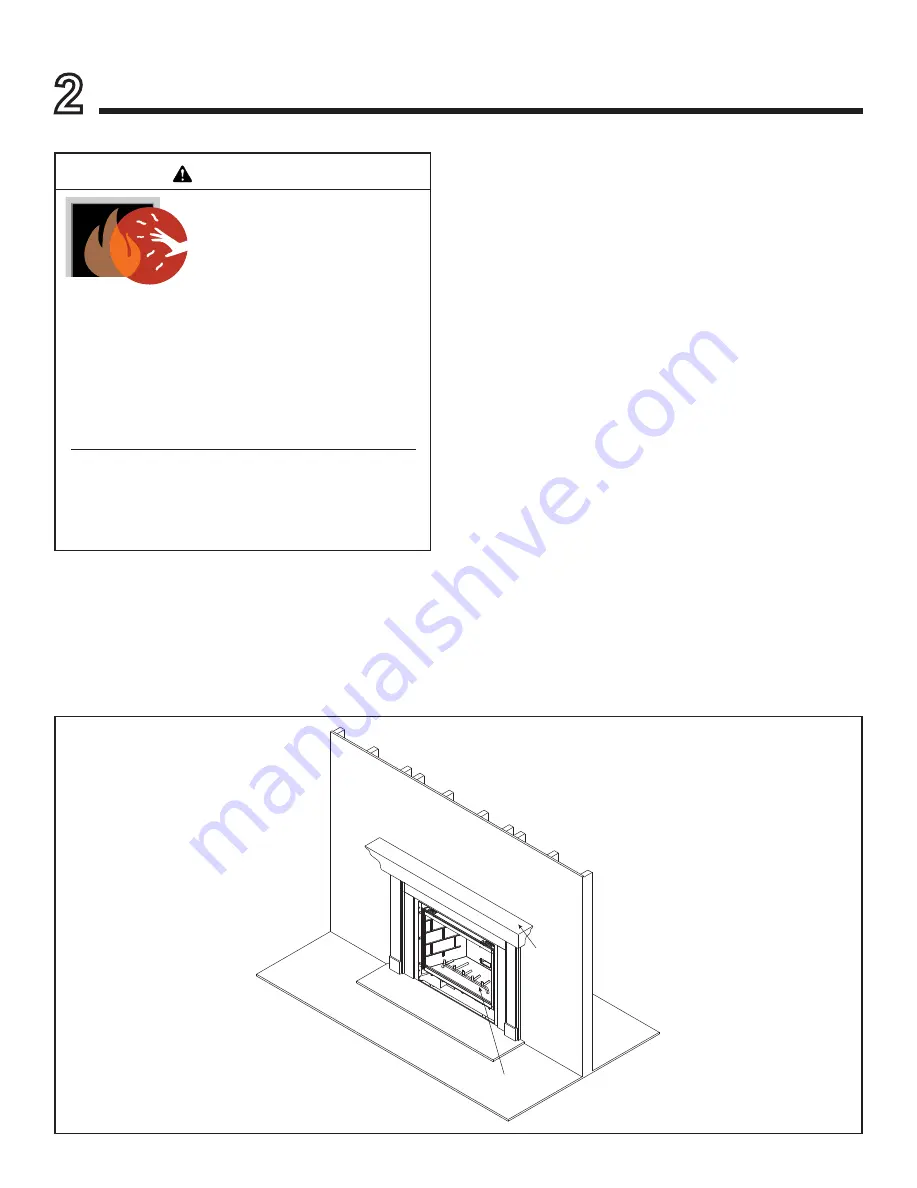
Figure 2.1  General Operating Parts

DECORATIVE DOORS

(NOT SHOWN)

SECTION 2.D.

FIXED GLASS ASSEMBLY

(NOT SHOWN)

SECTION 9.D.

MANTEL

SECTION 5.D

HEARTH

CLEAR SPACE

SECTION 2.C.

GRATE

Operating Instructions 


B.  Your Fireplace

WARNING!  DO  NOT  operate  fireplace  before  read

-

ing and understanding operating instructions. 

Failure 

to  operate  fireplace  according  to  operating  instructions 

could cause fire or injury.

This appliance is not intended for use by persons (including 

children) with reduced physical, sensory or mental capa

-

bilities, or lack of experience and knowledge, unless they 

have been given supervision or instruction concerning use 

of the appliance by a person responsible for their safety.
Children should be supervised to ensure that they do not 

play with the appliance.

A.  Gas Fireplace Safety

WARNING

This appliance has been supplied with an integral barrier 

to prevent direct contact with the fixed glass panel. DO 

NOT operate the appliance with the barrier removed. 

Contact your dealer or Hearth & Home Technologies if the 

barrier is not present or help is needed to properly install one.

HOT SURFACES

Glass and other surfaces are hot during 

operation AND cool down.

Hot glass will cause burns.

• 

DO NOT

 touch glass until it is cooled

•  NEVER allow children to touch glass

•  Keep children away

•  CAREFULLY  SUPERVISE  children  in  same  room  as 

fireplace.

•  Alert children and adults to hazards of high temperatures.

High temperatures could ignite clothing or other 

flammable materials.

•  Keep clothing, furniture, draperies and other flammable 

materials away.

If you expect that small children or vulnerable adults may 

come into contact with this fireplace, the following precau

-

tions are recommended:
•  Install a physical barrier such as:
  -  A decorative firescreen.
  -  Adjustable safety gate.
•  Install a switch lock or a wall/remote control with child 

protection lockout feature.

•  Keep remote controls out of reach of children.
•  Never leave children alone near a hot fireplace, whether 

operating or cooling down.

•  Teach children to NEVER touch the fireplace.
•  Consider not using the fireplace when children will be 

present.

To prevent unintended operation when not using your fire

-

place  for  an  extended  period  of  time  (summer  months, 

vacations, trips, etc):
•  Remove batteries from remote controls.
•  Turn off wall controls.
•  Unplug 6 volt adapter plug and remove batteries on IPI 

models.

User Guide

Summary of Contents for 350TSI-P-CEM

Page 1: ... HOT SURFACES Glass and other surfaces are hot during operation AND cool down Hot glass will cause burns DO NOT touch glass until it is cooled NEVER allow children to touch glass Keep children away CAREFULLY SUPERVISE children in same room as fireplace Alert children and adults to hazards of high temperatures High temperatures could ignite clothing or other flammable materials DO NOT place article...

Page 2: ...al authorities requirements for gas electrical and building regulations This appliance and its components are tested and safe when installed in accordance with this Installation Manual Report to your dealer any parts damaged in shipment specifically check glass condition The gas logs and flue system components are in separate packages Read all instructions before starting installation and follow t...

Page 3: ...ined in this owner s manual unless noted otherwise applies to all models and gas control systems Your new Heat Glo gas fireplace will give you years of durable use and trouble free enjoyment Welcome to the Heat Glo family of fireplace products We recommend that you record the following pertinent information about your fireplace Serial Number Type of Gas The model information regarding your specifi...

Page 4: ...9 C Tools and Supplies Needed 19 D Inspect Appliance and Components 19 5 Framing and Clearances A Selecting Appliance Location 20 B Constructing the Appliance Chase 21 C Clearances 21 D Mantel and Wall Projections 23 6 Termination Locations A Vent Termination Minimum Clearances 24 7 Vent Information and Diagrams A Approved Pipe 26 B Vent Table Key 26 C Use of Elbows 26 D Measuring Standards 26 E V...

Page 5: ...e Setup A Remove Fixed Glass Assembly 59 B Remove the Shipping Materials 59 C Clean the Appliance 59 D Accessories 59 E Air Shutter Setting 59 15 Troubleshooting A IntelliFire Plus Ignition System 60 16 Reference Materials A Appliance Dimension Diagram 62 B Maintenance Tasks 63 C Vent Components Diagrams 64 D Service Parts 68 E Contact Information 71 ...

Page 6: ...of original purchase In the case of new home construction warranty coverage begins on the date of first occupancy of the dwelling or six months after the sale of the product by an independent authorized HHT dealer distributor whichever occurs earlier The warranty shall commence no later than 24 months following the date of product shipment from HHT regardless of the installation or occupancy date ...

Page 7: ...oes not cover the following Changes in surface finishes as a result of normal use As a heating appliance some changes in color of interior and exterior surface finishes may occur This is not a flaw and is not covered under warranty Damage to printed plated or enameled surfaces caused by fingerprints accidents misuse scratches melted items or other external sources and residues left on the plated s...

Page 8: ...al room heat or as a decorative appliance It should not be factored as primary heat in residential heating calculations The Heat Glo gas appliances discussed in this Installer s Guide have been tested to certification standards and listed by the applicable laboratories This appliance must be installed in accordance with the rules in force NOX Class 5 for G20 NOX Class 5 for G31 B Additional Relate...

Page 9: ...are those consisting entirely of steel iron brick tile concrete slate glass or plasters or any combination thereof Materials that are reported as passing ASTM E 136 Standard Test Method for Behavior of Materials in a Vertical Tube Furnace at 750 ºC F Combustible Materials Specification Materials made of or surfaced with wood compressed pa per plant fibers plastics or other material that can ignite...

Page 10: ...elp is needed to properly install one HOT SURFACES Glass and other surfaces are hot during operation AND cool down Hot glass will cause burns DO NOT touch glass until it is cooled NEVER allow children to touch glass Keep children away CAREFULLY SUPERVISE children in same room as fireplace Alert children and adults to hazards of high temperatures High temperatures could ignite clothing or other fla...

Page 11: ...ials have been removed from inside and or underneath the firebox Review proper placement of logs ember material and or other decorative materials Check the wiring Check the air shutter adjustment Ensure that there are no gas leaks Ensure that the glass is sealed and in the proper position and that the integral barrier is in place WARNING Risk of Fire or Asphyxiation DO NOT op erate fireplace with ...

Page 12: ...the flame output will automatically drop to the lowest setting after the flame has been established for 10 sec After this 10 second period the flame can be adjusted from HI to LO with the switch 3 The control module has safety feature that automatically shuts down the fireplace after 9 hours of continuous operation without receiving a command from the RC300CE remote 4 If you intend to use both an ...

Page 13: ... YOU SMELL GAS DO NOT try to light any appliance DO NOT touch any electric switch do not use any phone in your building DO NOT CONNECT LINE VOLT AGE 110 120 VAC OR 220 240 VAC TO THE CONTROL VALVE Improper installation adjustment al teration service or maintenance can cause injury or property damage Re fer to the owner s information manual provided with this appliance This appliance needs fresh ai...

Page 14: ... may release an odor for the first several hours This is caused by the curing of materials from manufacturing Odor may also be released from finishing materials and adhesives used near the fireplace These circumstances may require additional curing related to the installation environment Film on the glass This is a normal result of the curing process of the paint Glass should be cleaned within 3 t...

Page 15: ...replace will give you many years of trouble free service We recommend an nual service by a qualified service technician Doors Surrounds Fronts Frequency Annually By Homeowner Tools needed Protective gloves stable work surface Assess condition of screen and replace as necessary Inspect for scratches dents or other damage and repair as necessary Check that louvers are not blocked Vacuum and dust sur...

Page 16: ...rebox Frequency Annually By Qualified Service Technician Tools needed Protective gloves sandpaper steel wool cloths mineral spirits primer and touch up paint Inspect for paint condition warped surfaces corrosion or perforation Sand and repaint as necessary Replace fireplace if firebox has been perforated Control Compartment and Firebox Top Frequency Annually By Qualified Service Technician Tools n...

Page 17: ...ion carryover to all ports Verify that there is no ignition delay Inspect for lifting or other flame problems Verify air shutter setting is correct See Section 9 for required air shutter setting Verify air shutter is clear of dust and debris Inspect orifice for soot dirt and corrosion Verify orifice size is correct See Service Parts List for proper orifice sizing Verify manifold and inlet pressure...

Page 18: ...F RAFTERS SECTION 8 FRAMING HEADED OFF IN CEILING JOISTS SECTION 8 C GAS LINE SECTION 11 MANTEL AND MANTEL LEG SECTION 5 D SURROUND HEARTH EXTENSION VENT PIPE SECTIONS 7 8 OPTIONAL WALL SWITCH SECTION 12 C STORM COLLAR SECTION 10 I NON COMBUSTIBLE ROOF FLASHING MAINTAINS MINIMUM CLEARANCE AROUND PIPE SECTION 10 H FRAMING HEADER SECTION 5 C ATTIC INSULATION SHIELD NOT SHOWN MUST BE USED HERE TO KEE...

Page 19: ... parts could impair safe operation DO NOT install damaged in complete or substitute components Keep appliance dry C Tools and Supplies Needed Before beginning the installation be sure that the following tools and building supplies are available Tape measure Framing material Pliers Manometer Hammer Phillips screwdriver Gloves Framing square Voltmeter Electric drill and bits 1 4 in Plumb line Safety...

Page 20: ...rom furniture and draperies NOTICE Illustrations reflect typical installations and are FOR DESIGN PURPOSES ONLY Illustrations diagrams are not drawn to scale Actual installation may vary due to individual design preference Figure 5 1 Top Vent Installation ALCOVE INSTALLATION TOP FLUE ONE 90º ELBOW A B G C H D B E F A NOTE THE REAR STANDOFF MAY NEED TO BE REMOVED WHEN VENTING AT 45º 1 3 cm TOP FLUE...

Page 21: ...C Clearances NOTICE Install appliance on hard metal or wood surfaces extending full width and depth DO NOT install directly on carpeting vinyl tile or any combustible material other than wood WARNING Risk of Fire Maintain specified air space clearances to appliance and vent pipe Insulation and other materials must be secured to prevent accidental contact The chase must be properly blocked to preve...

Page 22: ...DIMENSIONS Models A B C D E F G H I J SLP Pipe Rough Opening Height SLP Pipe Rough Opening Width Clearance to Ceiling Combustible Floor Combustible Flooring Behind Appliance Sides of Appliance Front of Appliance Rough Opening Width Rough Opening Depth 350TSI P CEM in 8 5 8 32 3 4 16 1 4 34 32 0 0 1 2 1 2 36 cm 21 9 83 2 41 3 86 4 81 3 0 0 1 3 1 3 91 5 Note The clearance to ceil ing is measured fro...

Page 23: ... 15 2 17 8 20 3 22 9 27 9 30 5 5 1 7 6 10 2 12 7 30 5 27 9 25 4 22 9 20 3 17 8 15 2 5 1 10 2 12 7 25 4 TOP FRONT EDGE OF FIREPLACE NON COMBUSTIBLE BOARD If joints between the finished walls and the fireplace sur round top and sides are sealed a 150º C minimum seal ant material must be used These joints are not required to be sealed Only non combustible material using 150 c Minimum adhesive if need...

Page 24: ...ons supplied with the decorative cap cover In a staggered installation with both gas and wood or fuel oil terminations the wood or fuel oil termination cap must be higher than the gas termination cap A B 15 2 cm minimum up to 50 8 cm 45 7 cm minimum 50 8 cm and over 0 mm minimum Figure 6 1 Minimum Height From Roof To Lowest Discharge Opening Angle H Min cm 0 26 6 30 26 6 30 3 38 30 3 33 7 46 33 7 ...

Page 25: ...offits 1 There must be 91 m minimum between termination caps 2 All mechanical air intakes within 3 m of a termination cap must be a minimum of 91 m below the termination cap 3 All gravity air intakes within 91 m of a termination cap must be a minimum of 30 m below the termination cap See Note 1 See Note 2 Note 3 Local codes or regulations may require different clearances Note 4 Termination caps ma...

Page 26: ...ent table key are used in the vent diagrams D Measuring Standards Vertical and horizontal measurements listed in the vent diagrams were made using the following standards Pipe measurements are shown using the effective length of pipe see Figures 7 2 and 7 3 Measurements are made from the appliance outer wrap not from the standoffs Horizontal terminations are measured to the outside mounting surfac...

Page 27: ...all shield and ceiling firestops as speci fied Failure to keep insulation or other material away from vent pipe could cause fire WARNING Example SLP pipe 7 ft 2 13 m min vertical 11 ft 3 35 m max horizontal V1 Minimum H1 Maximum Elbow only NOT ALLOWED 6 in 15 2 cm 1 ft 30 5 cm 1 ft 30 5 cm 2 ft 61 0 cm 2 ft 61 0 cm 4 ft 1 22 m 3 ft 91 4 cm 8 ft 2 44 m 4 ft 1 22 m 10 ft 3 05 m 5 ft 1 52 m 16 ft 4 8...

Page 28: ...inimum H1 H2 Maximum Elbow only Not allowed 6 in 15 2 cm 1 ft 30 5 cm 1 ft 30 5 cm 2 ft 61 0 cm 2 ft 61 0 cm 4 ft 1 22 m 3 ft 91 4 cm 6 ft 1 83 m 4 ft 1 22 m 8 ft 2 44 m 5 ft 1 52 m 10 ft 3 05 m V1 H1 H2 30 ft 9 14 m Maximum H1 H2 10 ft 3 05 m Maximum INSTALLED HORIZONTALLY H1 H2 V1 USE SLP SERIES COMPONENTS ONLY ...

Page 29: ... 5 cm 1 ft 30 5 cm 2 ft 61 0 cm 2 ft 61 0 cm 2 ft 61 0 cm 2 ft 61 0 cm 2 ft 61 0 cm 3 ft 91 4 cm 4 ft 1 22 m 3 ft 91 4 cm 3 ft 91 4 cm 4 ft 1 22 m 6 ft 1 83 m 4 ft 1 22 m 4 ft 1 22 m 5 ft 1 52 m 8 ft 2 44 m 5 ft 1 52 m 6 ft 1 83 m 6 ft 1 83 m 12 ft 3 66 m H1 6 ft 1 83 m Maximum H1 H2 12 ft 3 66 m Maximum V1 V2 32 ft 9 75 m Maximum V1 V2 H1 H2 36 ft 10 97 m Maximum H2 H1 V2 V1 USE SLP SERIES COMPON...

Page 30: ...ply with all minimum clearances to combustibles as specified in this manual Overlapping material could ignite and will in terfere with proper operation of doors and louvers Horizontal sections 3 inches 7 62 cm from the top of the pipe Horizontal sections 2 1 2 inches 6 35 cm at wall shield firestops Horizontal sections 1 inches 2 54 cm from sides and bottom of the pipe Vertical sections 1 inches 2...

Page 31: ...he outside and must never be attached to a chimney serving a separate solid fuel burning appliance Each gas appliance must use a sepa rate flue system common flue systems are prohibited WARNING Risk of Fire DO NOT apply combustible materials beyond the minimum clearances Comply with all minimum clearances to combustibles as specified in this manual Overlapping material could ignite and will in ter...

Page 32: ...IES COMPONENTS ONLY V1 H1 Maximum V2 V1 V2 Min Elbow only Not allowed 6 in 15 2 cm 2 ft 61 0 cm 1 ft 30 5 cm 4 ft 1 22 m 2 ft 61 0 cm 6 ft 1 83 m 3 ft 91 4 cm 8 ft 2 44 m 4 ft 1 22 m 12 ft 3 66 m 5 ft 1 52 m 16 ft 4 87 m V1 V2 H1 36 ft 10 97 m Maximum No specific restrictions on this value EXCEPT V1 V2 cannot exceed 32 ft 9 75 m ...

Page 33: ...lowed Not Allowed 6 in 15 2 cm 1 ft 30 5 cm 1 ft 30 5 cm 1 ft 30 5 cm 2 ft 61 0 cm 2 ft 61 0 cm 2 ft 61 0 cm 4 ft 1 22 m 4 ft 1 22 m 3 ft 91 4 cm 6 ft 1 83 m 6 ft 1 83 m 4 ft 1 22 m 8 ft 2 44 m 8 ft 2 44 m 5 ft 1 52 m 12 ft 3 66 m 12 ft 3 66 m H1 H2 12 ft 3 66 m Maximum V1 V2 H1 H2 32 ft 9 75 m Maximum INSTALLED HORIZONTALLY H1 H2 V1 V2 USE SLP SERIES COMPONENTS ONLY ...

Page 34: ...n a wall 4 3 8 in to 7 5 8 in 11 1 cm to 19 4 cm thick If wall thickness is less than 4 3 8 in 11 1 cm the existing heat shields must be field trimmed If wall thickness is greater than 7 5 8 in 19 4 cm a DVP HSM B will be required DVP SLP Pipe Shown 3 in 7 6 cm top clearance 1 in 2 5 cm clearance bottom sides Heat Shield Wall Shield Firestop Heat Shield WALL 3 in 7 6 cm top clearance 1 in 2 5 cm c...

Page 35: ... attics SLP pipe only Frame opening 9 in x 9 in 22 9 cm x 22 9 cm whenever the vent penetrates a ceiling floor see Figure 8 3 Frame the area with the same sized lumber as used in ceiling floor joist The ceiling firestop may be installed above or below the ceiling joists when installed with a attic insulation shield It must be under joists between floors that are not insulated Refer to Figure 8 4 S...

Page 36: ...nsulation from getting between the shield and vent pipe and to maintain air space clearance Figure 8 5 Attic Insulation Shield Vaulted Ceiling Installation Remove one shield from box NOTICE Cut previously installed batt insulation to make room for the attic insulation shield Cut the attic insulation shield if application is for vaulted ceiling to fit your ceiling pitch Snip cut edge to recreate 1 ...

Page 37: ... shield must remain in the vertical position Figure 9 2 To attach the first section of vent pipe make sure to use the fiberglass gasket to seal between the first vent component and the outer fireplace wrap Use 2 self tapping screws to secure the gasket to the outer wrap Note Once the seal cap has been removed it cannot be reattached WARNING Risk of Fire Do not remove heat shield El evated header t...

Page 38: ...am shows how to properly position and secure the appliance see Figure 9 5 Nailing tabs are provided to secure the appliance to the framing members Bend out nailing tabs on each side Place the appliance into position Keep nailing tabs flush with the framing Level the appliance from side to side and front to back Square the unit by securing diagonal dimensions to within 1 4 inch 0 64 cm of each othe...

Page 39: ...ved cracked broken or scratched Replace as a complete assembly Removing Fixed Glass Assembly Pull the four glass assembly latches out of the groove on the glass frame Remove glass door from the appliance see Figure 9 6 Replacing Fixed Glass Assembly Replace the glass door on the appliance Pull out and latch the four glass assembly latches into the groove on the glass frame Figure 9 7 E Components ...

Page 40: ...t of the lower controls compartment Fan can be operated at 3 speed levels using RC300CE remote and AUX300CE Refer to RC300CE section The fan will automatically turn on after 3 minutes and will stop 12 minutes after unit has been turned off Glass Panel To replace the glass door place the bottom edge onto the lower holders push glass against unit and secure the two spring latches at the top and bott...

Page 41: ... pipe slip section elbow and cap outer flues shall be sealed in this manner unless otherwise stated Figure 10 1 Adding Venting Components WARNING Risk of Fire or Explosion DO NOT break silicone seals on slip sections Use care when remov ing termination cap from slip pipe If slip section seals are broken during removal of the termination cap vent may leak Note Align seams to engage pipe then rotate...

Page 42: ...e must be supported every 8 ft 2 44 m Horizontal sections must be supported every 5 feet 1 52 m Vent supports or plumbers strap spaced 120º apart may be used to support vent sections See Figures 10 4 and 10 5 Wall shield firestops may be used to provide horizontal support vent sections SLP ceiling firestops have tabs that may be used to provide vertical support WARNING Risk of Fire Explosion or As...

Page 43: ...must be supported every eight 8 ft 2 44 m above the fireplace flue outlet by wall brackets To install support brackets for vertical runs Attach wall brackets to the flue pipe and secure the wall bracket to the framing members with nails or screws For Vertical Runs One firestop is REQUIRED at the hole in each ceiling through which the flue passes To install firestops for vertical runs that pass thr...

Page 44: ... wall thick ness DO NOT remove the heat shields attached to the wall shield firestop and the horizontal termination cap shown in Figure 10 12 Heat shields must overlap 1 1 2 in 3 8 cm mini mum There are two sections of the heat shield One section is factory attached to the wall shield firestop The other section is factory attached to the cap See Figure 10 12 If the wall thickness does not allow th...

Page 45: ... 5 cm LOWEST DISCHARGE OPENING 51 cm MIN 61 cm MIN Angle H Min cm 0 26 6 30 26 6 30 3 38 30 3 33 7 46 33 7 36 9 61 36 9 39 8 76 39 8 42 5 99 42 5 45 0 1 22 45 0 49 4 1 52 49 4 53 1 1 83 53 1 56 3 2 13 56 3 59 0 2 29 59 0 60 3 2 44 91 cm minimum in snow regions CAULK I Assemble and Install Storm Collar CAUTION Risk of Cuts Abrasions or Flying Debris Wear protective gloves and safety glasses during ...

Page 46: ...the opening of the installed flue pipes Cut and frame the roof hole Use framing lumber the same size as the roof rafters and install the frame securely Flashing anchored to the frame must withstand heavy winds Continue to install concentric flue sections up through the roof hole and up past the roof line until you reach the appropriate distance above the roof Attach the vertical termination cap by...

Page 47: ... be installed if the gas pressure exceeds 37 mbar Failure to install a regulator could damage valve WARNING Fire Risk Explosion Risk High pressure will damage valve Disconnect gas supply piping BEFORE pressure testing gas line at test pressures above 60 mbar Close the manual shutoff valve BEFORE pressure testing gas line at test pressures equal to or less than 60 mbar Columns highlighted in gray T...

Page 48: ...k solution following testing DO NOT USE AN OPEN FLAME NOTICE the gas supply line should be purged of any trapped air prior to the first firing of the unit Refer to Reference Section 16 for location of gas line access in appliance Gas line may be run through knockout s provided The gap between supply piping and gas access hole may be caulked with high temperature caulk 150 C minimum continuous expo...

Page 49: ...tch Incorrect wiring will damage controls NOTICE The mains supply to the appliance must have isolation of a minimum 3 mm contact separation in both poles WARNING Risk of Injury The gas supply shall be shut off prior to disconnecting the electrical power and remov ing batteries if installed before proceeding with any maintenance to the appliance B IntelliFire Plus Ignition System Wiring Wire the ap...

Page 50: ...C service before permanently enclosing the fireplace The access hole for connecting the service wires is found on the right exterior side of the unit See Figure 12 2 for wire connection de tail Note if any of the original wire as supplied with the appliance must be replaced it must be replaced with type 105º C rated wire Wires must have high temperature insulations E Control Module Operation See S...

Page 51: ... technician This remote control is tested and safe when installed in accordance with this installation manual Do not install any components that may be damaged Do not modify disassemble or substitute any of the com ponents included with this kit Installation of this unit must be done by a qualified service technician Placement of this remote control may affect performance An assessment of the spac...

Page 52: ... change the indicators on the room temperature and set temperature portion Note This equipment has been tested and found to comply with the limits for a Class B digital device pursuant to Part 15 of the FCC Rules and EN298 for multi functional control These limits are designed to provide reasonable protection against harmful inter ference in a residential installation This equipment generates uses...

Page 53: ...rol module will beep once 5 seconds later when ready See Figure 12 9 Using a small item such as a paper clip press and release the LEARN button located near the ON OFF REMOTE switch See Figure 12 9 Control module will beep once and LED will blink green for 10 seconds While the LED is blinking press the POWER button on the remote control A double beep will come out of the control module to indicate...

Page 54: ...ut tons are pressed within 5 seconds Press any button to resume full functionality In idle mode only active func tions will show on the screen Standby mode The remote control will go into a standby mode if no but tons are pressed within 5 minutes Press the POWER button to reactivate the remote control to ON mode Ac tive functions will be displayed Menu Select V V Menu Select V V Menu Select V V Me...

Page 55: ...emember the previous FLAME HEIGHT setting and will automatically adjust after 10 seconds Adjusting Fan Speed Press the MENU button to activate the menu Using the UP and DOWN arrows highlight the FAN icon and press SELECT Use the UP and DOWN arrows to adjust the FAN SPEED then press SELECT The FAN SPEED can be adjusted to 3 different settings HIGH MEDIUM LOW NOTICE The fan has a timer built into th...

Page 56: ... double beep will come from the control module indicating CONSTANT PILOT has been deactivated Setting the Child Lock Press and hold the MENU and UP arrow buttons simul taneously for 4 seconds to enable or disable the child lock feature NOTICE No functions will be usable until child lock feature is disabled Power Outage If fireplace battery backup system IS installed at time of power outage firepla...

Page 57: ...power button is pressed verify that the control module is plugged in the fire place junction box located in the controls area Also verify that the batteries are installed in the battery pack Fan does not turn on when fireplace is started Built in time delay The fireplace must run for three minutes in order for the fan to engage Fan does not turn off when fireplace turned off Built in time delay Th...

Page 58: ... finishing materials must never overhang into the glass opening Observe all clearances when applying combustible materials Seal joints between the finished wall and appliance top and sides using a 300 ºF 149 ºC minimum sealant Figure 13 3 Noncombustible Facing Diagram B A A B 350TSI P CEM Centimeters 74 1 83 7 Note All measurements in centimeters Note Measurement is taken from top of the opening N...

Page 59: ...ional acces sories with this appliance Using non listed accessories could result in a safety hazard and will void the warranty DO NOT MODIFY THIS APPLIANCE 14 Appliance Setup E Air Shutter Setting Air shutter settings should be adjusted by a qualified ser vice technician at the time of installation The air shutter is set at the factory for minimum vertical vent run Adjust air shutter for longer ve...

Page 60: ...bly for shorted sparker wire or cracked insulator around electrode Replace pilot if necessary 2 Pilot won t light there is no noise or spark a No power or transformer installed incorrectly Verify that transformer is installed and plugged into module Check voltage of transformer under load at spade connection on module with ON OFF switch in ON position Acceptable readings of a good transformer are ...

Page 61: ...ot orifice is installed and gas inlet is set to pressure specifications Polish flame sensing rod with fine steel wool to remove any contaminants that may have accumulated on flame sensing rod c Module is not grounded Verify module is securely grounded to metal chassis of ap pliance Verify that wire harness is firmly connected to the module d Damaged pilot assembly or contami nated flame sensing ro...

Page 62: ...rence only For framing dimensions and clearances refer to Section 5 Figure 16 1 Appliance Dimensions Location Centimeters K 1 3 L 57 8 M 28 9 N 40 3 O 16 8 P 5 5 Q 15 3 R 2 5 S 71 2 T 22 3 Location Centimeters A 83 7 B 71 4 C 61 3 D 40 7 E 74 1 F 9 0 G 17 5 H 82 2 I 98 4 J 41 4 A B Q E ELECTRICAL ACCESS S D R G F I H O Ø T J C K L M N GAS LINE ACCESS P ...

Page 63: ...ecessary 2 Replace appliance if firebox has been perforated Burner Ignition and Operation 1 Verify burner is properly secured and aligned with pilot or igniter 2 Clean off burner top inspect for plugged ports corrosion or deterioration Replace burner if necessary 3 Replace ember materials with new dime size and shape pieces Do not block ports or obstruct lighting paths 4 Check for smooth lighting ...

Page 64: ...RC RADIUS 14 in 352 mm 9 1 2 in 241 mm 14 in 356 mm COOL ADD Cap Shield 11 1 2 in 295 mm 5 3 4 in 146 mm 7 in 181 mm 12 in 308 mm DVP BEK2 DVP HPC Cap Brick Extension 14 in 352 mm 5 in 127 mm 12 in 302 mm Figure 16 2 Vent Components C Vent Components Diagrams ...

Page 65: ... Elbow SLP90 90 Elbow Effective Height Length SLP PIPE SLP HVS Horizontal Pipe Support SLP FS Ceiling Firestop SLP WS Wall Shield Firestop C Vent Components Diagrams continued Figure 16 3 SLP Series Vent Components 26 in 660 mm DVP HSM B Extended Heat Shield Effective Height Length Pipe in mm SLP4 4 102 SLP6 6 152 SLP12 12 305 SLP24 24 610 SLP36 36 914 SLP48 48 1219 SLP6A 2 6 51 152 SLP12A 2 12 51...

Page 66: ...al Termination Cap SLP CCS BK Cathedral Ceiling Support Box Black SLP DCF BK Ceiling Firestop Black SLP WT BK Wall Thimble Black C Vent Components Diagrams continued SL 2DVP Adapter Figure 16 4 SLP Series Vent Components SLP90 SL 2DVP DVP FBHT DVP FBHT 7 in 178 mm 15 1 2 in 394 mm 12 in 305 mm ...

Page 67: ...trimmed If wall thickness is greater than 7 1 4 184 mm a DVP HSM B will be required Heat Shield Term Cap Minimum Effective Length Maximum Effective Length Trap2 13 3 cm 23 5 cm 8 in 203 mm 12 in 305 mm Max Effective Length 5 1 4 in 9 1 4 in 13 in 330 mm 15 in 381 mm 8 in 206 mm 11 in 276 mm 10 1 2 in 267 mm 3 87 Effective Length 5 3 4 in to 8 3 8 in 146 mm to 213 mm 5 1 2 in 140 mm 8 3 8 in 213 mm...

Page 68: ...rial number when requesting service parts from your dealer or distributor ITEM DESCRIPTION COMMENTS PART NUMBER 1 Power Cord Assembly 2166 374 2 Burner Assembly 2033 050 3 Base Pan 2033 305 4 Valve Assembly Refer to valve page 5 Glass Assembly GLA 3504TRS 6 Hood SRV540 174 7 Door 2033 020 8 Lower Door 2033 042 9 Rocker Switch 2206 299 10 Lower Door Stop Qty 2 req 2033 125 11 Wire Assembly 2201 030...

Page 69: ...0 022 Pilot Assembly P 2090 033 4 2 3 Hole Grommet 2118 420 4 3 Ori ce N 44C 582 844 Ori ce P 55C 582 855 4 4 Bulk Head W Flex 7000 156 4 5 Valve Bracket 2118 104 4 6 18 in Flex Tube Assembly 2098 320A 4 7 Male Connector Pkg of 5 303 315 5 4 8 Valve N 2166 302 Valve P 2166 303 4 9 Module Gray 2166 306 4 10 Battery Pack 2166 323 4 11 Jumper wire 2187 198 4 12 Wire Harness 2166 304 4 13 Tranformer 6...

Page 70: ...r when requesting service parts from your dealer or distributor ITEM DESCRIPTION COMMENTS PART NUMBER Exhaust Restrictor 530 299 Gasket Assembly 2113 080 Includes Burner Neck Shutter Bracket Vent Seal Cap Valve Plate and Air Passage Gaskets Glass Latch Support Assembly Pkg of 2 2288 045 2 Heat Shield Control Module 2078 121 Mineral Wool 050 721 Top Heat Shield Interior 2033 307 RC300CE Remote REM3...

Page 71: ...______ ________________________________________________________________________________ ________________________________________________________________________________ ________________________________________________________________________________ Printed in U S A Copyright 2017 DO NOT DISCARD THIS MANUAL NOTICE Leave this manual with party responsible for use and operation Important operating a...

Reviews: