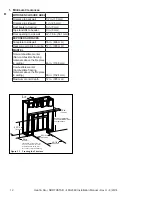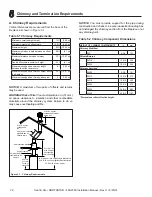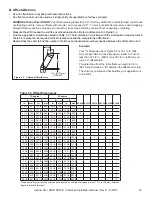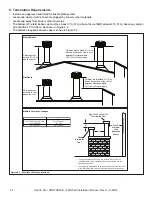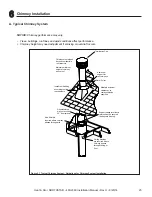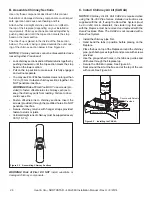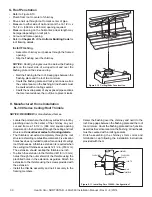
1in. (25 mm) Overlap
Metal strips 2 in. (51 mm) under edge of Fireplace
and Hearth Extension and extended 2 in. (51 mm)
beyond both sides of fireplace opening.
Nail or screw metal strips in place.
Pallet Mounting/Floor
Brackets
Raised Platform
Floor
2 in.
(51 mm)
1 in. (25 mm) min.
overlap
2 in.
(51 mm)
Top piece must overlap
bottom piece
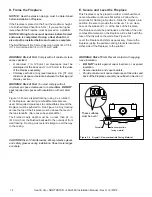
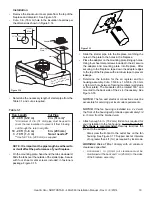
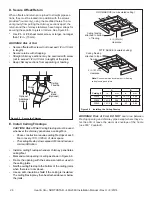
Figure 3.8 Protect the Front of an Elevated Platform
F. Protective Metal Hearth Strips
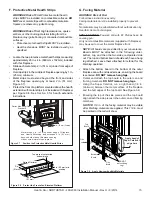
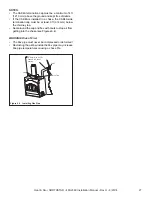
Figure 3.7 Position the Protective Metal Hearth Strips
• Locate the two protective metal hearth strips measuring
approximately 26 in. x 4 in. (660 mm x 102 mm) included
with this fireplace.
• Slide each metal strip 2 in. (51 mm) under front edge of
fireplace.
• Overlap strips in the middle of fireplace opening by 1 in.
(25 mm) minimum.
• Metal strips must extend beyond the front and sides
of the fireplace opening by at least 2 in. (51 mm),
Figure 3.7).
• Protect the front of a platform elevated above the hearth
extension with metal strips (not included with fireplace)
per Figure 3.8. See
Section 6
for hearth extension
instructions.
WARNING!
Risk of Fire!
Protective metal hearth
strips MUST be installed on combustible surfaces.
DO
NOT
cover metal strips with combustible materials.
Sparks or embers may ignite flooring.
WARNING!
Risk of fire!
High temperatures, sparks,
embers or other burning material falling from the
fireplace may ignite flooring or concealed combustible
surfaces.
• Protective metal hearth strips MUST be installed.
• Hearth extensions MUST be installed exactly as
specified.
WARNING! Risk of Fire!
Follow these instructions exactly.
Facing materials must be installed properly to prevent
fire.
No materials may be substituted without authorization by
Hearth & Home Technologies
G. Facing Material
TOOLS NEEDED:
Powered drill with #2 Phillips head bit;
caulking gun.
Only non-combustible materials (supplied with fireplace)
may be used to cover the metal fireplace front.
NOTE:
All boards are pre-drilled for your convenience.
Boards MUST be attached in the following order:
bottom, top, and then the two sides, red-painted side
out. The top and bottom board should each have a hang
tag attached. Leave them attached for referral for the
finishing operation.
• Attach the bottom board to the bottom of the outer
fireplace can with enclosed screws, ensuring the board
is centered.
DO NOT remove hang tags
.
•
Center and attach the top board to the outer can and
framing members.
DO NOT remove hang tags.
• Using the Super Calstick, run a light bead (1/8 in.
minimum) between the metal surface of the fireplace
and the butt edges of the top board.
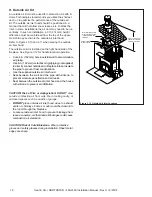
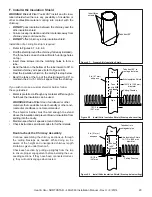
See Figure 3.9.
• E
nsuring the top of the side pieces and the top board
align, attach the side pieces to the outer can and framing
members.
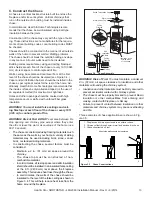
Figure 3.9 Apply Non-combustible Materials
Side
Board
Bottom
Board
Side
Board
Top
Board
DO NOT
remove hang
tags
Apply bead of
Super Calstick to
edge here
NOTICE:
1/8 in. of the facing material may be visible
after finishing materials are applied. This 1/8 in. must
be painted or the red will show.
15
Heat & Glo • NORTHSTAR • 480-2360 Installation Manual • Rev H • 8/20/14


