-10-
598-1188-02
Adjustments Continued . . .
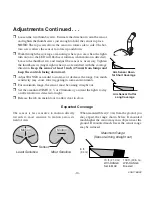
Aim Sensor Down
for Short Coverage
❒
Loosen the two thumb screws. Estimate the direction to aim the sensor
and tighten the thumbscrews just enough to hold the sensor in place.
NOTE: The top screw allows the sensor to rotate side to side. The bot-
tom screw allows the sensor to rotate up and down.
❒
Walk through the coverage area noting where you are when the lights
turn on (also, the LED will flash several times when motion is detected).
Loosen the thumbscrews and readjust the sensor as necessary. Tighten
the thumbscrews (finger tight) when you are satisfied with the coverage
direction.
Keep the sensor at least 1 inch (25 mm) from lamps and
keep the controls facing downward.
❒
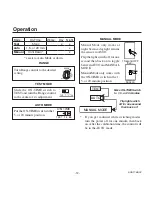
Adjust RANGE as needed to increase or decrease the range. Too much
sensitivity may cause false triggering in some environments.
❒
For maximum range, the sensor must be aiming straight out.
❒
Set the amount of TIME (1, 5, or 20 minutes) you want the lights to stay
on after motion is detected at night.
❒
Release the tab on metal door to allow door to close.
Aim Sensor Out for
Long Coverage
Expected Coverage
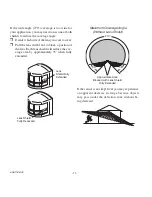
The sensor is less sensitive to motion directly
towards it, most sensitive to motion across its
field of view.
When mounted 8 feet (2.4 m) from the ground, you
may expect the range shown below. If mounted
much higher the sensor may miss objects near the
ground. If mounted much lower the sensor range
may be reduced.
Maximum Range
(Sensor aiming straight out)
8 ft.
(2. m)
0 ft. (21.0 m) 100 ft. (0.5 m)
With RANGE
With RANGE
Set to MAX
Boosted
Sensor
Least Sensitive
Most Sensitive
Motion
Motion


