28881 Rev G
14
01-02
NOVUS REAR DIRECT VENT
c. Assembling Chimney Sections
Use only pipe supplied and listed for use with
this appliance. See page 5 for a description of
listed components. See Section 3 on page 15 for
instructions on assembling the vent sections.
d. Firestop Spacer/Vent Installation
Frame an opening and install a firestop spacer
whenever the vent penetrates a ceiling/floor area,
as shown in Figure 17. Frame the opening with
the same size lumber as used in the ceiling/floor
joists.
DO NOT
pack insulation around the vent.
Assemble vent sections with three screws per
joint.
e. Chase/Termination Installation
Figures 18 and 19, and Table 1 specify minimum
vent heights for various pitched roofs. Vent sections
may have to be cut to a certain length.
These vent heights are necessary for safety and
do not ensure draft-free operation. Trees,
buildings, adjoining roof lines, adverse
conditions, etc., may create a need for a taller
vent should down drafting occur.
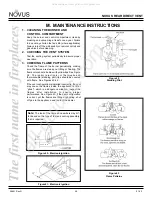
Figure 17
Installing the Firestop Spacer
Figure 18
Vent Height for Vertical Termination
Roof Pitch ................................. H (Min.) Ft.
Flat to 6/12 ............................................. 1.0
6/12 to 7/12 ..........................................1.25
Over 7/12 to 8/12 ................................... 1.5
Over 8/12 to 9/12 ................................... 2.0
Over 9/12 to 10/12 ................................. 2.5
Over 10/12 to 11/12 ..............................3.25
Over 11/12 to 12/12 ................................ 4.0
Over 12/12 to 14/12 ............................... 5.0
Over 14/12 to 16/12 ............................... 6.0
Over 16/12 to 18/12 ............................... 7.0
Over 18/12 to 20/12 ............................... 7.5
Over 20/12 to 21/12 ............................... 8.0
Table 1 - Vent Height
Figure 19
Multiple Vertical Termination
Note:
To ensure proper operation, verify all venting and
the termination are unobstructed.
All manuals and user guides at all-guides.com


