background image

Design and Installation 

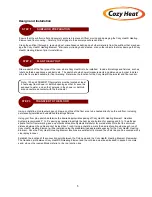
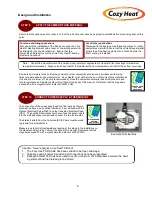
   STEP 2        PLAN THE LAYOUT 

Draw a sketch of the floor plan of the room where Cozy Heat® is to be installed.   Include furnishings and fixtures, such as 

toilets, bathtubs, appliances, cabinetry etc.  The sketch should show all measurements and dimensions in order to deter-

mine the floor area available for floor warming.  Determine the location for the Cozy Heat®  thermostat and floor sensor.  

Note:  120 and 208/240/277 thermostats must be located at least 

4 feet away from shower or bathtub openings so that it cannot be 

exposed to water, and so that  persons in the shower or bathtub 

area cannot make contact with the thermostat. 

Using a chalk line or carpenter’s pencil, draw an outline of the floor area to be heated directly on the sub floor, including  

permanently installed and uninstalled furnishings/fixtures.  


Using your floor plan sketch, determine the desired appropriate spacing of Cozy Heat®  Heating Element.  Heatizon  

Systems recommends 3”  to 9” spacing as required to satisfy the heat loss calculation for spacing and 8 to 15 watts per 

square foot for floor warming, see an authorized Heatizon Systems distributor for more details. Note that the minimum  

distance between the cables cannot be less than 1 inch. Using a chalk line, mark the desired location where each run of 

Cozy Heat®  Heating Element  will be installed using the predetermined appropriate spacing for the Cozy Heat®  Heating 

Element.  Once the Cozy Heat®  Heating Element locations are satisfactorily marked, the chalk lines can be covered with a 

clear spray lacquer.      


Establish the location of the connection point between the Cold Lead and the Cozy Heat®  Heating Element. Remember, 

The transition joint between Cozy Heat® SR Heating Element and the cold lead must be embedded in asphalt, concrete, 

sand, stone, other cementitious material, or be in a junction box. 

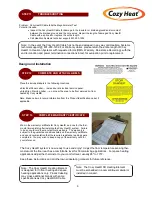
  STEP 3        TRANSFER TO THE FLOOR 

Ensure that the subfloor is flat and securely anchored to prevent it from moving and damaging the Cozy Heat®  Heating 

Element and floor covering.  Carefully fill in all gaps in the securely anchored subfloor. 


Clean the subfloor thoroughly, removing dust, miscellaneous debris and all other materials from the subfloor that may dam-

age the Cozy Heat®  Heating Element.  Eliminate protruding nails, staples, or any other objects that may damage the Cozy 

Heat®  Heating Element prior to installation. 

  STEP 1         SUBFLOOR PREPARATION 

Summary of Contents for Cozy Heat SR

Page 1: ...www heatizon com 2015 Heatizon Systems HEATIZON SYSTEMS RADIANT HEATING AND SNOW MELTING SYSTEMS Cozy Heat is a Registered Trademark of Heatizon Systems 01 15 Self Regulating Cable...

Page 2: ......

Page 3: ...Table Of Contents Product Overview 1 Cable Specifications 2 Cable Diagrams 3 Warnings and Reminders 4 Design and Installation 5 Resistance Recording Page 10 Warranty 11...

Page 4: ......

Page 5: ...e the NEC CEC and or local building codes for details Note The maximum insulation value of the floor ing material where Cozy Heat is installed should not exceed R 1 5 There is no limit for the insulat...

Page 6: ...If started at 40 F 0 F 20 F 505 475 420 650 560 765 765 9GM2 If started at 40 F 0 F 20 F 320 210 185 425 270 245 455 405 370 460 460 12GM2 If started at 40 F 0 F 20 F 240 155 135 315 210 180 375 310...

Page 7: ...SR Cable System Junction Box Power Distribution Panel Power Cable Ground Wire Heatizon Relay Panel Contactor Panel or Junction Box Cozy Heat SR Heating Element Cold Lead One Activation Device Cozy He...

Page 8: ...per square foot Cozy Heat SR braided grounding shield must be grounded to a suitable earth ground Always measure verify and record the actual re sistance at specific points throughout the installation...

Page 9: ...authorized Heatizon Systems distributor for more details Note that the minimum distance between the cables cannot be less than 1 inch Using a chalk line mark the desired location where each run of Co...

Page 10: ...o runs of Cozy Heat Heating Element and must extend out at least 10 inches away from the wall Warning Do not allow the sensor conduit to cross the Cozy Heat Heating Element Do not allow the sensor hea...

Page 11: ...Cozy Heat Heating Element is damaged contact Heatizon Systems at 801 293 1232 for repair options and do not cover Note Heatizon recommends that photographs of the installed Cozy Heat Heating Element b...

Page 12: ...turned on until cementitous material has fully dried a minimum of 7 days is recommended Once the cementitous material has dried measure and record resistance on Resistance Recording Table at the back...

Page 13: ...for future reference Note The Cozy Heat SR Heating Element must be embedded in a cementitious material or installed in conduit STEP 12 COMPLETE AND ATTACH LABELS 9 Place the included labels in the fol...

Page 14: ...low Customer Warranty Information 10 Name Address City State Phone Email Zip Purchased Product Details Watts Volts Watts Volts Ohms Sq Ft Model Size Serial Number Manufacture Date Tile Stone Vinyl Lam...

Page 15: ...e in writing no later than one 1 month following expiration of the warranty period and must be accompanied by the warranted part or compo nent Any claim not made in such manner shall not be honored by...

Page 16: ......

Page 17: ...Mail Heatizon Systems 4137 South 500 West Murray UT 84123 USA Phone 801 293 1232 Toll Free 888 239 1232 Fax 801 293 3077 Email info heatizon com Website www heatizon com...

Reviews: