The units are protected in the event of fan failure, or an obstruction of the
free airflow, by thermal PTC Self Hold Cut-outs. Having tripped, the PTC
cut-out remains open, effectively switching off the heating elements, as
long as mains power is available inside the appliance.
NOTE:
The unit MUST be reliably earthed.
For safety reasons a sound earth connection must always be made to the
unit before it is put to use. The unit should be wired in accordance with IEE
Regulations for the Electrical Equipment of Buildings.
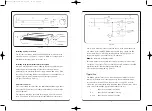
See electrical circuit diagram, fig 4, above.
Operation
The HSAC3 provides heated air in full and half power options as well as
cool air recirculation, and is operated with the control module locate on
the underside of the body, There are 3 switches –
see figure 5 overleaf
–
each with a green illuminated lamp indicating power/function status, which
when used in combination provide all functions of the unit:
1
Power on and cool air circulation
1+2
Power on and ‘half power’ heating
1+2+3
Power on and ‘full power’ heating
Installing directly on the wall
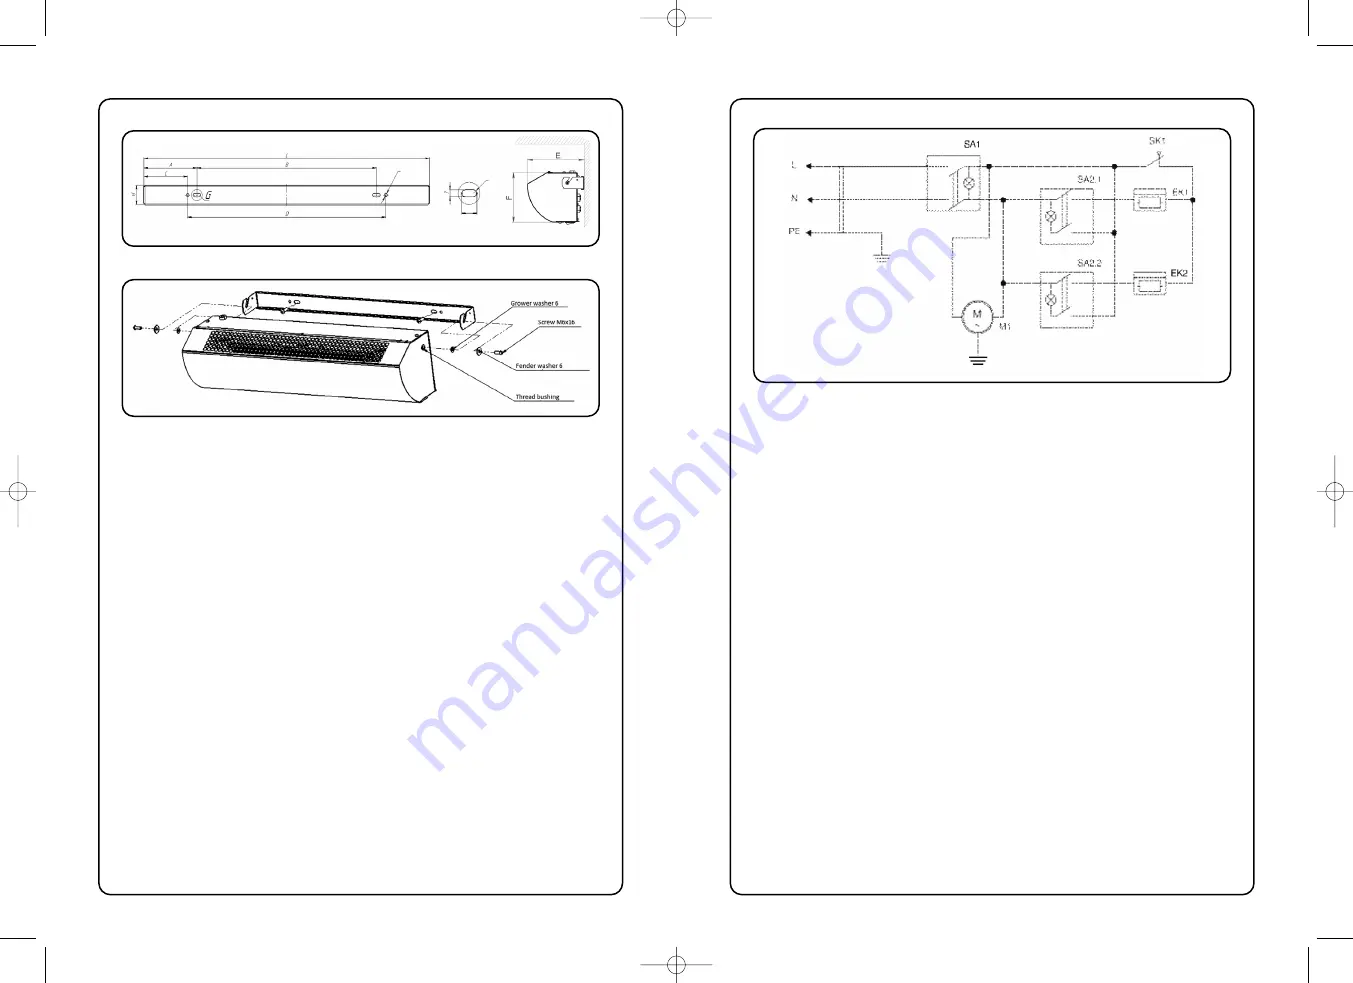
The unit has two slots on its back panel allowing the unit to be directly
mounted to a wall –
see figure 1, on page 3
. Make sure enough space is
available for the supply cable entry to the unit.
Installing using the adjustable brackets supplied
Remove mounting bracket screws, allowing the mounting bracket to be
removed from the unit. Making sure that the mounting bracket is
horizontal, fix the bracket to the wall using 4 x No 8 wood screws. Place
the unit on the mounting bracket ensuring the washer is positioned as in
diagram. Tighten screws to hold the unit at the required angle.
See figure 2, and figure 3, above
Electrical connections
This unit is suitable for connection to a 230/240 volt 50 Hz single phase
AC supply. The heater consumes 3kW at 230 volts when switched to the
full heat position.
The appliance should be connected to the supply via a circuit in which
there is an all-pole switch. Test for correct operation and refit the cover.
Figure 2
Figure 4
5
4
Figure 3
Ø6.3
15.5
R3.5
HSAC3[16]instructions 9/6/16 09:18 Page 4


