20 |
Breaker must remain OFF until installation is complete.
Connecting Power Supply to MODEL 3
Electric Shock Hazard. To prevent SERIOUS INJURY or DEATH, ALWAYS disconnect power supply
before installing or servicing.
In accordance with NEC 110.3(A), the information supplied in this manual, along with labels on the
MODEL 3 (NEC 422.60(B)), allow suitability for installation and equipment use to be determined
and marked by a licensed electrician.
STEP 1
DOUBLE CHECK the electrical connections to make sure they are correct and that all wire
connections are tight and secure. Confirm again the correct breaker size and wire gauge has been
used and confirm the unit has been connected to a ground in accordance with applicable codes.
STEP 2
Confirm all the air has been purged from the water lines before energizing the breaker to supply
power to the unit. Refer to STEP 3 in the plumbing installation section.
STEP 3
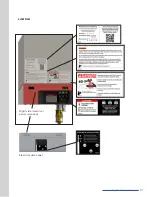
Remove the service access panel cover located on the right bottom side of the unit by removing
the two (2) screws and carefully setting aside.
STEP 4
Verify all wiring (wire gauge) and circuit protection (breakers) comply with national and local
electrical codes.
The MODEL 3 requires two (2) power conductors and one (1) grounding conductor.
The power conductors should be Line 1 and Line 2 for a typical 208, 220, or 240 VAC single phase
installation.
STEP 5
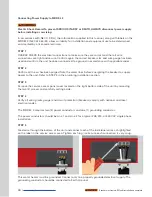
Feed wire through the bottom of the unit and connect each of the individual wires as highlighted
on the label in the service access area. Tighten each lug; make sure each connection is very snug.
This water heater must be grounded. Connect only to a properly grounded electrical supply. The
grounding conductor should be connected to Earth Ground.
L1
L2
G
L1
L2
G


