Working with the Nexscan F 4100/F 4200
Nexscan F 4100/F 4200 – Operation
4–1
ABC
4 Working with the Nexscan F 4100/F 4200
Operating Sequence
1. Preparation for production
2. Possible tray preparation
3. Position the originals
4. Secure the originals
5. Open the scanner lid
6. Possible tray insertion
7. Original is Flat
8. Close Scanner Lid
9. Perform the scan
If you wish to obtain precise, geometric accuracy
for both pre-scan and fine scan, then you should
not remove the universal tray between these two runs!
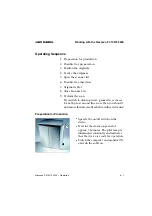
Preparation for Production
0
Operate the on/off switch on the
device.
0
Wait for the warm up period of
approx. 3 minutes. The pilot lamp is
illuminated constantly and indicates
that the device is ready for operation.
0
Switch the computer and monitor ON
and run the software.


