8 Programming: Cycles
170
ú
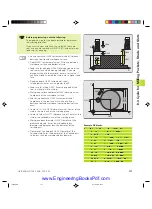
Direction of the milling path
DR
+
: climb milling with M3
DR
–
: up-cut milling with M3
ú
Rounding radius: Radius of the pocket corners. If
radius = 0 is entered, the pocket corners will be
rounded with the radius of the cutter.
Calculations:
Stepover factor k = K x R
where
K
is the overlap factor, preset in machine parameter 7430, and
R:
is the cutter radius
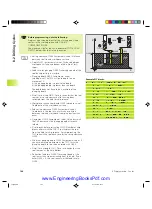
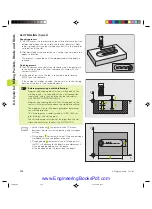
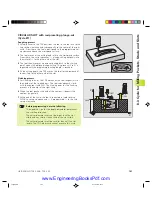
POCKET FINISHING (Cycle 212)
1
The TNC automatically moves the tool in the tool axis to set-up
clearance, or — if programmed — to the 2nd set-up clearance,
and subsequently to the center of the pocket.
2
From the pocket center, the tool moves in the working plane to
the starting point for machining. The TNC takes the allowance and
tool radius into account for calculating the starting point. If
necessary, the TNC plunge-cuts into the pocket center.
3
If the tool is at the 2nd set-up clearance, it moves in rapid traverse
FMAX to set-up clearance, and from there advances to the first
plunging depth at the feed rate for plunging.
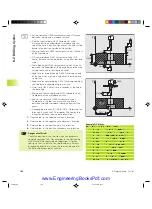
4
The tool then moves tangentially to the contour of the finished
part and, using climb milling, machines one revolution.
5
After this, the tool departs the contour tangentially and returns to
the starting point in the working plane.
6
This process (3 to 5) is repeated until the programmed depth is
reached.
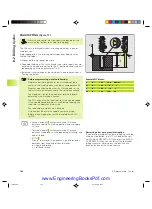
7
At the end of the cycle, the TNC retracts the tool in rapid traverse
to set-up clearance, or - if programmed - to the
2nd set-up clearance, and finally to the center of the pocket (end
position = starting position).
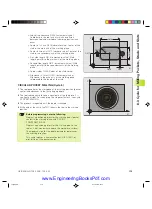
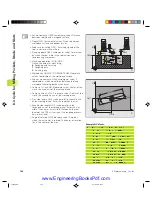
Before programming, note the following:
The algebraic sign for the depth parameter determines
the working direction.
If you want to clear and finish the pocket with the same
tool, use a center-cut end mill (ISO 1641) and enter a low
feed rate for plunging.
Minimum size of the pocket: 3 times the tool radius.
8.3 Cy
cle f
or Milling P
o
c
k
ets,
St
uds and Slots
kkap8.pm6
30.06.2006, 07:03
170
www.EngineeringBooksPdf.com
Summary of Contents for TNC 426 B
Page 3: ...BAUSKLA PM6 30 06 2006 07 03 2 www EngineeringBooksPdf com ...
Page 4: ...BAUSKLA PM6 30 06 2006 07 03 3 www EngineeringBooksPdf com ...
Page 6: ...CINHALT PM6 30 06 2006 07 03 2 www EngineeringBooksPdf com ...
Page 16: ...CINHALT PM6 30 06 2006 07 03 12 www EngineeringBooksPdf com ...
Page 17: ...Introduction 1 Dkap1 pm6 30 06 2006 07 03 1 www EngineeringBooksPdf com ...
Page 29: ...Manual Operation and Setup 2 Dkap2_3 pm6 30 06 2006 07 03 13 www EngineeringBooksPdf com ...
Page 83: ...Programming Tools 5 Fkap5 pm6 30 06 2006 07 03 67 www EngineeringBooksPdf com ...
Page 106: ...Fkap5 pm6 30 06 2006 07 03 90 www EngineeringBooksPdf com ...
Page 107: ...Programming Programming Contours 6 Gkap6 pm6 30 06 2006 07 04 91 www EngineeringBooksPdf com ...
Page 165: ...Hkap7 pm6 30 06 2006 07 03 150 www EngineeringBooksPdf com ...
Page 166: ...Programming Cycles 8 kkap8 pm6 30 06 2006 07 03 151 www EngineeringBooksPdf com ...
Page 253: ...kkap8 pm6 30 06 2006 07 04 238 www EngineeringBooksPdf com ...
Page 265: ...LKAP9 PM6 30 06 2006 07 04 250 www EngineeringBooksPdf com ...
Page 266: ...Programming Q Parameters 10 MKAP10 PM6 30 06 2006 07 04 251 www EngineeringBooksPdf com ...
Page 297: ...MKAP10 PM6 30 06 2006 07 04 282 www EngineeringBooksPdf com ...
Page 298: ...Test Run and Program Run 11 NKAP11 PM6 30 06 2006 07 04 283 www EngineeringBooksPdf com ...
Page 312: ...MOD Functions 12 Okap12 pm6 30 06 2006 07 04 297 www EngineeringBooksPdf com ...
Page 332: ...Tables and Overviews 13 Pkap13 pm6 30 06 2006 07 04 317 www EngineeringBooksPdf com ...


