5
USING THE JACK TO RAISE A FORKLIFT
This section discusses the appropriate and safe methods for using the HW93659 Forklift Jack to raise and lower a forklift.
Using the jack to raise a forklift requires several steps that must be followed each and every time the jack is used:
1. Inspect the jack for signs of wear or damage.
2. Transport the jack to the work area.
3. Select appropriate support stands and bring them to the immediate work area.
4. Prepare the surrounding area before using the jack.
5. Identify a lift point, prepare the load for lifting, and chock wheels that remain on the ground.
6. Raise the forklift.
7. Use appropriate support stands.
8. Lower the forklift.
Each of these steps is discussed in detail in the following sections. Failure to follow all of these instructions can
lead to serious injury or death.
!
WARNING
1. Inspect the Jack for Signs of Wear or Damage
Before each use, you should inspect the jack for any visible signs of wear or damage. See the “Inspecting the Jack”
section on page 7 for details about how to inspect the jack.
WARNING!
If you see any signs of wear or damage, or if there is any indication that the jack is not performing normally,
immediately take it out of service and call customer service at 816-891-6390. NEVER use a jack that appears damaged
in any way.
2. Transport the Jack to the Work Area
Transport the jack to the work area by either (a) wheeling it or (b) lifting and carrying it. The lift should always be wheeled
to the work area if possible—only lift and carry the jack if it cannot be wheeled safely. Wheel the jack only across smooth
surfaces. If the surface is rough or uneven, lift and carry the jack instead of wheeling it.
WARNING!
Jolting caused by the wheels catching on uneven surfaces can cause physical strain and personal injury.
A. How to Wheel the Jack
1. Make sure the surface over which the jack will be wheeled is smooth. If the surface is rough or uneven, lift and
carry the jack instead of wheeling it (see “How to Lift and Carry the Jack” on page 6).
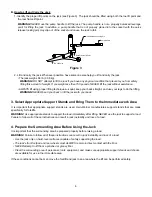
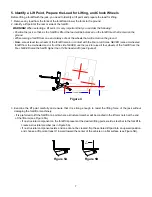
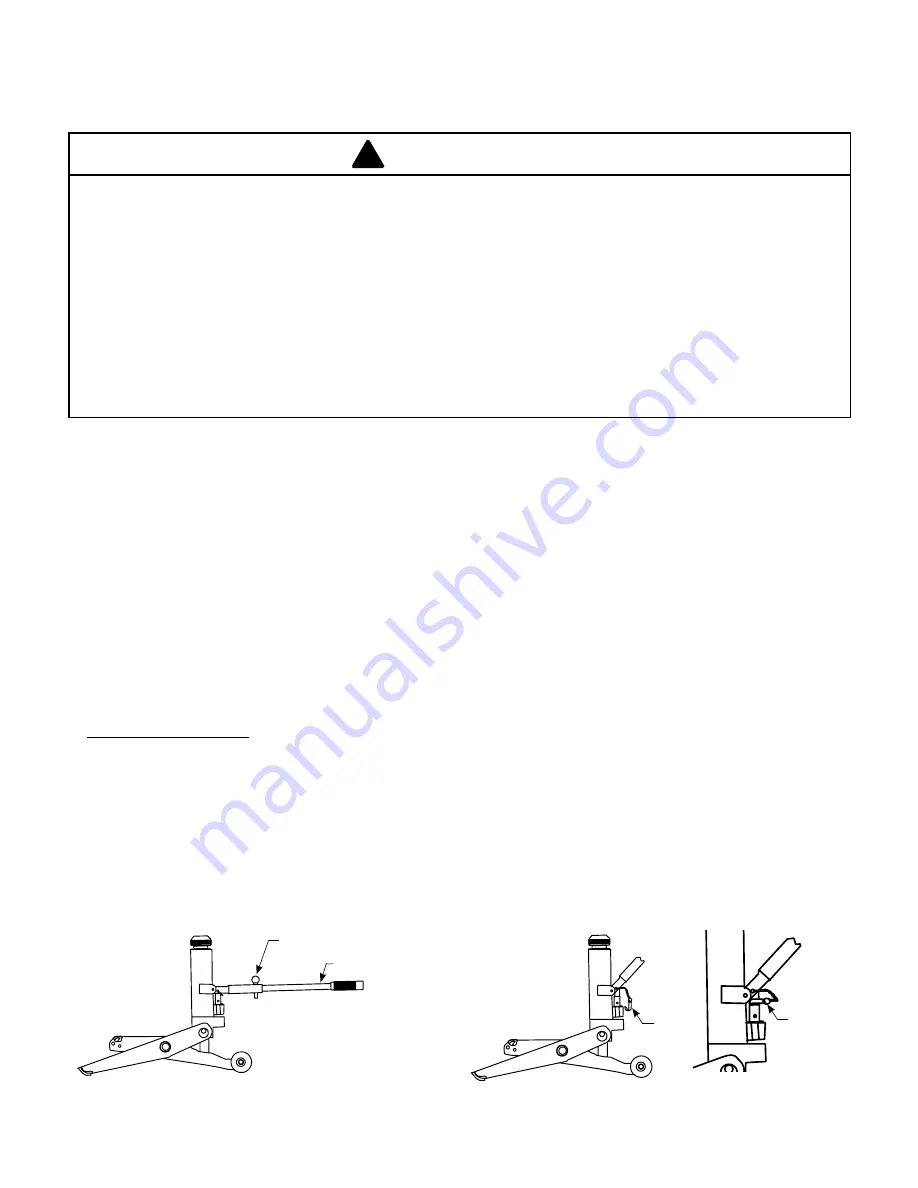
2. Insert the jack pump handle into the socket and lock it into place using the quick-release locking pin (see Figure 1)
immediately after inserting it into the socket.
WARNING!
NEVER transport the jack with an unsecured pump handle.
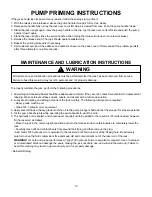
3. Raise the pump handle as far as it will go and place the J-clip around the pump plunger shaft to lock the pump
handle in the up position (see figure 2).
4. Push down on the pump handle to raise the front foot pad off the floor and allow the jack to roll freely on its
wheels.
Quick Release Locking Pin
Pump Handle
Figure 1
Figure 2
J-Clip
J-Clip hooked
around pump
plunger to lock
handle in UP
position


